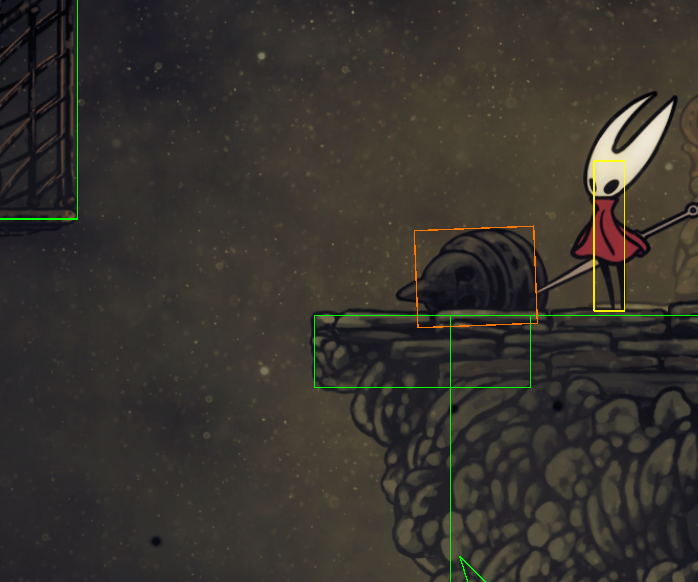
You still only have 3-4f to press jump most times, but this cue should give you a ballpark area for where to press jump. The decoration hitbox lines up pretty well with where the wall you’re meant to hit is. Considering how little time you have to jump, I personally interpret it as the base of the “horn” being where the wall is, which allows my hand time to press jump in the 3-4f window.
Here’s 3 blasted steps skips as well I guess. Do note that having wind will fuck you up if you try and aim for this (solution: jump earlier)
I’ve done a little bit of research regarding this skip and have some examples to show. The main takeaway is that if you collide with the wall at all, you always have at least 1 frame in which you can press jump. How many frames you actually have depends on how far you are up.
There will be a few example videos, the first showing a scenario in which I slide off the wall, followed by an example of getting a walljump without cling. The main thing is that the first frame you collide with the walls, and the subsequent frames you are colliding with the wall, you are able to walljump, regardless of if hornet visually shows a cling grip state or not. The second video shows a successful BS2 in which I press jump the first possible frame without clinging.
The third video shows 3 examples, the first being pressing jump without cling on the third frame of collision. The second is of pressing jump 2f early (in a scenario in which I wouldn’t get cling), and the third is a sample cling grip. It seems if roughly half of hornets hitbox collides with the wall then she will cling.
If you cling grip you have 7 frames before downward acceleration starts, combined with the time it takes to slip off this means a clingged jump usually have at least 10f (0.167s) or so to be inputted from the wall. Conversely, in my own experience most non-clingged attempts have roughly 3-4f which you’re able to jump off of.
A lot of attempts you won’t get high enough to cling, but you will be able to hit this 3-4f window and still get the skip.
Pressing dash twice only after heal (has been pretty consistent for me) instead of spamming it makes you less likely to dash up the wall and bonk your head
The soul collection for it in the video only lost 4s, it will be a bit more on average however, because the Judge is pretty rng and getting the 2 enemies bunched up saves time. It might be possible to optimize more though, given that you can basically facetank here as you get another heal after.
Make sure to trigger the Pilgrim spawn on the ground or they might not spawn. The conchfly pogo in the next room is optimal, so 8 Silk is enough out of the room
 8