Getting 1 extra hit on the hopper here loses anywhere from frames to around 0.1 depending on how much you greed it. Should save 0.1-0.2 over the other hit of soul we normally get before Markoth.
Note that you'll normally want to delay charging cdash for a step so that your cdash make it past the hopper. How much you delay depends on how well you greed the turnaround, but there seems to be enough leeway to make it consistent.
right side entry tft Turns out walking off the right ledge entering uumuu and missing the ledge below is t-ft (or subunits or whatever), so moving right/clinging to the wall before inventory dropping should be the play.
Optimal damage tank for the husk when overcharmed. They don't start moving until you're far enough left so me not overcharming here doesn't affect the spacing.
Consistent 2 heal setup that works even when the folly is as close as possible. Make sure to buffer heal before you hit the ground. If you mess up the menuing or something and get hit before the scream you can kill the folly and still quitout, but you may need extra geo from the Watchers chest.
Setup for the dream nail timing that incorporates healing twice, as you both don't want fury and don't want to die if you get hit in the next room. Press focus at the same time Gorb's scream starts to drop in pitch, then dreamnail immediately after. Open to other setups, this is just the best I could come up with that allowed me to get into position as well.
Better Voidheart abyss drop, saves 0.3-0.4. The first inv drop I use the platform on the right of the first image as a cue. The position in the first image is the farthest right you can go without landing on the creeper, 2nd image is the farthest left you can be without landing on a platform on the way. During the first inv I use the spike platform on the left (image 3) leaving my screen as a cue to close the inv drop (It's easy for me to see during the inv drop while playing). After that you just gotta dash and go left a tiny bit so you pass the shadow creeper. The first inv drop is slightly hard, but apart from that it's really easy to greed this one.
Optimal strats for getting well rock while taking 3 damage to setup for the baldur death.
If the husk is on the left, you want to damage boost to the right and then damage tank again right after your second up-slash on the rock. From there, if the crawlid is moving to the right, you can do a large pre-hop and damage boost to the left (note you'll have to jump further left if you lost time earlier in the room). If the crawlid is on the left, however, you'll have to go neutral and pogo the statue after damage boosting, as demonstrated in the second video. For the left husk rng in particular there can be a lot of variance in how far left it is due to random walking, but you should still always try to go for these rotations as even with terrible rng and an awkward backup you can still make the crawlid cycles.
If the husk is on the right, you want to hit both the husk and the rock with side-slash into two up-slashes, damage tanking right after the first up-slash. From there, if the crawlid is on the left you just want to damage tank backwards on the tiktik as soon as possible which will then set you up to a final damage tank on the tiktik. If the crawlid is moving to the right, you can damage tank on the crawlid a little sooner and save a small amount of time, but remember the tiktik has to be far left enough when you damage tank so keep the cycle lock in mind.
With this and the previous strats post in mind, well rock for ibaldur categories loses about 2.4 seconds on average for around 20 geo - getting it with dash and/or claw is slower than getting it on the way to the baldur death.
Doing this shade soul into cdash in the first room of frogs seems to get me much more consistent low times. You activate the frogs later in the room during your cdash so they have less time to move around and get in awkward positions. In the next room you can dream nail the fool eater to regain the soul used on the fireball.
Note that you want to hold cdash a bit longer than usual; since it stops charging during the freezeframes but the sound keeps playing it's very easy to release it early if you go with your usual cdash greed.
https://www.youtube.com/watch?v=WClBOnRXO_c Charging the crystal dash on the back of the elevator here gives a much better visual cue than charging it on the front, making it easier to get a good cdash release. I release cdash after completely passing the third window in the background here.
Benching before left atrium and quitting out after the lever saves about 0.5 on 1221. To accommodate for the missing soul, it requires 4 hits to be replaced - 2 in the last right atrium room, and 2 additional hits in balcony 2. I've supplied videos with every movement change and the optimal soul routing (in order) This has been known to be faster on lp and Chinese runners have been doing it for a while, but was never fully timed/had legitimate soul routing on 1221 until now
Also, since I'm pretty sure there was never a legitimate strats post for this, it is 100% optimal on lp as well (and where this originates), but I am not sure the soul routing. I think you just dreamnail the 2 guys after the quitout before shrogo.
Doing no inventory here loses about 0.4 to the thing people normally do here (inventory asap + landing at the bottom before the transition).
For reference, being too far right on the inventory open having to open inventory again loses at least 0.6, landing on the ledge loses about 0.8, and being too far left and dunking loses about 3s. So I think this is a nice middle ground that loses a little bit less than messing up the other strat and is much easier to hit consistently.
if you have shade cloak doing this before the jelly tunnel is faster on average
it loses 0.2 in movement, saves at least 0.1 in freeze frames from the big jelly on right, saves another 0.1 for each jelly missed, and makes the cancel at the end a lot safer and better to greed also cuz you're hitting 1-2 less jellies on average in the tunnel and dont hit the 1st jelly, you're less than half as likely to cdash glitch which loses almost 2s if it happens
Alternate rotation for Uumuu 1 cycle involving a damage tank. Seems to save a bit over the other rotation, but hard to tell how much because of Uumuu move rng.
The visual cue I use for when to walljump/dash off the wall is when the part of the blobs marked in red are at the wall.
For extra backup, wait until Uumuu starts moving then dash wings back onto the wall, then do the setup like normal.
fullgame viability for thornstand in balcony 4. You if you cancel cdash optimally, you can grab the hazard respawn so missing the thornstand is not so devastating.
note that this hazard respawn grabbing can be applied to the normal strat as well, it is just more relevant here because the normal strat is not very dangerous
Here is the cue for where I press the cdash cancel and hold right, along with the blue hazard respawn hitbox.
dash asap -> buffer upslash out of dash -> buffer fslash -> buffer dash out of fslash -> buffer upslash out of dash -> buffer upslash the first upslash sets up the leftslash perfectly and also allows you to hold left and avoid clinging A true beauty of hollow knight movement
left/right is objectively optimal here because you get the dash refresh sooner and dont have the speed reset
left/analog right at the top, can hold it from the cdash, and let go of analog right before dashing, then swap to right/analog left for the gate wall, continue to hold this as you dash through since its a right dash and you dont have to worry about greed as much, careful not to dash early or you'll dash off the wall
saves 0.14 on a perfectly greeded cyclone to the bottom, and 0.02-0.1 on a good cling -> downpress, however it saves more than that generally since this is bufferable consistency where the other strats have a lot of timing going on, probably closer to 0.3 for most people
Alternate transition wcs setup that lets you cling to left wall instead of right. Seems to save around 0.2 over the normal setup, and much easier to execute.
To get the storage, cling to the left wall before the transition and press down to uncling.
If you have 3 soul after the second wave, you can do the optimal damage rotation for Traitor Lord pretty reliably without scream skipping. By itself this saves 0.3 because of no freeze frames, but if you are 1HP after frogs you save an additional 2 seconds because you don't have to heal and then get soul.
Go for the double on the first wave and then go for double double on the second wave. For every double you miss, get 3 nail hits and fireball so you still end with a cast. The only meaningful downside is if Traitor Lord does three grounded dashes in a row, it's really hard and maybe not possible to get enough soul hits to do the last double, so you'll have to get 3 extra nail hits and fireball, but this is still faster than healing.
Free hit of soul you can get after defeating Marmu, loses no time assuming you have wielder on and are dream gating out after the essence. In TE it lets you skip the soul totem before Traitor Lord which saves 0.7, but probably useful in other categories like 112. The petra isn't there 100% of the time but it is still very worth it on average to go for.
Been doing this for a while, but forgot to make a strats post about it 😅
Saving some soul out of broken vessel to start off Lost Kin with a double makes the end of LK much more consistent since you don't run out of staggers.
Ideally you get exactly 4 doubles on BV so your damage lines up and you get to enter LK with 5 hits.
Otherwise, when BV is 1 shade soul away from dead, just hit it until you're at 7 or 8 hits of soul, then shade soul.
This saves around 3s optimally in Lost Kin, but probably saves more on average.
Since the last walljump we do here is to the right (in left atrium 2 before the sawblade cycle), we can input a cdash here in order to walljump in the direction we're going. Saves around 0.1-0.2 over the non chain movement if done well.
This may have applications to other gate wallcling storages, as long as you have cdash when you do it.
THK has 1000 HP, or 1250 HP (he heals TO, not adding 250 after entering phase 4 (last))
phase 1: 1000-751 HP phase 2 (when he is able to do the first scream): 750-401 HP phase 3 (where he is able to do 2nd scream/self stab): 400 until death HP (doesn't end until you hit him AFTER he has reached 0 or less HP, the hit that ends this phase does damage to the phase 4 health pool (ex. if you end phase with a nail slash he will be at 245hp in phase 4)) phase 4: 250-0
------- Evade Antic --------- (backdash/parry)
before THK's idle animation (explained below), THK will roll an RNG check depending on the phase he is in (phase 1: 0%, 2: 60%, 3: 15%, 4: 0%) if this check succeeds, he will either parry or backdash (50/50) after checking whether or not to turn around ( the only thing that can delay the parry/backdash is if he is turning around. ) the evade rng check is also retriggered by the end of a parry, as that goes to the idle, (this could be the cause of parrys chaining into themselves). this isnt the only way for thk to parry, or backdash
------- THK idle animation -------
This is the animation/state after he wakes up from a stagger, after he finishes a move, etc.
exception 1: the end of a backdash does not enter the idle animation, it just immediately goes to another attack (after this attack ends it will go to idle.) . exception 2: an attack immediately after a teleport also does not usually enter the idle animation, it just immediately goes to another attack (after this attack ends it will go to idle.) not entirely sure about this one
The amount of time he spends in the idle state is rng and phase dependent:
Phase 1: .75s to 1s Phase 2: .25s to .5s Phase 3: 0s to .25s Phase 4: 1 second
Low FPS version of 0 fireball shade skip. Saves around 1.7 to the normal 2 dash setup because of how far left you can do it. Requires below 190 fps cap to be consistent.
The visual cue/setup I use is to stand in the left side of the doorframe, then wait for the shade to reach the line in the background in the attached pic. Then, minihop, 2 full jumps, and do the rest like in the clip. Keep in mind to hold down before damage tanking, as this allows you to buffer the pogo.
Extension of Archives WCS that saves about 0.7. To get the dashes to the right, go neutral and slash, then immediately press right and dash. On the very rare occasion that the small jelly is in your way for the first dash to the right, you can switch to the normal movement and go even. For all skills, cut out the last wcs dash so you can hold your nail and do the cyclone wcs.
makes bad rng lose 0 (unless you chain, dash chain is prolly faster than chaining here) hold down at the start of room (dont release until you pogo or see you didnt get the rng) to make it easier, if you get the rng in these videos you let go of analog left (so u don't cling and can pogo) when near then pogo, dash, and during dash repress analog left to recling left video is new strat, right video is old strat new strat saves ~.3, but you can save more by getting chain (no video as this rng is v rare so i havent hit it and i cant be bothered. it saves time regardless.) (dont expect perfect timings for these strats, they are very hard to time as the rng is pretty rare) credits to @PsyKlone for helping with timing and labbing
Even faster abyss drop using the door wcs, saves 0.4 to Stratus' version. You need to upslash just before moving left, since you still have wcs and will just grab the wall again otherwise.
Visual cues:
go neutral out of the wcs when you're approximately at the center height to the right of the platform with the geo rock on it
Inv drop within this area below the platform, it's a fairly tight window, about 3-4 frames
close inv once the tall platform on the right side of the image is gone from your screen
Alternative to the inv drop near the start of the qg thorn drop room. They're exactly the same time-wise from my timing, but I find the pre-jump version to be a bit easier to greed. The sedic slash makes sure you're as far left as possible before the dash. You can do the pre-jump from the spot in the picture, almost right after you're under the part sticking down
Alternate opener on the first knight for shade soul WKs. This and pogocancels are almost the same time on avg (accounting for the difference in soul after roll this is a tiny bit faster) I prefer this one, because it's easier (especially in AS where you have to avoid diving during pogocancels), it doesn't risk getting you shade souls i-framed, and it makes the kill times closer on avg, no matter the rng pattern (Roll is less good, but bounce is less bad) 8.6s for nail attack 8.6s for roll, leaves you with 1 soul 9.6s for bounce
These should be the best dmg rotations for pogocancel opener on the first knight. 8.7s for nail attack, saves 0.8 at the cost of one soul compared to dashing back over like Strat does in current TE WR 8.8s for roll, leaves you with 3 soul 10.2s for bounce
movement for if your loads are too fast and these BASTARDS are always in your way. not rng dependent and only loses 0.2 to the fastest things available. es ist sehr vorbei
wings prejump :gorbbrain: here you can do every input as soon as possible from transition with a very small double jump. good luck not instawinging this cheaters 😘
This is the optimal soul collection for the last fog canyon room on the way to No Eyes. After placing the dream gate, if you can't pogo both the ooma and uoma at the same, pogo the uoma at the end of the room so you leave with 6 soul, or get an extra hit in the room before Stone Sanctuary to enter No Eyes with full soul.
After breaking the wall by archives, cdashing into the upper fog canyon room instead of dashing through is ~1.5 seconds faster for True Ending and ~0.9 faster for All Skills [1]. The cdash will work in the following situations:
If the ooma is high enough, the cdash will kill it and knock the core towards the transition and doesn't hit you (this is the most common)
The ooma is very low and you can cdash right above it
If the ooma is high enough that your cdash will hit it but low enough that it'll get knocked into the wall, attempting to cdash through the room will result in a hefty damage tank which loses 0.1 to cdashless [2]. This is especially punishing in TE where being 3 HP for No Eyes up to the toll bench sucks, but you can react to the ooma position and cancel the cdash to avoid the damage tank (also applicable to AS and 106%):
The most safe option is to cancel the cdash early, then shade dash through it and do a minimum height wings [3]. This loses 0.05 to cdashless but saves 0.05 to damage tanking. To avoid floaty wings from the dream gate, do a jump wings during dash cooldown in the previous room which loses nothing if done correctly.
Alternatively, you can wait until your cdash hits the ooma and cancel cdash on reaction, then quickly wings and shade dash through the explosion [4]. This saves 0.05 to cdashless and 0.15 to damage tanking, but is considerably harder and riskier so I wouldn't default to this especially in TE. However, this can be used as a backup if you try to cdash above it but misjudge its position and get hit, so you can afford to be less cautious about going through with the cdash. (Do note that you have to react to hitting the ooma, NOT the ooma core hitting the wall. If you wait that long it'll be too late to cancel the cdash, so there is still a level of proactivity required for this strat, you just have more time to make the decision.)
These dashes lines up shade cloak's cooldown well so you can buffer dashes and prejump --> shade dash through the last batch of frogs before Marmu, assuming you don't need to heal and dream nail the mossflies. You can still land into a frog at the end of the dash but this should ensure you take 1 hit at most.
Use minihops to reach the platform I shade dash off to save the shade cloak charge (this is faster anyway). Then dash after landing and do the next couple dashes quickly enough so you get two normal dashes for every shade dash. It is a little bit harder to get soul this way but you can get extra hits on the frogs pretty safely.
I find this a more consistent version of mantis pogo sorry for bad quality there is so many ways you can get the mantis pogo with this setup like it has one million backups
Slightly faster version of this drop, with the added bonus of not needing to worry about dunking in spikes at all. The amount it saves depends on how much you greed the last inventory drop of course, so in runs it probably breaks even most of the time.
Be sure to cling at the end to avoid inventory dash refresh jank.
LK Dash Attack Storage If you stagger Lost Kin during its aerial dash attack animation, it skips the landing phase and still thinks it's supposed to dash. Even if it pulls an empty hop or down stab, air dash always overrides them. You can manipulate this to chain air dash triples multiple times with the right timing. (s/o to Magnetic Pizza for helping me figure this out lol)
In order for the dash attack to be stored, Lost Kin needs to be staggered during the "Dash Attack" animation (green circle). If it enters the "In Air" animation (red circle), it loses the storage. Getting the third fireball tick to hit lost kin before the animation ends is a bit tricky, so watch the video on the left and practice the timing. You want to shoot the fireball at about the same time as LK starts the dash - just be careful because if you shoot too early you'll single hit. Even when you're not in the stagger lock, be on the lookout for the air dash attack and see if you can stagger during the dash animation - the dash anticipate animation lasts a long time so make sure it's not staggered until the dash starts to get the storage.
The video on the right shows an alternate stagger rotation that could be viable for LP. The extra nail hit will get the stagger count up to 7 after the triple, and on 1.2.2.1 it will still get tripled fairly consistently. However, it can be awkward/rng to triple the air dash with the extra stagger hit, so I would recommend only trying that on later patches.
When the dash attack is stored, Lost Kin can do a grounded dash 28% of the time which is worse than an aerial dash because you can't keep the storage (at least not consistently) but you can still triple it if you fireball early enough.
collecting some quick soul to do firebell if you come off of basin bench saves over 0.5s overall (not my finding at all has been theorised for a while). applicable in true ending and current wr all skills route, obsoleted in the new faster all skills route
Faster, more consistent start setup for TE Radiance. You still wanna start with full soul but only shoot 2 fireballs at the start, then dash in and buffer 6 nail hits like this: Pogo --> Side slash --> Wings side slash --> Side slash --> Pogo --> Pogo This puts you at a good height, refreshes your dash, and leaves you with full soul so you can react to any pattern she does and get double hits. Getting the nail hits in time and dodging certain attacks can be pretty tricky. If you feel like you were a bit slow, prioritize dodging the attack over getting 6 hits; the 5th hit is also a pogo so it's better to lose the hit of soul then get hit right at the beginning of the fight for double damage. If she starts with the triple laser, it's important to react to the laser placement so you don't dash directly into one, then just make sure to only fireball when you have an opening and save your wings to stall in the air if needed. If she starts with the sword burst/aoe, you basically wanna do the same thing but it's harder because the attack is faster. In general, it's better to stay in the middle verticaly when going for slashes so you have the option to both dash left and right, sometimes this also makes the sword burst miss completely. If she does a passive attack and you dash in the same direction she teleports, just dash the other way and spam shade souls, you still have time to get at least 2 double hits, but usually you can still get 3. Of course remember to delay subsequent fireballs ever so slightly so they're not i-framed.
Update: It's faster and safer to do a nailcancel at the beginning so you don't have to shoot the extra fireball at the end. You'll have to delay the second fireball less but it's consistent once you get a feel for it, and you don't have to worry about dodging the boomerang if you get the good RNG. If he doesn't backup, do the same damage rotation from before without the last fireball. Once again you only need 6 soul entering so you can still do firebell.
Cdashing high lets you wings to the platform without needing to wall jump, which saves 0.2-0.3. Do a neutral dash from as far right on the platform as possible, quickly turn right and hold cdash as you cling. You want the knight's horns to be lower than the the white flower petal thing (blue line). With this setup most of my mess ups are starting the charge too high which can be easily fixed by sliding down. The cdash isn't precise but if you end up very low, doing the room normally is better than trying to go back up. If you cancel cdash too early like in the second video, you can hit the platform by dashing and barely lose any time. This won't trigger the charged lumafly until about halfway across the platform, and you can use corner correction to shorten your dash as needed. This is possible with isma's tear for all skills and 1xx but dipping into the acid and jump/wings to the platform is probably close to the same speed.
Going from right wall is much more lenient and significantly easier (imo) than any other setup, loses ~1s to left wall and basically breaks even with center double shrogo, so you can decide if that's worth for being easier/more consistent, regardless there’s 0 reason to do center double pogo now
A much easier method to catch the fastest cycle in WP Balcony 3 (aka Top Lever). The current most common strat is to dash to the wall under the breakable arch; pogoing the sawblade instead makes this cycle significantly more lenient. Confirmed to work on 1.2.2.1 and 1.4.3.2; assumed to work on 1.5.
Shade soul double setup for the white palace kingsmould with a reliable backup for bad rng. Stop cdash around the rightmost poll, dash and buffer 3 nail hits, jump and delay a fireball. You want to stay in the second to left orange box (just to the left of the door) where it can either dash back or swing. If it dashes back, the shade soul should double consistency with good execution and two more single hits will kill. If it swings, get a nail hit and dash --> two nailcancels --> shade soul as shown in the video. This saves 2-3 seconds but you need 6 soul going in, so it's only worth it if you have dream wielder, in which case you would dream nail the devout in beast den and firebell as normal.
~0.1 slower than the damage tank inv drop but easier, 0.8 faster than no inv drop. nail slash is to give correct alignment for the inv drop so that you don't get a slope drop from one of the ledges below
Fastest strat using shade soul, shamans, and dream wielder. If you miss the double at the beginning and/or come in with low soul, you can safely up slash the first spiny husk until you have enough. It's better to do the up slashes first because your dream nail knocks it back. Might apply to other categories on 1.2.2.1 Saves at least 2 seconds over no dream wielder and gets all of the geo
arena c-dash https://clips.twitch.tv/SpeedyNastyHareHoneyBadger-tYS9EEJ_hHuuQgiM Upstrike here going to the wall and hold neutral. Since upstrike prevents wall cling, it should put at a very nice position and cause you can only wall cling if you go towards the wall, hold neutral afterwards. Then tap left -> immediate c-dash at the right time. It saves 0.09 on avg against normal positioning (For me usually), and is a lot more comfier as you it prevents from wall clinging accidently. The prejump before the drop was accidental btw, Optimally you would just dash over the platform
Fastest strat for getting the shrumal ogres notch on the way to Elder Hu in TE. Mostly applicable to the 1.2.2.1 dream wielder route. Overall saves up to 2 seconds over previous timings of getting the charm notch.
Get exactly 4 nail hits and 1 fireball cast on the right shrumal ogre, dash left to fight the other one, do a nailcancel fireball, and upslash it at the same time you damage tank. If you're lucky this will cancel the freeze frames of taking damage. Immediately after damage tanking, dash to the other side of it and do two nailcancel fireballs to the right. With good execution this will consistently kill both of them, but be careful that your fireball doesn't get eaten by the wall on the left. If you miss one of the tiny mushrooms at the beginning you can hit the leftmost one on the way back. If you come into the fight with 4 hits of soul you should always end with 2, so you'll need 2 extra hits in the wow room for full soul Elder Hu, which only loses about 0.3 seconds.
This is possible on 1.4.3.2+ but inconsistent because the fireball has less range. It should work if the right shrumal ogre does a slamming attack as you're dashing away because it'll move closer, but it would need more labbing.
1fb right side rafters: Not really the most useful strat for runs since its pretty rng for the vf to get in the right place to do this, only really try to do it if you are doing roomsob/comsob etc. Its about 0.15 faster than double fb-ing and 0.3 faster than the regular strat.
As for soul routing, it makes it so you can go into the room with no soul which is nice, it also allows you to do this strat: https://discord.com/channels/772964112908156938/822611544231772170/1042428277987475487 without losing time to soul routing. This would save an extra 0.1 since you don't have to pogo past them and can just dash through so overall it would be like 0.25-0.4 of timesave which is not at all worth for how rng it is.
Prolly needs to be labbed a bit more for 1221/high fps, but highly doubt it would be too much different.
Damageless acid skip way to hornet 2, ill post a vid with the normal strat and the other one found by @joeleren (may ping), u have to do a neutral walljump at the end
Here's different movement for this room that I picked up from ismas route roomsob. It saves about 0.1-0.2 on avg to just dashing across normally. Always make sure to not try to pogo or hit the ghs or the freezeframes will lose about 0.1 than just jumping over. You can't get soul from the rava so be weary of that. Pogo-ing that bg object just before the ghs platform isn't needed but more comfy for getting to the platform. Background objects aren't pogo-able on 1221. This example is kinda slow, an avg you would get 8.1-8.2
Consistent 2 shriek marmu kill. Dream nail at the right side of the bush, hold right and shriek asap, stop holding right and jump shriek. Important to not jump too high, else marmu will hit you often. I tend to just cancel my jump by using shriek. How far right you get is more lenient than the height. Just make sure you are at least at the right side of the bush
The left moss knight walks while in the load and then turns into leaves when you actually drop in, so having a worse pc just gives you more variation, meaning you simply get fucked and lose multiple seconds quite often if he is facing left. Current takeaway from this discovery is just get a better pc lol !
Don't know if this is known, but this is a pretty good visual/audio queue to time the gate for traitor lord. If you slide off of the right wall, and wait until traitor lord's "blowing up" sound stops, start channeling cdash, and release it slightly delayed. If you release cdash perfectly on time, you'll smack into the gate.
New jump saves 0.1: After entering laser gauntlet, land as early as possible on the 2nd flipping platform and immediately jump really high and dash. This triggers the proximity on the 2nd to last crystal earlier (green line good), which is normally the only laser you need to wait a brief moment on, which means it disappears 0.1-0.15 earlier
Saves some time over just dunking in the acid, (dont try this at home), it's safer to go up until reaching the warp zone and then trying to get the stallball, just in case you fail. You'd need to take more soul or just go into the hornet 2 fight with less soul if youu go for it. Its also another way of going into the fight with full health if you get it. Still, prob more viable for a comsob or something.
Consistent strategy for the good moss knight spawn that combines a few time saving strats. Try to hit both geo rocks on the way down. Even if you miss one by a little, it will set up the timing for the moss knight nail hit. You can hit both geo rocks and the moss knight with the same nail hit as it wakes up, if you're positioned correctly inbetween the geo rocks in midair.
probably already known but i havent seen it, slightly different set of movement for the final set of dream nail platforms, ~.15-.2s faster than landing on the 1st platform that spawns. annoyingly easy to undershoot the 3rd platform you land on, so jump a bit higher than you think you need to
Cursed but consistent mantis pogo that skips one of the dashes, i found it based off something I did in TAS, but quick glance shows cerpin was doing something similar into double dash. Allegedly saves 0.4 but idk how accurate that is. Difficulty wise, its much harder than mantis pogo, I'm about 80% consistent after 30 minutes but I know what I'm doing wrong every time i mess it up so take that as you will. If someone else has also come up with this I'm here to vouch for its validity and post it here
This kinda messes you up geo wise, you get less geo and often none at all, so maybe don't do this all the time, or just default to top row if you're doing SS route
You want to fireball halfway through the gap (red) , higher or lower does work, but it makes the rest tighter, you then want to dash, walk a bit (green), jump and hit the lever and immediately dash to the right, full jump after getting past the alcove, pogo once while making sure to not bonk on the lip, pogo again
Backup wise, usually the worst that happens is a mantis hits you and you just mash your nail button and ur all good, you can also just do double dash if ur spooked
Common mistakes:
You need to pogo later than you would in double dash because you need more height
You need to jump for the lever at the correct spot, earlier than double dash, if you don't the left mantis will be too high/low
If ur slow the right mantis gets too close
If u fireball too low the right mantis gets too close
Fireball too high and the left mantis is too high
All in all fairly reasonable enough to do in runs with enough practice I'd assume and definitely run viable enough for comsobs
Also note a lot of the timesaves gonna be how far you go left after doing the 2nd pogo, and this makes doing the 3rd dash on the platform to mantis claw even worse timewise
Starting from the loading zone you basically do 3 wall jumps into a dash, double jump, then fireball the bottom corner of the wall while the top of the knight is slightly above the bottom of it. You want to be near the center but slightly closer to the wall you arent facing. Works in both directions and use vysnc of course.
more lenient and more consistent ending setup for soul catcher early control. you have a lot of iframes, so wait until you see the baldur start to curl up and then move to the left side of it. warning that you CAN go too far left so dont just hold left and expect to get hit since you need the iframes for when the baldur comes back.
Doing an upslash here lets you get a sub short hop height prejump, which saves about 0.05-0.07, and messing it up will basically just give you the normal time. Its not too bad imo. I think a similar thing could have the potential to be applied in other areas, though its use case is quite specific. I've tagged it 1221 because I know upslashes take longer to cap your jump on cp and idk if it would kick in soon enough. Might be that it makes it easier or impossible.
cdash early control from shade cloak on 1.4+. Need to tap up+dnail as soon as the scene name changes to Menu_Title (-33.0, -2000.0) (idk cue for when you don't have mods on, just need to learn timing) then hold cdash. first found by yihou i think
Doing this forward slash pogo doesn't lose much soul and saves 0.3-0.5 over the normal strat. You don't need to greed as hard as I did, as long as you play like you would in a run its impossible to be too fast (technically possible if you are like zkad irl or smth). Very lenient
adaption of shamanless mantis pogo to avoid missing it due to shamanless muscle memory, and an example of a mantis claw early control setup (go right side when dropping back down whenever you can, I just wanted to avoid the mantis here)
I couldn't find an example in here for this shade skip, so here're two examples I got; one with good rng, and another with a shade fireball and recovery timing.
For the backup start jumping again as soon as the fireball passes over you. If the fireball passes higher above you, you can start jumping earlier so that you still rise up about equally behind it with your jump as I did here.
Buffer every jump, or else you're playing a game of luck with whether you align with the shade's up/down dipping to get enough height. if you read it well you can probably save some missed jumps and adapt with double fb, and just skip the firebell at rg stag (for AWR).
note: I am not good at this shade skip, so if you have issues with these setups you can share clips of attempts etc and ask for help/guidance in #hk-nmg-discussion or any similar channel
Made a video tutorial for the Soul Catcher early control setup. Saves about 2.5 seconds on categories that are already picking up soul catcher as their first charm https://www.youtube.com/watch?v=w-5NJ3Uylhg
Ceiling boost here for more fall speed through the platform. In order to get the boost you need to be holding right for (idk one or more?) frames after your jump bonks the ceiling, so that you move into the ceiling. Takes a lot of practice.
not super big, but doing walljumps like this saves a tiny bit of time when done well in many situations purely bc walljump x-velocity = 16 (and then drops back down gradually), and walking x-velocity = constant 8.3
setup to get a really good wcs into room, also just ensures you never miss it (2 slashes when the elevator hits the bottom, not precise when you start them)
Transition storage dive before crossroads stag in True Ending All Glitches, leaves you with 3 casts for firebell, trinomi drop dive, and archives dive. Forces you to downdash out of the Monomon dream. To execute: enter crossroads_03 with transition storage, and spam dive. Dash left when you reach the height of the load to the stag. Warning: if you hit the load too soon (perhaps before the ddark animation ends?), you enter stag with no control
I made a guide for True Ending nmms, which is now run on current patch. It doesn't go into detail about anything nmg in the route (which is a decent amount of it) but assumes no prior glitches experience. https://www.twitch.tv/videos/1283091574
True Ending White Palace IL strat, saves about 1.5, this shit sucks ass but its possible. It's very easy with sharp shadow, so useful in WP IL and when people start using SSDM in 106, but very difficult with TE loadout.
Stand at this pillar then nail slash twice and instantly release cdash, can't go to fast in testing, but sometimes looks like you go through the gate :Burgy:
Easier way to hit the good spear cycle, neutral wall jump at the start of vertical corridor, wings and pogo, do either another wings or wall jump, wall jump and pogo
this strat gives geo more consistently than the normal one and it's only 0.4-0.7s slower so it's worth if you're low, but rng can screw you over if the geo flies to the left. if you get geo you'll probably get 5-12
jump when the petra is on the right of the platform, not immediately sometimes the big geos don't land on the platform so you'll have to catch them midair
spent some time looking at the fsm for hu and found that after his big attack, which side he teleports to is only rng if you stand in the center of the arena. if you are on the left side, he is guaranteed to tp to the right, and if you are on the right side, he is guaranteed to tp to the left side. youre able to start moving right after the last pancake spawns here are some screenshots of the farthest left or right that you can stand.
a variant of shade soul shaman stone 1 cycle for uumuu. first example is with extra, second is without. important points to watch out for are keeping uumuu at the right spot after the 3rd attack (slightly off the right end of the center platform), and delaying the first shade soul a little bit to make it double more consistently. an extra sets up perfectly for the original 1 cycle setup that you see most often. can be mirrored across the center if you feel more confident with the extra setup moving right than moving left.
same strat without dashmaster. just hold direction and dash, the cooldown should line up on anything but absolute worst-case backing up rng, in that case it still dboosts you towards the dreamer in all my attempts. never actaully timed this, but not having to wait eliminates 99.9% of possible devout rng, compared to having to wait for the cooldown. https://clips.twitch.tv/SuspiciousHelplessStarlingPJSalt-Pd816xD1HMewW3f7
consistent setup to get the corner correct for dream dash every time (which is super important if you're doing this clawless)
get on the right side of the 2nd post (position isn't super precise but don't go past the grass and don't go before the post), swing 7 times when you see the seer, full jump and dash as seer leaves the screen
oh i guess some quick trouble shooting, if you're going past the platform, you're dashing too early or are too far right, if you're hitting the side, you're either jumping late, or dashing early while also being too far left
idk turning seems to make the save icon appear faster after early control, finding more details on if its shade soul exclusive later [it is] and this only works on 1221
a setup to time the final shade soul to finish failed champ. useful in any category that does this fight with shade soul. the timing is done by falling down when the floor breaks, hardfalling, fullhopping off the ledge, and casting at failed champ's height. tested on 1432, should work on any patch 1221-1.5
easier variant on the TE shade skip, based on how I do it with a dash into the shade instead of drifting onto it
shown here is a setup where you don't need to drift at all to get the damage boost, instead you dash into it, this allows you to just hold down for the most of the trick and do the pogo and fireballs until you turnaround and dash to the ledge, one thing to note is that you'll need to make sure you're facing to the left at the beginning of when you jump to get it to work instead of it not mattering like with the regular setup
if you're used to the regular setup, the timing might feel a little bit off, i line up the shade and myself with the background then dash at the apex of my jump
.2s faster with good execution (6.04 no wcs -> 5.85 wcs) dash is kinda hard to get. Both examples poorish execution just to show how to deal with rng Right side:
for those doing the one fb shade skip (i'm currently capping 250 so it is easier than those capping 300) if you have soul leaving gruzzers due to a bad cleanup (one hit or more) you can fireball the husk for the geo and get the 3 hits on the other husk, and it still save a second to the 2fb method
mother faster soul collection to get a hit on this tik tik (loses 0.08 in crossroads_03) and avoid the hit on the aspid (saves about 0.23 in crossroads_09), pre-jumping in 03 is within 0.05 of dashing but slower [hitting the aspid is faster than double hitting jennifer, so hit the tik tik, aspid, and jennifer once]
Obtain transition WCS on the right. Frame perfect dash left, hold right again. It is not faster to chain this on the lumaflies at the bottom, faster to inv drop. Idk full timesave cuz i'm bad. Also hit the jelly, i'm dummy. If you miss it you won't be hit by lumafly, but you miss the cycle so you lose time
Corner WCS off the ceiling to skip a wall jump on Xero. When optimized, saves 0.2 over the normal strat. Sometimes the subpixels just work and sometimes they don't, idk why.
A full-length run viable strat for making a faster spear cycle. Saves about 1.3s over normal cycle. Relatively safe because timing cues can tell you if you won't make the cycle. Apparently Ax discovered this independently recently, but I couldn't find anything posted so adding it here so everyone can benefit.
adding to the above post, hitboxes shown as well as a setup that does not require baiting the shade back to the left. fulljump as soon as you land after the dash back to salubra, then start the 3 fulljumps to get the shade up as it passes the red line in the image. requires you to be fairly close to the edge of aggro range to be able to dash into the ledge. this variant saves ~4s over a good 1fb and ~7 over a 2fb. performed at 250fps on 1.4.3.2
jump as soon as you touch the ground, dash at the top of the first wall and immediately wall jump, then tap right to turn around, and buffer the 2nd dash (yes, off cooldown) and immediately walljump again, works every time.
Dashing to the wall is an easy way to inventory slide. It's also possible to do it without the dash but more precise so higher chance to get pushed to the spikes.
The fastest known way to drop into birthplace in True Ending. Shoutouts to Muri. Even sloppy version of this drop will be on par with tryhard version of the normal drop most people do, and this particular execution is ~0.3 faster than the best regular drop I was able to pull off. On average it saves like 0.6-0.8 https://www.youtube.com/watch?v=l3KuZSIa-Zs
wcs setup for archives gate that works for both True Ending and All Skills. Start nails when you hear uumuu exploding. Prob works well for any% but you just stall a bit instead of using wings
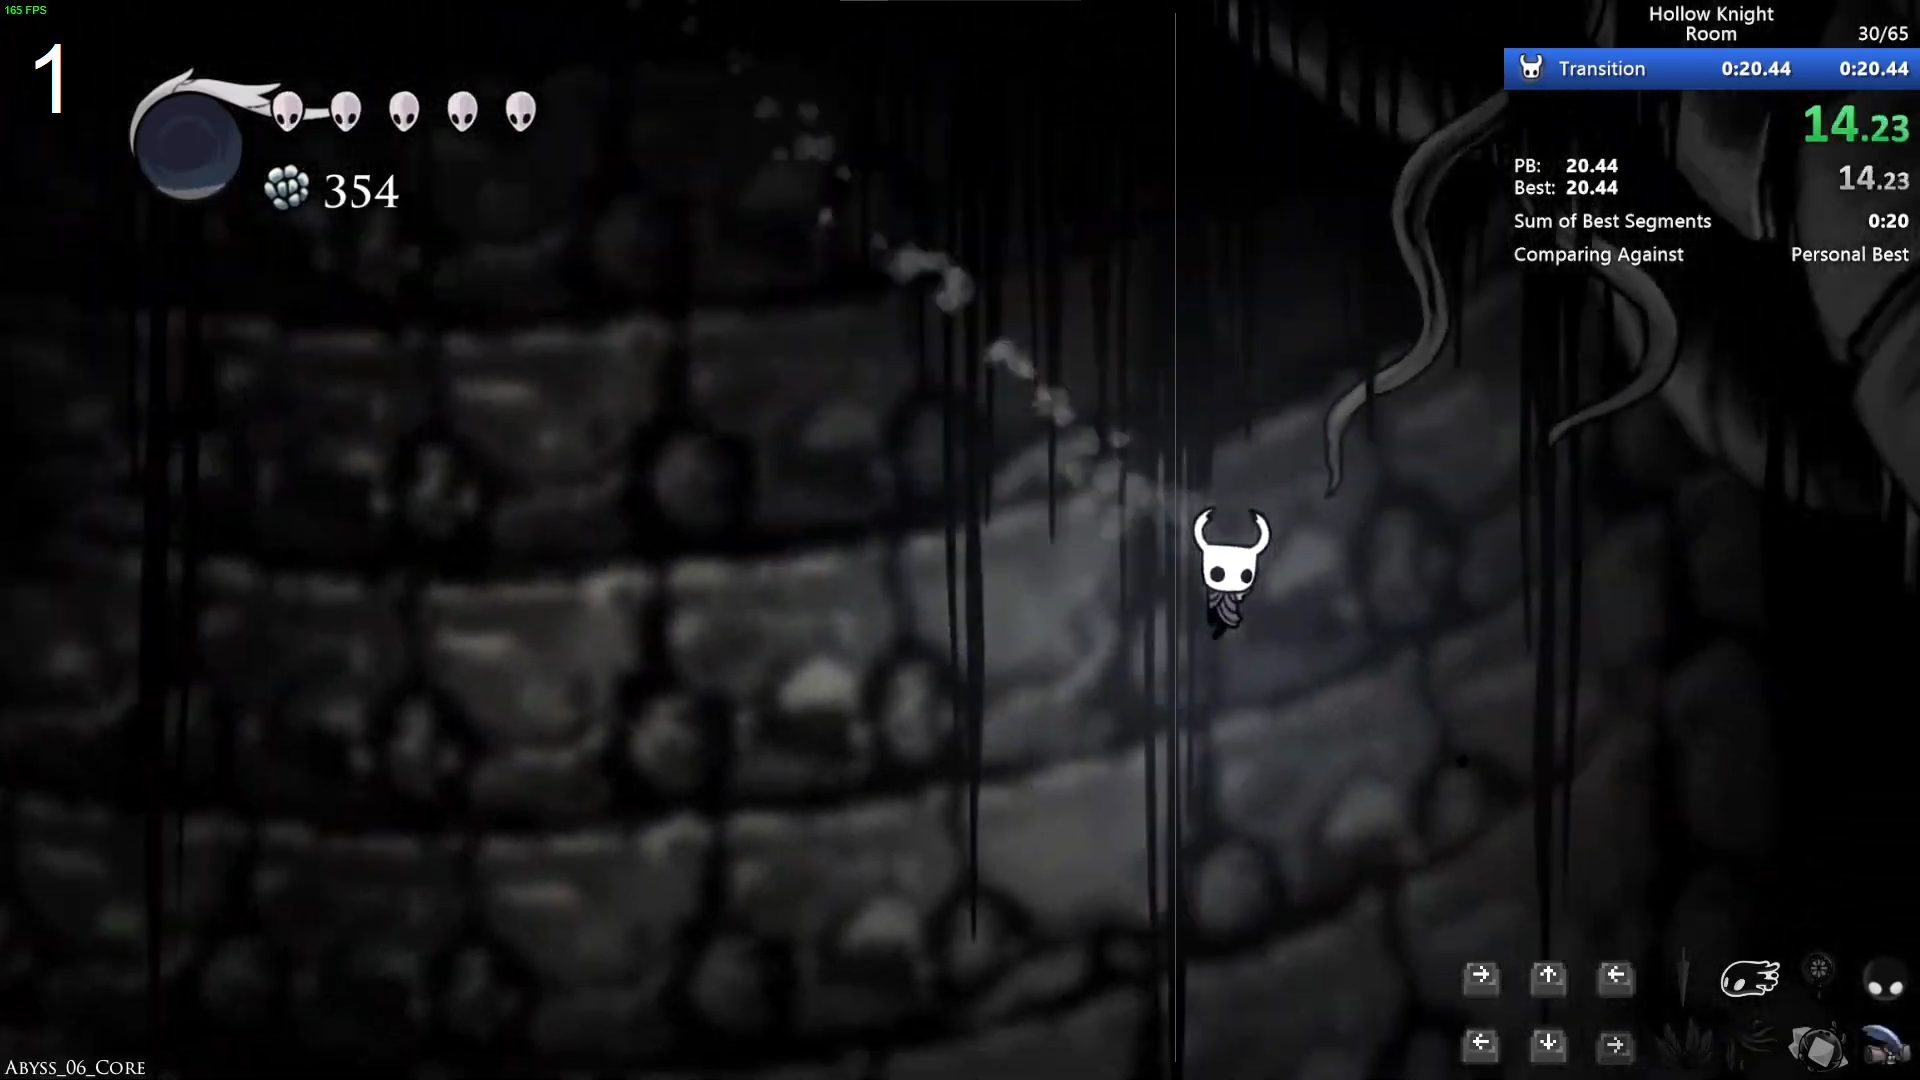
This is the faster true ending shade skip setup not counting the 0fb version coz fuck that noise. Align yourself with the left side of the door and do the three full jumps as normal. The more diagonal you can move with your shade the faster. Also attached in the second clip is the same setup but done with 1 fireball. You have to move a bit more vertically and make sure the pogo after the parry is at absolute max range. Kind of a meme but if you get a promising dboost and pogo you can do this one on reaction to that. Both of these clips were done at around 350fps as per the counter in the top left, and should be easier at lower framerates. I can't get 600 fps in that room but if you do the 1fb version may be quite difficult if not outright impossible. As per TE shade skip general guidelines, if the shade fireballs mid skip you're just going to have to play by feel but starting it further left like this gives you a lot more space to work with to try and save it so it should be slightly preferable to if you were going for a further right setup.
Extremely cursed dash only shade skip that saves a little time in TE due to not having to collect soul. Needs 120 or lower fps, so only saves 1-2s if you have to turn on vsync, but if you cap to 120 or lower or are on console it saves around 5s instead. https://youtu.be/YL_PgTjlfps
 1




 1
 6


 1

 1

 2
 11


 3
 14
 13
 5
 14
 2


 12
 1
 12
 1