right side entry tft
Turns out walking off the right ledge entering uumuu and missing the ledge below is t-ft (or subunits or whatever), so moving right/clinging to the wall before inventory dropping should be the play.
#all skills 133
Doing a wings into the ceiling here (at around 4s in) instead of landing and prejumping saves a couple frames (thanks cerp)
 5
Video on how it looks like: https://youtu.be/82grKNvSV-4?t=132
A version of shade skip that uses this bit of extended wall hitbox to dash twice (first image) and that saves ~0.34.
Basically you just do what I did but make sure you walljump+right when the knight clings to this rock (second image). The rest of the tomfoolery is just to wait for the shade.
Feedback: If you dash twice on the wall and only one dash comes out then you pressed too late. If 2 dashes come out then you pressed too early
(EDIT: The actual rock to jump off of is the tiny one below the picture, my fault for the misinformation y'all)


- 4
Here are the strats I use for consistent 3 damage tanks in well room. They work for both rngs of the bottom crawlid (but one is faster), and although not as fast as hoping for good gruzzer rng, they are reasonably fast. I have been getting mid to low 45 baldur entries which equates to a mid to high 50 death. I believe it's faster to do 3 damage tanks here than the consistent two in the next room.
 4
- 2
A consistent way to take 2 damage in the room before dying to the baldur, which is relevant for all categories that do ibaldur and skip well rock.
This loses 0.9 to the fastest possible 2 damage tanks that requires specific gruzzer rng, but otherwise saves a lot of time as you'll always enter the transition with 1 health.
If the crawlid is on the right (or if you can damage boost using a gruzzer), you can do a full hop from the center of the platform which breaks even with the inventory but is trivial to greed. On LP it is recommended to minihop if you damage boost on the left side of the platform.
- 3
using 112 rotation for phase 2 is a good safety strat if you really need to avoid taking hits here, if you get fake dives in any of the first 3 dives your kill is pretty much on par with the riskier wall strat. timing on the jump is important to get the shade souls off regardless of whether he fake dives or not in some of these scenarios
- 7
Found a way to manipulate the crushers to get a cycle that saves 0.5 without dashmaster and 0.7 with to the standard cycle.
On 1221 crushers are camera activated, so if they're not on screen they aren't active. Doing the jump between the first two crushers, delays the bottom ones enough that you can get past the bottom right one a cycle earlier and save time.
Without DM you want to do the midair dash to stall it for slightly longer than just the jump. While with DM it's possible to land and still make the cycle to save the extra 0.2 (It's kind of tight though so can just do the dash in the air to be safe). Keep in mind if you land during the cyclone you can't do the midair dash because :spaghettiArrive:
- 5
This fury kill that baits over the two vengeflies from earlier in the room allows you to get 65-70 at the cost of 6.5 seconds.
Pogo strats that skip the scream give you around 50 geo at the cost of 5.5 so this is better if you need that extra bit of geo like we do in All Skills
- 2
fast backup for if shit goes wrong with the new aspid pogo strat. super useful and barely loses anything (if at all?). has potential
- 10
shoutouts to @JKmaginary for strat idea
this aspid skip is usually damageless, saves about 2s to the damage tank strat, and gives a lot more soul, however its much more fickle
its really important to delay the dash that aggros the aspid or it'll fly up too high, if the aspid isn't clearing the ledge at the end you probably delayed too much. However the aspid being too low is much easier to backup.
The spit dodges are a bit tricky at first but pretty consistent. You might need to delay your slashes and dashes more based on the aspids positioning to avoid falling in the spikes.
The ending is the most difficult part. The aspid can only take 7 hits so you need to be careful not to kill it if you mess up. The strat normally gets 6.
Ive gotten hit sometimes at the ending and still made it, I think you can get this damageless but I dont think you should do this strat if you're afraid of getting hit
Definitely just play around with it, its very feel based but its consistent once you understand it for the most part, you do have to back it up a lot. However backing it up by being one spit later makes it go even with the old strat, and getting it two spits later is only 1.5s.
- 8
By clinging to and unclinging from the left wall in the previous room, you can dash left once and then dash right to your heart's content with wall cling storage.
Without dashmaster:
- If the glimback is on the right, wall jump over it midair and continue as normal to save around 0.4
- If the glimback is on left, you can either do the same thing or go for the chain and do the sequence in the first video to save 1.1
With dashmaster:
- If the glimback is on the right, do the sequence shown in the second video - delaying the dash after the glimback pogo helps make the rest more lenient but make sure not to touch the ceiling
- If the glimback is on the left, do the sequence shown in the third video - the background object on the left is pogoable but the right one isn't so dash quickly after pogoing the glimback to line yourself up
- For both patterns you save around a second, and if you lose too much height and have to midair wall jump you barely lose anything to a perfect room.
- Theoretically you could probably save more time by chaining and keep wcs through the entire horizontal section of the room but it's pretty hard because you can graze the wall
- 5
if you have shade cloak doing this before the jelly tunnel is faster on average
it loses 0.2 in movement, saves at least 0.1 in freeze frames from the big jelly on right, saves another 0.1 for each jelly missed, and makes the cancel at the end a lot safer and better to greed
also cuz you're hitting 1-2 less jellies on average in the tunnel and dont hit the 1st jelly, you're less than half as likely to cdash glitch which loses almost 2s if it happens
- 2
its a hard thing to time but this transdash setup doesnt lose time and its a lot easier since you able to stall in the air for longer, gets the same times or faster for all the hyper greeded setups
on paper it could only be faster or even, and couldnt be slower, dont want to write a thesis on it
(mainly directed towards aslp but applies to 1xx lp as well)
Broken Vessel has 525hp; stagger values are 9 hits for combo (<1s/hit) and 13 otherwise; headbanging phase starts for the first time once you deal 155 damage, so 4 shade soul hits is always enough to trigger it.
You want to always start the fight by firing 2 shade souls (where you do a small jump between the first fb and the second one), which has a few different outcomes:
-both shade souls double or one triples and the other singles (e.g. whilst bv is on the ground or dashing towards you):
For this case get 4 nail hits before the headbanging phase starts*, and then you want to get 1 nail, 1 pogo and a ddark, followed by 1 upslash, one pogo and another ddark, followed by a pogo and a ddark, finally ending with a ddark.
-only one shade soul doubles and two single hit:
For this case there's pretty much no risk of staggering before the headbanging phase starts, so try to get 7/8 nail hits in and then do your first ddark. After that you want to do a sequence of 1 upslash, 1 pogo and a ddark (all) twice, which will send the boss into a staggered state. Depending on wether you got 7 or 8 nail hits at the beginning you can either directly ddark the boss (or shade soul double if you're feeling spicy) or you'll have to do a pogo into the ddark.
The two most common cases are the ones described above, but there are some other misc starts to the fight, for example, where you get "bad rng" but the 3rd shade soul doubles (or even triples in some cases) or you try to go for three doubles. Essentially, if you get 5 shade soul hits at the start of the fight you want to follow the 1double2singles case (soul gathering a little less strict), but instead of finishing with a ddark you can get enough soul for a last shade soul.
*try not going for more than 4 because stagger is at 9 combo hits (or 3 hits if you start with 5 shade soul hits)
Alternate rotation for Uumuu 1 cycle involving a damage tank. Seems to save a bit over the other rotation, but hard to tell how much because of Uumuu move rng.
The visual cue I use for when to walljump/dash off the wall is when the part of the blobs marked in red are at the wall.
For extra backup, wait until Uumuu starts moving then dash wings back onto the wall, then do the setup like normal.

- 6
left/right is objectively optimal here because you get the dash refresh sooner and dont have the speed reset
left/analog right at the top, can hold it from the cdash, and let go of analog right before dashing, then swap to right/analog left for the gate wall, continue to hold this as you dash through since its a right dash and you dont have to worry about greed as much, careful not to dash early or you'll dash off the wall
saves 0.14 on a perfectly greeded cyclone to the bottom, and 0.02-0.1 on a good cling -> downpress, however it saves more than that generally since this is bufferable consistency where the other strats have a lot of timing going on, probably closer to 0.3 for most people
- 4
saves .08 or .06 optimally , dunno. but on average im saving .04
if u accidentally recling its same speed as not doing it
only loses time if u accidentally slash right somehow (u should be doing nail before press left to avoid this)
- 6
Alternate transition wcs setup that lets you cling to left wall instead of right. Seems to save around 0.2 over the normal setup, and much easier to execute.
To get the storage, cling to the left wall before the transition and press down to uncling.
- 4
unlike 1221 where theres actual directional cycles, for LP theres just idle times, so you just need to react to positions
as a general rule, if the first husk walks decently far, inventory cancel the 2nd dash so you can fit in 2 dashes more consistently
if the 2nd husk is close to you, nail slash them before the 2nd dash, if they're really close inv cancel the 2nd damage on the 1st EVEN if they're pretty far right
for the damage on the 2nd husk, you can inv cancel it if ur close to the door or a dash will get you there, theres some patterns where you'll want to take the knockback since its double walking speed but often the heights just really bad
Lastly, if the 1st husk starts walking right, just take 2 damage and make it up after sly, you can use a nail to prevent the husk from walking too far for the shade spawn on your last damage
- 7
free hit of soul before claw, works even if they dont attack
- 🔥2
Better movement for the Hell room lever skip which let's you get the soul jar for no timeloss. Dashes leading up to the dash slash save around 0.15, and the rightside walljump saves another 0.15. This also means you are fast enough to still get the wcs which can save up to an additional 0.6
- 7
If you buffer a pogo out of a dash here you perfectly land on this little platform, allowing you to pick up any stray geo that might've fallen onto it during the squit arena. It's the same speed as the other ways I've seen people do movement here.
You need to be at least as far left as the image for it to work, so just don't greed the dash as hard as possible and you won't be early.

- 4
Slightly better version of this for All Skills, that makes use of left-right wcs.
If you're already doing left-right when you hit an actual wall it doesn't reset your fall speed at all, so you get to be as far right as possible and get rid of the wcs, so you can dash right as soon as you clear the bottom of the wall.
you just need to start holding analog left before you touch the wall.
- 4
If you dash slash the lever at the top here to bring the elevator up you can start moving right while falling, which lets you skip a dash. The hardest part is greeding the last dash slash, I use the cue of touching the left bit of the foreground object you can see in the last vid.
Saves up to 0.3
Even without cancelling the first inv drop in the vid early (Strats post for that here: https://discord.com/channels/772964112908156938/822611544231772170/1158759101958983712) it saves about the same
- 7
If you cancel the cdash going into petra arena as soon as you trigger the arena (the orange line in I'm next to in the pic) and stall for a brief moment, you can nearly guarantee getting all the 12 geo from the first petra, since it will move to the center of the platform as soon as it spawns.

- 14
If the husk in KS is on the left you can do this dash slash to save about 0.1 while getting an extra hit of soul
The exact timesave depends how well you greed the horizontal spacing, you wanna end the dash slash dash as close to the husk as possible without ramming into it, but even if poorly greeded it's a free soul hit
(skate movement is bad for this rng in AS because you pretty much always need the soul hit)
- 7
Doing this movement saves 0.3 over the current cyclone strat if you get the wings bonk like here, a few frames less if you don't.
It consists of doing a dash into buffered pogo, buffered dash and buffered min wings jump. Then before you reach the wall start holding analog left, as soon as you wallcling press nail and let go of horizontal inputs, then you can dash anywhere after you've passed the spikes.
Left-right wallcling knocks you away from the wall you're on if you press nail, which ensures you don't hit the spikes, and that you land on the ledge under them. Getting the wallcling also stops you from hardfalling if you land.
This strat works for both 1221 and LP
3rd vid has input display for left-right nail knockback
- 5
Extremely consistent soul warrior quick kill that saves 1.2 seconds compared to the best rng with the current strat. Needs full soul, but in my experience I usually have that here already.
The only trick to it, is that you wanna jump up a bit before you dash, at the same time you hit the soul warrior trigger (The trigger is at the tip of the arrow shape on the ground, look under where I jump). That way you can shade soul as soon as the dash ends.
You can also upslash before the dash if you're 8/9 soul, which is useful if you doubled the soul twister and then get up to 8/9 from the shade soul jar
You end with 0 soul instead of 4, but you can easily get enough soul before soul master in less time (for instance the soul jar in hell room costs 0.3).
The current strat very often loses more time too, like if one of the shade souls don't double, if it teleports to the left side of the arena after the opener, if you get hit, or if the geo spread is awkward.
- 10
You can ddark these two spiny husks for geo at the cost of ~1s and 3 soul. Gives 16-24 geo without chasing the geo.
Make sure you end cdash and ddark as far left as possible so the left husk's geo is more likely to bounce into you if it goes leftward.
Better than Herrah rocks if you need <20 after Petra arena (if you have more than 185 geo)
- 6
-------- Phases ------
THK has 1000 HP, or 1250 HP (he heals TO, not adding 250 after entering phase 4 (last))
phase 1: 1000-751 HP
phase 2 (when he is able to do the first scream): 750-401 HP
phase 3 (where he is able to do 2nd scream/self stab): 400 until death HP (doesn't end until you hit him AFTER he has reached 0 or less HP, the hit that ends this phase does damage to the phase 4 health pool (ex. if you end phase with a nail slash he will be at 245hp in phase 4))
phase 4: 250-0
------- Evade Antic --------- (backdash/parry)
before THK's idle animation (explained below), THK will roll an RNG check depending on the phase he is in
(phase 1: 0%, 2: 60%, 3: 15%, 4: 0%)
if this check succeeds, he will either parry or backdash (50/50) after checking whether or not to turn around ( the only thing that can delay the parry/backdash is if he is turning around. )
the evade rng check is also retriggered by the end of a parry, as that goes to the idle, (this could be the cause of parrys chaining into themselves). this isnt the only way for thk to parry, or backdash
------- THK idle animation -------
This is the animation/state after he wakes up from a stagger, after he finishes a move, etc.
exception 1: the end of a backdash does not enter the idle animation, it just immediately goes to another attack (after this attack ends it will go to idle.) .
exception 2: an attack immediately after a teleport also does not usually enter the idle animation, it just immediately goes to another attack (after this attack ends it will go to idle.) not entirely sure about this one
The amount of time he spends in the idle state is rng and phase dependent:
Phase 1: .75s to 1s
Phase 2: .25s to .5s
Phase 3: 0s to .25s
Phase 4: 1 second
Killing the devout with wraiths + shadesoul saves 0.3 over ddark + shadesoul.
Does have a bit more risk if the devout backs up, if it backs up after 2 hits you can recover with another wraiths or ddark, but if it backs up after just 1 hit you kind of just cry. I was only getting the backup about 10% of the time though, so probably still worth.
Highly recommend vsync for this, with in game cap of 150 I was getting 2 hit wraiths (without devout backing up) 20-30% of the time, but switching to vsync I got no rng missed hits.
- 2
Doing a cyclone on right drop then dashing to the middle allows you to do the first cyclone sooner and charge the second cyclone while you're dashing to middle drop.
Saves about 0.3 over cycloning twice in mid drop.
- 9
Extension of Archives WCS that saves about 0.7. To get the dashes to the right, go neutral and slash, then immediately press right and dash. On the very rare occasion that the small jelly is in your way for the first dash to the right, you can switch to the normal movement and go even. For all skills, cut out the last wcs dash so you can hold your nail and do the cyclone wcs.
- 4
Neat little background object pogo that allows for quicker snake jumps. Saves around 0.3.
- 10
Setup for hitting the gate wcs after gruz mother which, contrary to popular belief, is ~0.35 faster than the normal movement with no chains (1). After finishing cleanup, do 4 nail slashes and then quickly dash near the top of the gate. Continue holding right until you touch the ground (or the wall) then jump and dash to the bench (it's possible to chain the jump dash and still land on the top platform but it's very tight)
For an additional 0.2 timesave, you can chain the wcs and do a second dash midair with a nail slash (2). To input this, go neutral to uncling, then slash (direction doesn't matter but you HAVE to be neutral during the slash) and within 6 frames, press right and dash. Generally I land early enough to where I can fit in an extra dash and jump with coyote frames to the bench, but if you land further to the right you can probably go for a chain instead. The frame window for this is not super tight but it's a really awkward input that's very hard to greed, and if you mess up you'll be zooming to the left and lose one quantillion years so this might not be worth for runs but maybe it can be improved to save more time.
If you dash through the gate too early and don't make it over the ledge, you can back it up with the normal movement and still save about 0.2 (3). For TE and other categories without claw, the 4 nail slashes can also work as a good setup for pre-dashing through the gate (4).
- 10
makes bad rng lose 0 (unless you chain, dash chain is prolly faster than chaining here)
hold down at the start of room (dont release until you pogo or see you didnt get the rng) to make it easier, if you get the rng in these videos you let go of analog left (so u don't cling and can pogo) when near then pogo, dash, and during dash repress analog left to recling
left video is new strat, right video is old strat
new strat saves ~.3, but you can save more by getting chain (no video as this rng is v rare so i havent hit it and i cant be bothered. it saves time regardless.)
(dont expect perfect timings for these strats, they are very hard to time as the rng is pretty rare)
credits to @PsyKlone for helping with timing and labbing
- 9
Even faster abyss drop using the door wcs, saves 0.4 to Stratus' version.
You need to upslash just before moving left, since you still have wcs and will just grab the wall again otherwise.
Visual cues:
- go neutral out of the wcs when you're approximately at the center height to the right of the platform with the geo rock on it
- Inv drop within this area below the platform, it's a fairly tight window, about 3-4 frames
- close inv once the tall platform on the right side of the image is gone from your screen


- 5
Buggy pogo you can go for if you don't wanna do the crystal pogo. Loses 0.4-0.6 depending on buggy's position.
In some cases buggy won't be low enough to pogo, if so you can pogo the crystals by doing a neutral walljump before the dash
This dash slash works as an easier way to time the barrel pogo to manipulate the top laser when going for dog cycle.
You only need to let yourself fall a tiny bit after it, so you pogo and dash into the bottom of the wall
Alternative to the inv drop near the start of the qg thorn drop room. They're exactly the same time-wise from my timing, but I find the pre-jump version to be a bit easier to greed.
The sedic slash makes sure you're as far left as possible before the dash.
You can do the pre-jump from the spot in the picture, almost right after you're under the part sticking down

Alternate opener on the first knight for shade soul WKs. This and pogocancels are almost the same time on avg (accounting for the difference in soul after roll this is a tiny bit faster)
I prefer this one, because it's easier (especially in AS where you have to avoid diving during pogocancels), it doesn't risk getting you shade souls i-framed, and it makes the kill times closer on avg, no matter the rng pattern (Roll is less good, but bounce is less bad)
8.6s for nail attack
8.6s for roll, leaves you with 1 soul
9.6s for bounce
- 7
These should be the best dmg rotations for pogocancel opener on the first knight.
8.7s for nail attack, saves 0.8 at the cost of one soul compared to dashing back over like Strat does in current TE WR
8.8s for roll, leaves you with 3 soul
10.2s for bounce
- 4
Strats for Soul Master p2 with a 2 soul start.
The first is a dmg tank that gets you a 15.0s kill, but is very easy to mess up since the timing is tight and he can easily i-frame your 2nd shade soul if you're not careful.
The second is a much easier dmgless version that gets you a 15.5s kill
Several different strats for Soul Master p2 with a 1 soul start. The first is 15.8s for guaranteed dmgless.
The 2nd and 3rd are rng to get hit, 15.5s if you don't, 15.8s if you do.
The last two show good backups for fakedives. 15.9s if you get one for the first attack, 15.0s if you get one for the 2nd
better dmgless Soul Master p2 strat for a 0 soul start, 16.3 second kill. This is the same speed as the dmg tank version that gets a shade soul off before getting hit
Slightly different setup for the aspid skip to Hornet 2. This makes it impossible for the aspid to shoot into the ceiling, and has felt overall more consistent for me.
It also allows you to back it up most of the time, due to the movement leaving the aspid directly under you.
Examples below of the normal look plus the backup 2 different times.
- 10
Uumuu dmg cycle that makes use of dash slash storage, saves around 0.2-0.3.
Make sure you jump back and wait until Uumuus left side is aligned with the edge of the wall to do the last two shade souls, like in the clip
- 13
Better movement for the lumafly room, saves around 0.3-0.4 to the double cdash version, the first wings jump is min height, and the last one is max height so they line up really nicely
- 16
movement for if your loads are too fast and these BASTARDS are always in your way. not rng dependent and only loses 0.2 to the fastest things available. es ist sehr vorbei
- 5
wings prejump :gorbbrain: here you can do every input as soon as possible from transition with a very small double jump. good luck not instawinging this cheaters 😘
- 2
After breaking the wall by archives, cdashing into the upper fog canyon room instead of dashing through is ~1.5 seconds faster for True Ending and ~0.9 faster for All Skills [1]. The cdash will work in the following situations:
- If the ooma is high enough, the cdash will kill it and knock the core towards the transition and doesn't hit you (this is the most common)
- The ooma is very low and you can cdash right above it
If the ooma is high enough that your cdash will hit it but low enough that it'll get knocked into the wall, attempting to cdash through the room will result in a hefty damage tank which loses 0.1 to cdashless [2]. This is especially punishing in TE where being 3 HP for No Eyes up to the toll bench sucks, but you can react to the ooma position and cancel the cdash to avoid the damage tank (also applicable to AS and 106%):
- The most safe option is to cancel the cdash early, then shade dash through it and do a minimum height wings [3]. This loses 0.05 to cdashless but saves 0.05 to damage tanking. To avoid floaty wings from the dream gate, do a jump wings during dash cooldown in the previous room which loses nothing if done correctly.
- Alternatively, you can wait until your cdash hits the ooma and cancel cdash on reaction, then quickly wings and shade dash through the explosion [4]. This saves 0.05 to cdashless and 0.15 to damage tanking, but is considerably harder and riskier so I wouldn't default to this especially in TE. However, this can be used as a backup if you try to cdash above it but misjudge its position and get hit, so you can afford to be less cautious about going through with the cdash. (Do note that you have to react to hitting the ooma, NOT the ooma core hitting the wall. If you wait that long it'll be too late to cancel the cdash, so there is still a level of proactivity required for this strat, you just have more time to make the decision.)
You're able to fit 2 cyclone drops in this room, and it is a lot easier to go towards the left before entering the transition.
- 10
I find this a more consistent version of mantis pogo sorry for bad quality there is so many ways you can get the mantis pogo with this setup like it has one million backups
- 🤯8
https://youtu.be/Q0xzphMeiC4
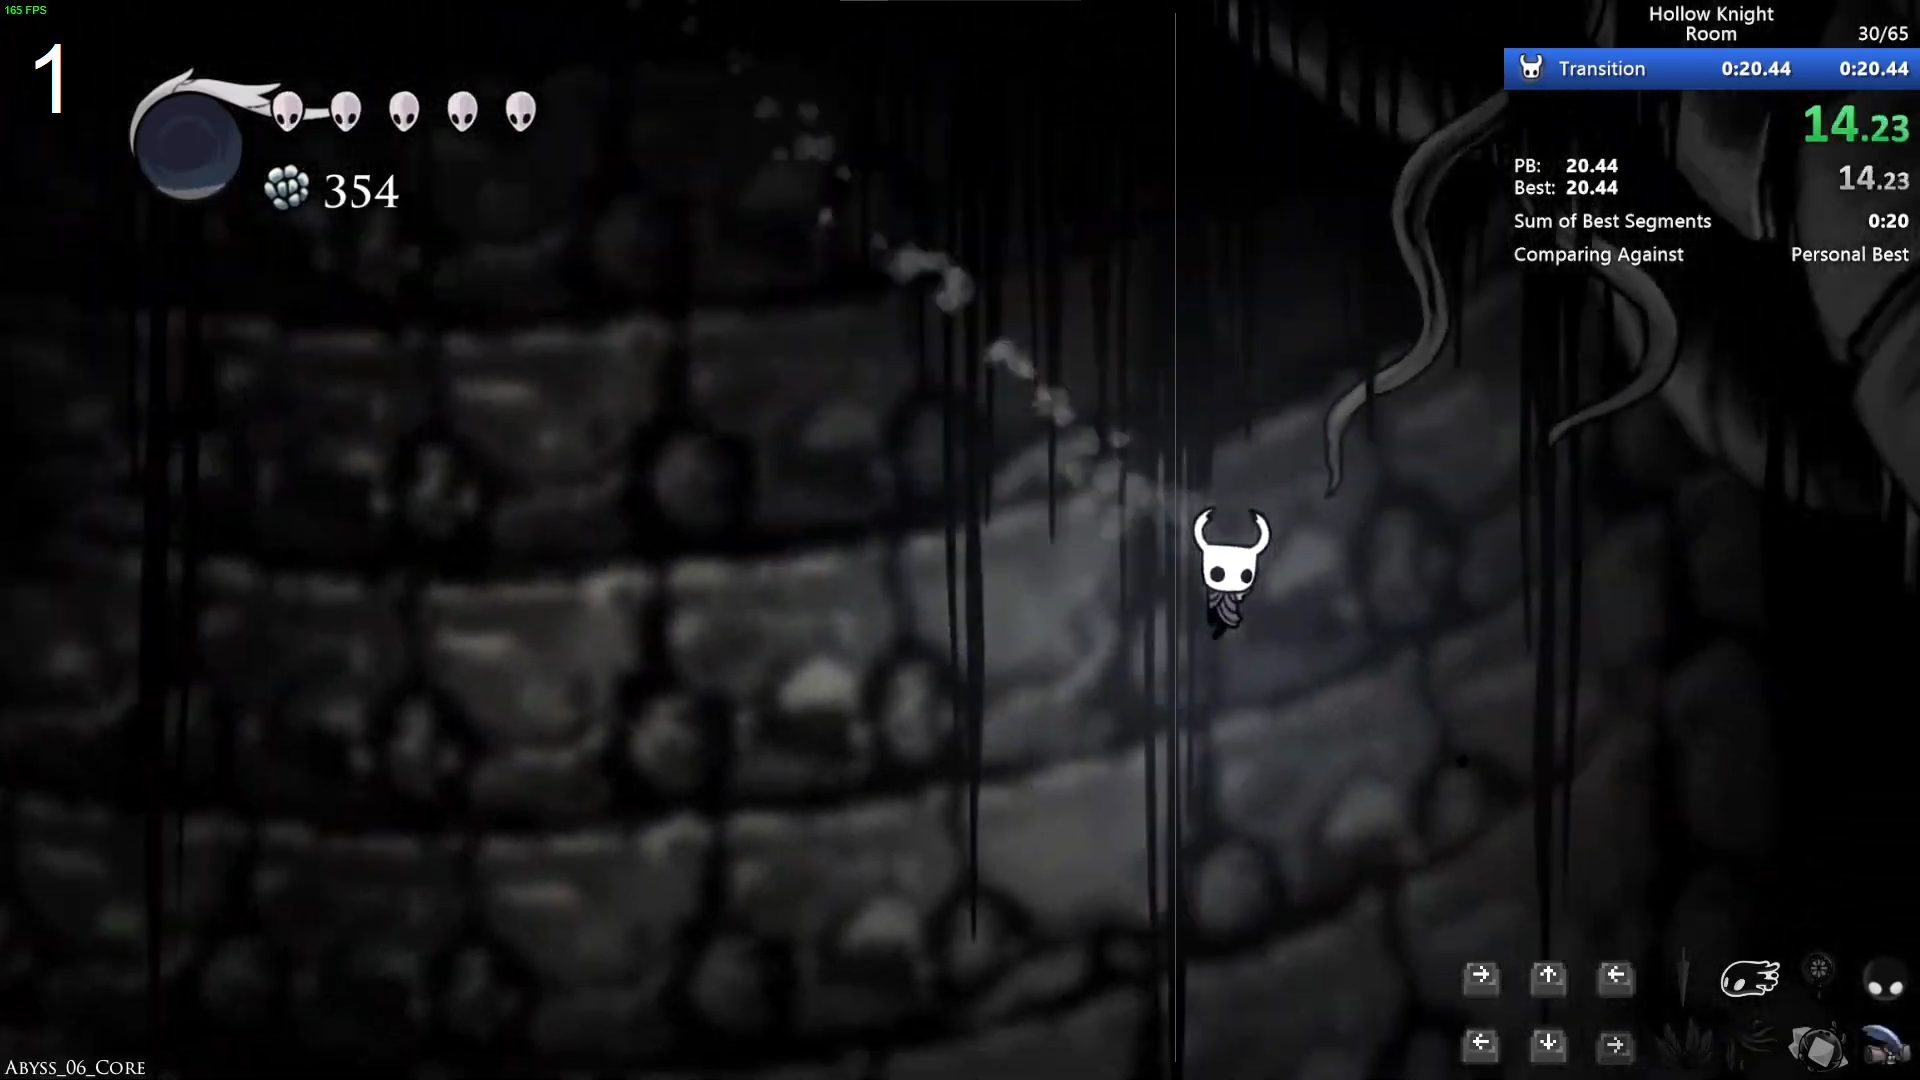
Slightly faster abyss drop (~0.4) that better utilizes the wallcling storage we get off the door.
Here are my visual cues:
- Open inventory when you get to the longest background object.
- Close inventory when you pass the ceiling of this platform.
- Open inventory below this platform. Anywhere in the green box will allow you to inventory drop all the way down.
- Close inventory for the last time once you see this spiked platform leave your screen.


- 12
 1
Slightly faster version of this drop, with the added bonus of not needing to worry about dunking in spikes at all. The amount it saves depends on how much you greed the last inventory drop of course, so in runs it probably breaks even most of the time.
Be sure to cling at the end to avoid inventory dash refresh jank.
 6
Closing the inv drop early here rather than landing saves up to 0.2, and there's a super easy visual cue for when to do it.
You just have to close your inv as soon as you've passed the window in the background on the way down.
You can hold left during the inv to start moving as soon as you regain control, and you then have a fairly lenient window to dash at the bottom, but the earlier the better.
The dashes line up perfectly to let you do a min height pre-jump out of the last dash towards the left as well.

- 🔥5
- 6
Brand aspid skip for kings brand wingsless without a damage tank for newbies like me who don't wanna go into hornet 2 with 4 masks lol
loses time over damage tank, alternatively can do damage tank with a heal afterwards but then you don't have as much soul at the start of the fight
- 15
collecting some quick soul to do firebell if you come off of basin bench saves over 0.5s overall (not my finding at all has been theorised for a while). applicable in true ending and current wr all skills route, obsoleted in the new faster all skills route
- 3
Better strat for the dmg tank fast kill on Soul Master.
Saves 0.4 since you get to skip a cast after the dmg tank.
You wanna cast right before he spawns, not too difficult to time with a little bit of practice if you have a good feel for when he starts a new dive.
Try to lean towards being late rather than early since you can just back it up with the normal strat if you're late and don't get the cast off.
This strat also allows you to do a nailcancel after the dmg tank if you missed one of the earlier hits. (Just make sure you don't nailcancel too fast because he will i-frame it)
- 5
i haven't timed this but this movement seems fast someone can back me up later. depends a lot on the position of the lightning lumafly enemy at the bottom
- 8
just cdash into the next room and do a faster strat i think this saves around .5 but it 100% does save time
- 5
Aspid damage tank skip for wingless King's Brand.
stand approximately between the two foreground stalagmites, jump when the aspid shoots the projectiles.
This works most of the time (around 80-90%), but occasionally it goes too high and shoots into the ledge instead. it can be hard to backup because it doesn't like to cooperate, but you basically wanna try to jump above and towards it in order to push it down into a better spot
- 9
- 5
Slightly better way to get the soul off of the Ambloom after firepogo than the turnaround slash if it's walking left. How much depends on how good you are at the turnaround, but I was saving around 0.1
- 9
Better movement for heading to the Stag while leaving den. Saves around 0.1-0.2 to the other variations I've seen and is very easy to execute
hwurmp knockback storage explanation
Its consistent, all you have to do is leave their orange aggro circle before they inflate fully
- you want to take a diagonal path after slashing, preferably by holding jump but falling works too
- you want to slash as far away as possible
- you want to turn as quickly as possible
It DOES NOT MATTER
- what direction you slash after the one to wake them up
- when you get close to them again
- when the slashes after the inflation happen
Please Note: im still looking further into this since it seemed to stop working as soon as i started doing il attempts, so bear with me

- 28
- 🐐4
Wiggle firebell with Shade Soul saves up to 0.6 over double reentry.
You wanna wiggle fast but not too fast, try to shade soul as close to the transition as possible so the knockback from it pushes you into the loading zone.
https://youtu.be/_EyjsxPYx5U
https://youtu.be/O-selojgMoM
https://youtu.be/bTn9Ye2B4rc?t=34 This is the fastest ghs rava skip that I could find. It saves 0.3 to the yihous strat (Which can be found in the video at 0:00). Overall its not that worth in runs unless its a reaction (If you can). Its very inconsistent and tight to pull off. Maybe it might be useful if there c-dash roomsob eventually. I went to bench strictly for timing purposes not cause I was doing ismas, I swear.
You do the setup for the yihous strat except you do 1 less wall jump before the pogo and not dash.
- 2
~0.1 slower than the damage tank inv drop but easier, 0.8 faster than no inv drop. nail slash is to give correct alignment for the inv drop so that you don't get a slope drop from one of the ledges below
- 7
 2
ye uh so apparently you can cdash high enough on the pair to get over that ledge which saves 0.3 to dashing
arena c-dash https://clips.twitch.tv/SpeedyNastyHareHoneyBadger-tYS9EEJ_hHuuQgiM Upstrike here going to the wall and hold neutral. Since upstrike prevents wall cling, it should put at a very nice position and cause you can only wall cling if you go towards the wall, hold neutral afterwards. Then tap left -> immediate c-dash at the right time. It saves 0.09 on avg against normal positioning (For me usually), and is a lot more comfier as you it prevents from wall clinging accidently.
The prejump before the drop was accidental btw, Optimally you would just dash over the platform
- 8
Consistent method for backup soul for ghs. Loses 1.42 to right elevator (regardless of ghs), but nice for a more consistent damage rotation for ghs. Only worth if you don't have 1 cast of soul going into the room.
A nice way to deal with this husk if its in this position. You'll get hit if you don't do the first slash and it goes towards you, so recommend for consistency; the second slash is just for soul (Loses 0.12). Its especially nice for all skills or rafters any% cause you have much less soul going into the room
- 8
Here's different movement for this room that I picked up from ismas route roomsob. It saves about 0.1-0.2 on avg to just dashing across normally. Always make sure to not try to pogo or hit the ghs or the freezeframes will lose about 0.1 than just jumping over. You can't get soul from the rava so be weary of that. Pogo-ing that bg object just before the ghs platform isn't needed but more comfy for getting to the platform. Background objects aren't pogo-able on 1221. This example is kinda slow, an avg you would get 8.1-8.2
- 14
The left moss knight walks while in the load and then turns into leaves when you actually drop in, so having a worse pc just gives you more variation, meaning you simply get fucked and lose multiple seconds quite often if he is facing left. Current takeaway from this discovery is just get a better pc lol !
 11
Different pattern (2 upslashes) that sometimes saves the double when you get really big jumps (ghusk jump distance is rng) and also should save a bit of time because you don't have to walk as far to aggro her the next time
- 4
Pretty sure the optimal punish for dash first pattern when doing moss knights, can pogo earlier than in clip, but just a demonstration
- 2
Doing this wiggle saves ~0.4s compared to doing the lookdown
- 6
New jump saves 0.1:
After entering laser gauntlet, land as early as possible on the 2nd flipping platform and immediately jump really high and dash. This triggers the proximity on the 2nd to last crystal earlier (green line good), which is normally the only laser you need to wait a brief moment on, which means it disappears 0.1-0.15 earlier

- 38
This transition wcs saves .2-3, depending on how late you grab the wall going in, and how early you dash.
The wallgrab loses .02-08 from my testing, depending on how late you grab.
It is the easiest transition wcs I've tried, because you have a couple frames to buffer the jump, and don't have to do any other inputs immediately.
If your jump press is early, which will likely be more often than not, when you miss it. You can easily react to the fact you didn't jump, and just do standard movement as backup. Which only loses the small amount of time to grab the wall on the way in.
- 6
Consistent strategy for the good moss knight spawn that combines a few time saving strats.
Try to hit both geo rocks on the way down.
Even if you miss one by a little, it will set up the timing for the moss knight nail hit.
You can hit both geo rocks and the moss knight with the same nail hit as it wakes up, if you're positioned correctly inbetween the geo rocks in midair.
- 6
instead of two dashes you can hold left, full jump and dash when you bonk the ceiling. Saves up to 0.8
- 12
new soul master phase 2 quick kill. doesn't require damage tanking, which is good.
- 16
Doing an upslash here lets you get a sub short hop height prejump, which saves about 0.05-0.07, and messing it up will basically just give you the normal time. Its not too bad imo.
I think a similar thing could have the potential to be applied in other areas, though its use case is quite specific.
I've tagged it 1221 because I know upslashes take longer to cap your jump on cp and idk if it would kick in soon enough. Might be that it makes it easier or impossible.
- 12
To get the alignment you need to be flush to the wall then neutral jump and dash. Saves 0.2-0.3s
- 22
cdash early control from shade cloak on 1.4+. Need to tap up+dnail as soon as the scene name changes to Menu_Title (-33.0, -2000.0) (idk cue for when you don't have mods on, just need to learn timing) then hold cdash. first found by yihou i think
- 6
Better drop for latest patch all skills. saves .8s on previous single dive strat. Not too tight of a timing, savable if you miss the small platform by winging.
- 13
Doing this forward slash pogo doesn't lose much soul and saves 0.3-0.5 over the normal strat. You don't need to greed as hard as I did, as long as you play like you would in a run its impossible to be too fast (technically possible if you are like zkad irl or smth). Very lenient
- 8
dash after elevator passes 2nd notch in the window. ~0.05 to 0.1s timesave
- 7
reverse acid skip saves 0.3sh over no cdash. if cdash is too high and ends at the end of the overhang it loses time. don't do this.
- 13
- 3
Saves 1-2s depending on if you get the forward boosts on the Hwurmp or not. If the Hwurmp is too high up it becomes much harder, and probably better to go for the upslash strat.
- 35
fastest movement to hit the lever
- 8
This should save .4 or so, subpixels apparently can line up but you risk corner correcting
https://clips.twitch.tv/AuspiciousSingleEyeballWoofer--eWjDQe3Mo49umb8
- 1
wcs off the down transition on the way out of sanctum, around 0.4 faster
- 19
adaptation of spirity's movement above for good rng out of the crawlid, if you get bad rng do what spirity does instead
- 1
- 5
- 3
Ceiling boost here for more fall speed through the platform. In order to get the boost you need to be holding right for (idk one or more?) frames after your jump bonks the ceiling, so that you move into the ceiling. Takes a lot of practice.
- 5
- 1
setup to get a really good wcs into room, also just ensures you never miss it (2 slashes when the elevator hits the bottom, not precise when you start them)
 5
do this its fast by like .3-.6 defending on execution/framegreeding
https://clips.twitch.tv/MiniatureCallousEggDoritosChip-GzT0NE9cEQsIRrtj
 1
quick kill w/o needing to follow stagger. get 1st 4 nail hits asap, wait for headbang attack. make sure 5th nail hit doesnt stagger bv out of headbang, then buffer 3x pogo ddarks, finally upswing -> pogo -> final ddark.
if you get an instant headbang attack, just do the regular kill. you wont have enough time to get the 5th nail hit and finish all 4 ddarks in time before the headbang attack finishes, causing it to stagger and be pushed out of your final ddark
if you framegreed~~ the 5th nail~~ everything super hard, can kill w/o triggering stagger (during headbang) but yeah that sucks lol
- 11
this strat gives geo more consistently than the normal one and it's only 0.4-0.7s slower so it's worth if you're low, but rng can screw you over if the geo flies to the left.
if you get geo you'll probably get 5-12
jump when the petra is on the right of the platform, not immediately
sometimes the big geos don't land on the platform so you'll have to catch them midair
- 4
a variant of shade soul shaman stone 1 cycle for uumuu. first example is with extra, second is without. important points to watch out for are keeping uumuu at the right spot after the 3rd attack (slightly off the right end of the center platform), and delaying the first shade soul a little bit to make it double more consistently. an extra sets up perfectly for the original 1 cycle setup that you see most often. can be mirrored across the center if you feel more confident with the extra setup moving right than moving left.
- 11
Movement in first qg room towards wraiths, around 0.4 faster than comsob
- 9
a setup to greed the first ddark
after the dnail do 2 normal dashes then full jump when the knight overlaps with the right eye of the last watcher, as soon as you hit the wall do a full wall jump while holding left and do 2 neutrals when you hit the ground
the visual cue to start the ddark is when the knight's feet are at the top of the watcher's horn, you can do it when they are halfway between the top of its head and the top of the horn like i did in the clip but it's very risky and doesn't save much time(probably less than 0.2s)
to see if you got it or not open the debug console and if the watcher's health is at 132 then you got it, if its at 155 then you missed the first hit
use this only if you know the timing for the dnail without any setup cause if you mess up, knowing the timing is the only backup
if you are too late and can't get the dnail without getting hit, commit to the dnail and tank the damage, the soul is more important than the health
i tested this only on 1221 but it should work on cp too
- 5
an easier setup for wcs than scruffy's and w/o having to learn any timings
stop holding jump once you're above the lantern, then when you're far enough right to pogo the soul container tap left and pogo neutral, buffer the jump and dash when you're around the height of the crest in the door(its better higher than lower), if you're too close to the door you can do a wiggle after the jump
once you hit the ground jump(don't buffer or you'll jump in the wrong direction) and immediately neutral, this should put you close enough to talk to the shaman, if you're not you're dashing in the door too low
i haven't timed it but this is probably slower than scruffy's bc they dash only once
Consistent soul collection for the baldur before greenpath on current patch. Enter the room to the left instead of the right and pogo the first tik tik (don't sideslash into a pogo or you bonk), kill the remaining tik tiks on your way up to the entrance, and hit the tik tik above the entrance once. If any gruzzers actively get in your way, you only need to hit one of them once. Loses a tiny bit of time to the normal strat, but this strat is resistant to gruzzer rng.
 9
- 8
Not mine, but I see lots of people doing slower or sketchier strats. Land by the geo rocks and slash up, right, up and jump. The moss knight will always hop backwards (the same manipulation used to get the double fireball on the first moss knight). About 1 second faster than the right-side strat.
- 20
cdash into door, 4 dashes right (until big veins here), then 4 dashes back left, single slightly delayed nail for the knockback and timing, full yump, dash, wcs (also try to dash as you land on the ground. if youre lucky it preserves the wcs (likely physics framerate jank))
.2s faster with good execution (6.04 no wcs -> 5.85 wcs)
dash is kinda hard to get. Both examples poorish execution just to show how to deal with rng
Right side:
.1 faster hahahahahahahahahahahahahahahahhahahahahahahahhahahahahahahahhahahahahahahahhahahahahahahahhahahahahahahah :maggotprime: :maggotprime: :maggotprime: :maggotprime: :maggotprime: :maggotprime: :maggotprime: :maggotprime:
- 🌀7
- 7
 4
originally found by deababy, but not as widely known as i'd like it to be. around same speed/maybe a bit faster and much much less likely to get fucked by rng (i didn't get hit by twister once in 40 minutes of testing, vali says it can happen though) AVOID GETTING CORNER CORRECTED LIKE THE PLAGUE
- 16
https://youtu.be/cqfKlp-iA_w?t=39 yes, this is not even my video here, but it's actually really cool what's happening here: you do a little jump and then you can nail the lever instantly on this room, because of how the lever hitbox looks. not sure how much it saves
- 1
.15s faster than landing on top of the platform, can setup the strat by bonking the ceiling on the jump. this is .2s slower than the walljump on the right, but no risk of hitting thorns
https://clips.twitch.tv/TriangularZanyApeTTours-AoVsZlL5wfnKl_pf
- 5
crushers cycle that doesn't require inventory drop and does the dive instead. At most 0.15-0.2 slower than the optimal inventory drop cycle you can do there, 0.6 faster than the sketchy invless cycle and about 1.5 faster than the normie cycle
- 11
Obtain transition WCS on the right. Frame perfect dash left, hold right again. It is not faster to chain this on the lumaflies at the bottom, faster to inv drop. Idk full timesave cuz i'm bad. Also hit the jelly, i'm dummy. If you miss it you won't be hit by lumafly, but you miss the cycle so you lose time
Fairly consistent setup to get a fakedive while escaping soul sanctum. Saves around 3 seconds (+ some soul) compared to going all the way down. Dash into wall, dash 3 times, then press down, left and quickcast simultaneously (maybe down-left slightly before quickcast). Works on 1.5, 1.4.3.2 it only kinda sorta sometimes works.
- 9
- 1
Go under this plat always. get hit less + faster + touch grass
jump as soon as you touch the ground, dash at the top of the first wall and immediately wall jump, then tap right to turn around, and buffer the 2nd dash (yes, off cooldown) and immediately walljump again, works every time.
 12
the final pogo isn't necessary and you can just do an upslash instead, but then you're screwed if you get a fakedive
WCS superslide entry to abyss
- 13
Dashing to the wall is an easy way to inventory slide.
It's also possible to do it without the dash but more precise so higher chance to get pushed to the spikes.
- 12
wcs setup for archives gate that works for both True Ending and All Skills. Start nails when you hear uumuu exploding. Prob works well for any% but you just stall a bit instead of using wings
 1
credits to underlein and vali
very lenient
Video assembling what is supposed to be the fastest way out of the archives. Two main interesting points:
-the cyclone drop into jump is faster than cyclone drop into dash but you must hold right to be in reach (comparison with ax's comsob : https://cdn.discordapp.com/attachments/818520522471637052/831549844698431518/unknown.png)
- the diagonal archives proposed by cerp. The strats has a little bit of variance depending on jelly rng, so you better practice it, but it's fairly consistent.
Double dash mantis pogo: https://youtu.be/HLaYY7BhzO4
Original post by Ax2u
cp uumuu 1 cycle for cp all skills https://www.youtube.com/watch?v=sStHypsLa3w
Original post by Underlein
https://youtu.be/j9ZEtm6VFtc all skills left side archives exit, not much slower and much less rng dependent (also full strats i do for before left going left side).
Original post by Spirity
Safe/beginner spire lever skip, using dash slash, which lights up the dark room (for All Skills). Initially posted/discussed here: https://discord.com/channels/283467363729408000/414293858667462656/816046673406459984
an easier way to do the uumuu 1 cycle, i believe credits to HollowMC.
its just as fast, but you need to be conscious of where you are when you shoot the fireballs on the platform or the second wont double.
Original post by Tsira
small video about how exactly the cyclone slash strat works on the THK chains
https://youtu.be/Mv3Z09CMflA
Original post by Ax2u
a different way of doing the right side of room after godcycle without getting hit
Original post by Tsira
Uumuu extra attack one cycle recovery compilation post
Pisces' tutorial:
https://www.youtube.com/watch?v=ZihoQdYQZcg
Monstah's setup run clip:
https://clips.twitch.tv/BoxyAntediluvianCamelFreakinStinkin
Ax's original strat:
https://youtu.be/1NvaIcu0o80
#bonus_underplat #Fungus3_Archive_02
Left-side All Skills Archive climb skipping the cdash along the ground by using the platforms, wings and diagonal movement instead. The final underplat is required to avoid triggering the above Lumafly on a horrible cycle
Note: There is some variance in jellyfish positions. The biggest is whether the first Ooma is high or low in its cycle. Depending on its height, you can either dash underneath+wings up to platform, or over it like in this clip, neither lose any significant time to the other.
The final Uoma may occasionally be too far right to squeeze by on the inside (similar to the cdash variant), if you have suggestions on how to handle that, I am all ears.
Saved me 0.5s to left-side c-dash with the last bg object pogo into wings at transition and the same level of execution.
Saves ~0.9s over average right-side climb with poor rng.
Saves ~0.6s compared to decent right-side climb with good rng and lumafly leftwards dboost.
Original post by Cerpintext