#strats

no room

HypoCritical 0_0

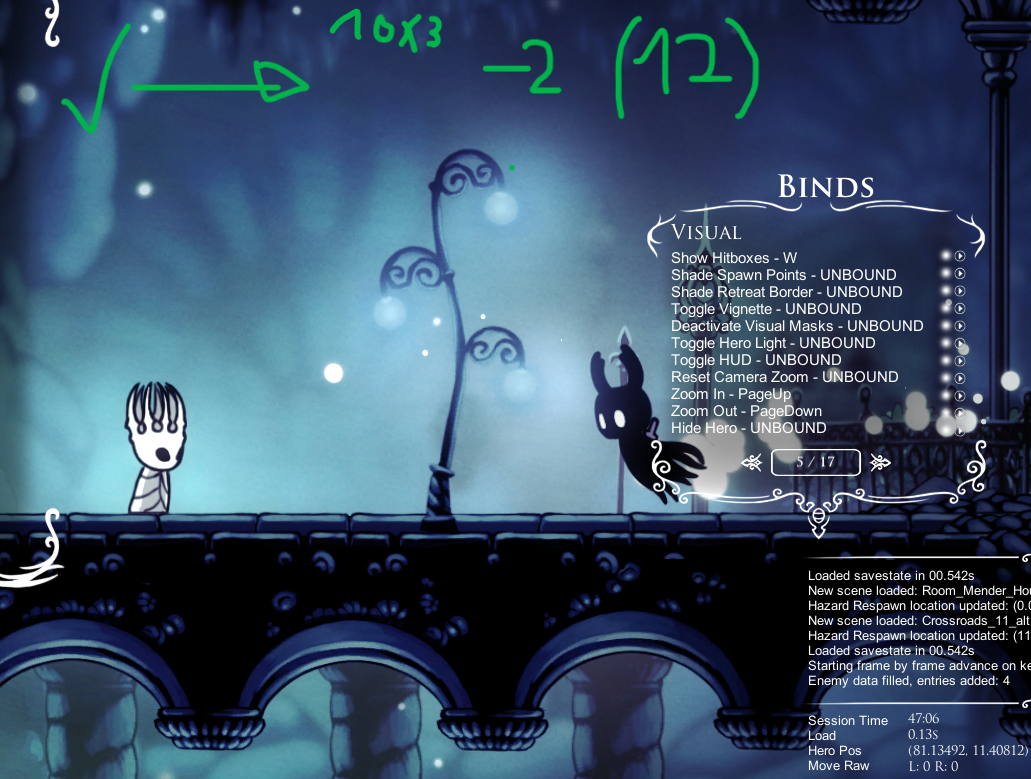
Here's the range of frames in which you can start the wiggle. Assuming left side step starting wiggle and a wiggle duration of 10 frames on all three (turning around at the 11th frame. 299 fps cap).

If you'd like to adjust these frames to middle step wiggle start, take a given shade position and add 5/6 frames to it (most of them you'd have to do yourself tho).

Have in mind too, that the window to hit ibaldur varies greatly depending on the duration of the wiggles afterward. Hope it's useful. (Additional note: Baby pale king has so much aura).

Too_early.png
1.png
2.png
3.png
4.png
5.png
6.png
too_late.png
Stratus (he/him)

right side entry tft
Turns out walking off the right ledge entering uumuu and missing the ledge below is t-ft (or subunits or whatever), so moving right/clinging to the wall before inventory dropping should be the play.

HypoCritical 0_0

This double dash saves like 0.15

https://youtu.be/jGx4Gruc_tY?t=3

Small but cool optimization suggested by @!!cerpin. If you prejump dash after the fireball to kill the enemies outside GHusk, you'll clear the ledge at the end of the tunnel. I recommend either jumping at the divot in the ground marked in red or dashing at the notch in the ceiling marked in yellow.

Some things about this:

  • All of these advantages assume you normally wait until landing to dash after the tunnel, which you typically would to make sure you get the geo
  • Buffering the next dash out of the tunnel with the normal movement will have you dash above most of the geo. Air dashing means you can't dash early, so you can buffer the next dash on landing
  • Clearing the ledge lets you dash again a little earlier and exit the room faster; looks like roughly 2f/0.04s from my timing
  • Clearing the ledge also has you land a little further right, allowing you to pick up a few extra geo on average
image.png

This is a repost of an old strat, but with a visual cue instead of the weird way I did it before. When you enter the GHusk room, jump ASAP and dash when you meet this pointy thing in the foreground (screenshot). You can buffer your first pogo out of the dash, then buffer a second if the big enemy is facing left (first clip) or slightly delay if they're facing right (second clip) to avoid only hitting the background object. In the latter case, you'll also wanna do a turnaround slash as you enter the tunnel. This will give you at least two extra hits of soul before GHusk and will ensure that the fireball after will kill the big enemy instead of having to hope it'll double.

Greeding this is not always necessary for it to work but is recommended. Less greeding will eventually cause the right case to fail (third clip). For best results on both enemy patterns, the first dash should be as low and to the left as possible while still going over the enemies.

ghusk_reference.png

If this ooma is low and blocking you during archives exit, a sideslash here seems pretty safe to knock it out of the way.

if youre above 6 soul in the tunnel, you can save future nail hits of soul by shooting a fireball backwards to instantly kill the husks before proceeding to do the normal strat for ghusk. unfortunately, there is higher chance of missing geo from the husks as you tend to kill them farther right (idea from @magneticpizza)

Vaguely known but this hasn't been brought up like at all, you can mash the top line of text when buying tolls. Not really sure if it was better before, but since we have the automasher now it's super easy and free timesave. Seems to save about 0.06 for me at King's Stag on 1221, unsure if they're all the same

Here are some alternative movements using an nta to the standard rng cling done to exit monomon. These variations basically break even but are fully consistent and a bit harder.

  1. Cling and inmediately down press to uncling, then nta at the right time. If you do the cling low enough (very easy) you'll avoid hardfalling if you miss it and also i recommend tapping down twice in case the 1st tap was too early. Finally if you stop holding right too early and dont cling at all, you can always do the standard cling as a backup.

  2. Dash on the ground once you are past this mark (Image 1) and hold neutral, slash to avoid turning around and hold right briefly, then do the nta at the right time. This variation feels easier to execute but if you miss it you'll hardfall. If you miss the second step and end up looking right you can back it up with the cling strat. If you see you've missed the nta the fastest backup is to avoid hardfalling by dashing to the right.

  3. A clip of the standard rng cling strat for reference. In this case i decided to use 2 slashes once my feet reached this cue (Image 2) to set up the timing, but you can do it with a single slash or with none.

image.png
image.png

I was messing around trying to find a relyable and fast set up for this wcs, the idea is that you want to barely avoid the corner and you want to do so with as much vertical speed as possible. For this setup you want to dash from basically anywhere on this platform by reacting to the explosion sound and then hold left. As long as you dont have lr set up (no reason why you should) you will cling to the wall briefly (i found this delay to be pretty important, so if for whatever reason you werent getting it, now you know why). Once you land on the platform you simply have to buffer a full jump and dash roughly once your head lines up with this thing on the background.

Captura_de_pantalla_2026-07-23_110806.png
  1. If you are doing lr wcs here (which you should be doing anyways) you can try to let go of left and right at the same time to end up looking right (actually i think you need to release left one frame before your release right) and this will allow you to skip the freeze frames from killing the jelly with an upslash (-0.07s). This is easier to do than it might sound, but ideally you should still be able to react to missing it and be able to back it up with the usual upslash -> buffered dash.

  2. I also took the time to record a somewhat clean clip of the backup strat in case you miss the wcs entirely bc i dont think its easily findable.

If you hold down before you pause, the cursor will move consistently from option to option. You can use this fact to consistently time unpausing your game without having to mash. I aim to press Esc as the cursor would transition into the top option. Its also a good idea to press Esc twice in case you go slightly too early the first time around.

I think if you greed it very well you can technically unpause while the cursor is still at the bottom, but its really tight.

Category Do It Now Go #This Is Known But Nobody Does It So Reposting #I Beg Everyone To Do This Please

NOTE: This is not a real strat, its just funny (at least in this context, its actually useful for TAS in the context of true nail cancels as you can fb instantly out of the pogo)

You can pogo things frame perfectly as you touch the ground to instantly cancel the pogo animation and get this weird alternative version. If you go a frame too early you'll just get a normal pogo and if you go a frame too late you'll just do a side slash.

Imo its a pretty cool way to mess around while walking without any risk of losing time. Here's a clip of me doing it successfully 3 times in a row.

Strat and I have found a more optimal save so you can hit that one-time metal lag Even Quicker! Cdash early control, hold right, and just nail!

Quick little tip about main menu mashing:
The file select screen it will not accept inputs until all of the files come in to view. This means you can save yourself some finger stress from useless inputs if you stop mashing after pressing Start Game and then wait to see the 4th file fade in before resuming mashing.

Alternative to Nebula's setup that uses buffered inputs for the timing/positioning. Some notes:

  • This loses at most 0.1s to a fully greeded version of this, but realistically will go even with other run setups like the visual cue Nebula posted
  • The dash after the drop before the upslashes needs to be neutral to lure the spore a bit to the right to avoid running into it after the mushroom pogo
  • For the mushroom pogo, I hold right out of the dash into the wall and start holding left at the same time as the pogo. Switching to holding left too late can cause you to run into the spore
  • The timing here works out so that hitting the spore as soon as you're low enough to fit under the ledge greeds the spore height well
  • I tend to go neutral after the explosion to make sure the pogo reaches

At long last, we have a solution to safely fireball LP THK's triple slash attack. This punish can avoid the extremely obnoxious frametraps he had in a bunch of scenarios. Recommend using hitboxes to get a feel for the backswing of the 2nd hit, you need to fulljump to not get hit by it

Due to his notoriously short idle timer on LP, pogoing triple slash meant that you could not safely fireball him or you risk being hit - which led to situations like multiple triple slashes being a damage tank or safely nailing him while on full soul. With this new tech, that is no longer the case. Thanks cerp for the suggestion, this is huge

Stratus (he/him)

Cool strat to save back some time if you miss one hit on the triples

Stratus (he/him)

https://www.youtube.com/watch?v=WClBOnRXO_c
Charging the crystal dash on the back of the elevator here gives a much better visual cue than charging it on the front, making it easier to get a good cdash release.
I release cdash after completely passing the third window in the background here.

cdashcue.png

Alternate strat for the final skip to the grub in Who%, it seems slightly easier since the jump for the other strat can be kind of tricky, but it's most likely up to preference. Managed to make it with a fireball going the wrong way lol

Easier and consistent way of getting through the baldur without spit rng. Optimally loses about 0.5 to a first spit but saves 0.8 to a second spit, but the slower/easier method breaks even with a second spit (losing 1.3 to a first spit)
Do 2 fireballs and nail the mini baldur once, then line up on the left side of the planks and fireball right before the mini baldur hits you. Make sure your nail hits the mini baldur and big baldur so you have enough soul for the last fireball. Nail cancelling it immediately like in the first clip is pretty tight, but if you can do it consistently then it is 100% worth to do this.

Keep in mind that you can't consistently do soul catcher early control with this strat, which means unless you do the fast version, it is most likely not worth it (assuming you go for the early control every time)

Spirity

using 112 rotation for phase 2 is a good safety strat if you really need to avoid taking hits here, if you get fake dives in any of the first 3 dives your kill is pretty much on par with the riskier wall strat. timing on the jump is important to get the shade souls off regardless of whether he fake dives or not in some of these scenarios

Benching before left atrium and quitting out after the lever saves about 0.5 on 1221. To accommodate for the missing soul, it requires 4 hits to be replaced - 2 in the last right atrium room, and 2 additional hits in balcony 2. I've supplied videos with every movement change and the optimal soul routing (in order)
This has been known to be faster on lp and Chinese runners have been doing it for a while, but was never fully timed/had legitimate soul routing on 1221 until now

Also, since I'm pretty sure there was never a legitimate strats post for this, it is 100% optimal on lp as well (and where this originates), but I am not sure the soul routing. I think you just dreamnail the 2 guys after the quitout before shrogo.

In case you miss epogo while being full soul, this is a pretty good back up. I pretty much jump slightly after hearing the sporg fire and then for the big jump you can slash at the same time/slightly after pressing jump.

If you have 2 soul after failing epogo, you can full jump right away after reaching the platform, upslash the sporg and drop off the platform asap, then continue as shown here. Its a bit tighter ime, but def possible

Good replacement for the cue on when to jump for pacifist pogo on lp since the background objects are different than 1221

image.png

Getting leftright at the top like this saves .1 maybe a little more optimally if you dont have cyclone for the room outside of king's station heading into edge (photoshop room). idk what categories use this but theres definitely something that does lol. LPTE maybe?

double lookup alternative if u dont want to use virtual controller. after the 5th slash delay the dash right a little

frying whales

Double heal LP Uumuu setup when entering with full soul

well that didn't take long, something more cursed than before. saves less than .1 fortunately

Going neutral to fit in 1 more dash for this last part and then doing them normally is same speed as other strats (maybe very slightly slower), but this is significantly easier than anything else I've tried. extra dash saves .25 to just doing the entire thing normally.
unsure if known but never saw this when looking up dreamplats stuff so posting it just in case

you can walk to the edge of the tram and back to setup the interact timing, better than anything else since the left inputs buffered, if you interact late with the tram you can just turn earlier (careful every 2 frames late you interact is only 1 frame earlier you turn)

since the setups a bit wonky its not quite as much time saved as for other things but still worth doing imo

alternative left climb to the double pogo strat, it's pretty much same speed (although my fastest was like a frame faster with this). easier to get a fast time with imo

Stratus (he/him)

Alternate rotation for Uumuu 1 cycle involving a damage tank. Seems to save a bit over the other rotation, but hard to tell how much because of Uumuu move rng.

The visual cue I use for when to walljump/dash off the wall is when the part of the blobs marked in red are at the wall.

For extra backup, wait until Uumuu starts moving then dash wings back onto the wall, then do the setup like normal.

image.png
magnolia๐Ÿ’™

fullgame viability for thornstand in balcony 4. You if you cancel cdash optimally, you can grab the hazard respawn so missing the thornstand is not so devastating.

note that this hazard respawn grabbing can be applied to the normal strat as well, it is just more relevant here because the normal strat is not very dangerous

Here is the cue for where I press the cdash cancel and hold right, along with the blue hazard respawn hitbox.

5732c80f5a5fa587f1cb89f718029a73.jpg
88797697a8d75cd2cadc9cb4c727a07a.png
magnolia๐Ÿ’™

while birthplace is opening, do a left-right WCS above to store the speed, then enter the room holding analogue left. After the inv, you can just keep holding analogue left and all you have to do is just press right. Make sure you don't release left right before the bottom, your dash will always go to the right even with both directions held after the slide.

Saves 0.00-0.14, easier to greed for fullgame

credit to nebula for idea
https://youtu.be/TyrAy0LJIvE

Stratus (he/him)

Alternate transition wcs setup that lets you cling to left wall instead of right. Seems to save around 0.2 over the normal setup, and much easier to execute.

To get the storage, cling to the left wall before the transition and press down to uncling.

Stratus (he/him)

Alternative reaction to the early open by the devout. Saves a damage tank, making it better for runs.

@magnolia๐Ÿ’™ since youd kill me if you didnt get pinged
@Nebula cuz we talked earlier
ping ur friends that you want to get a 31, and then we can strat hide from the rest :palehmm:
I have solved instabuffer for dreamers/thk

it is tied to completing a heal, anytime you complete a heal the game will no longer instant buffer ur focus input until you savequit

HOWEVER if you start a heal, and cancel it, the game will RETURN to the bufferable state, and you can cancel it without losing soul (this is why if you heal when you have more than one cast to less then full hp, the next heal will briefly start and you can instabuffer still)

in order to channel the focus you will need enough soul to heal, so if you don't have soul you can't fix the state, you can channel this focus by itself or after a heal (assuming you don't have 5 hp at the time of the canceled heal)

for lurien, this means if you have a cast before you start watcher knights you should start and cancel a heal (let go of focus as soon as the knight starts bending to heal) and you can instant focus lurien EVEN if you healed before this
the timing for this is to press focus slightly after you dash (specifically 2 frames, but remember buffer windows so aim later than this)
if ur healing at watchers and not healing to 5, you can using the extra soul to continue the heal animation and cancel that instead

for monomon, f you heal in uumuu you should start a heal and cancel it at some point in the fight (either at the start or waiting for one of the openings)
if ur not healing to full you can just cancel the last heal if you have enough soul at once

for thk, if you healed at some point and havent quit out, you can set this up during self stab, as long as you've hit them in a multiple of 5 you've gotten all the damage that matters anyway (you can't do this after killing them because you will probably not have the soul to channel a heal)
if you press focus 1 frame before a nail (remember that ur inputs can be buffered so probably aim at the same time as or slightly later) you can nail again without dps loss (3 frame window), losing a bit of dps is fine since worst case you're losing 1 damage and also theres a window where you have to wait or youd wake up thk late
if you're not healing to 5, you can heal during self stab and continue the heal animation and cancel it instead

for herrah theres probably no point where you've healed so it doesnt matter, if you are healing in herrah just dont heal to 5 let the heal run slightly long to cancel its animation if you want (each frame you run long is a frame you lose, so its not always worth but you save 3 frames in herrah so if you let it run 1 frame long its 2 frames saved)

there is a 0.2s window where the soul starts draining and you can let go of the button and get the soul refunded

instant buffer can also cancel the nail animation itself so its 4 frames faster in dreamers over a perfectly timed buffer, no guaranteed timesave in THK but buffering is always better than not

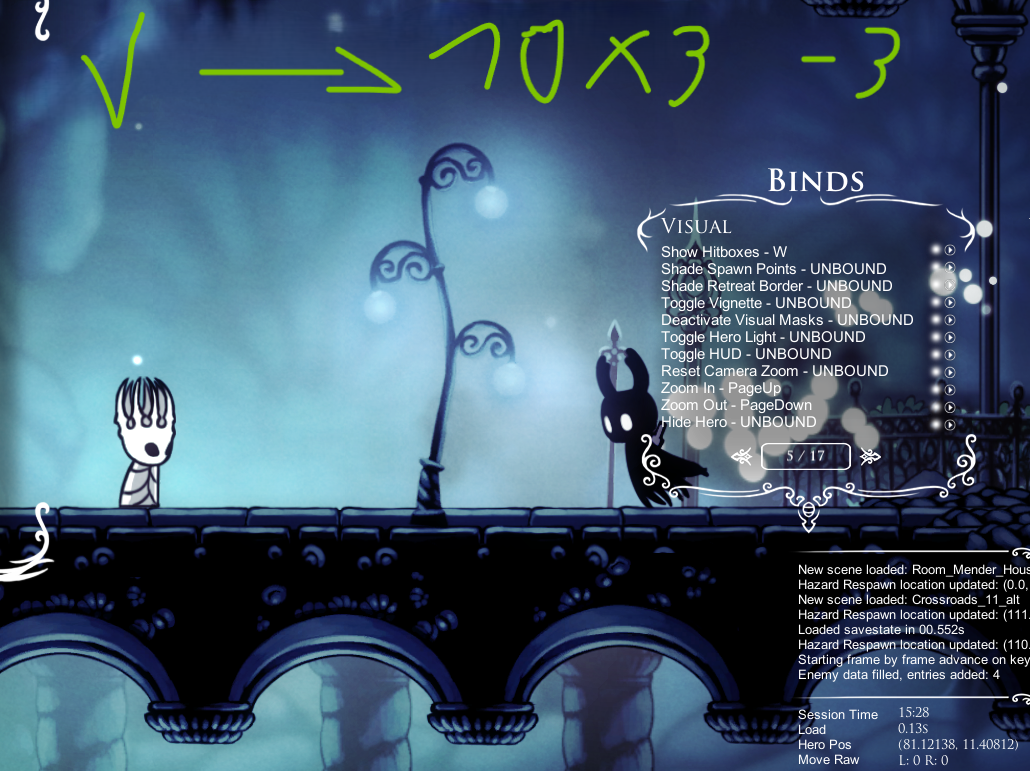
This black bar/(door frame?) coming on screen is a rly good reference point to cancel the cdash, it's pretty much as soon as you see it (although if ur reaction time is insane it might be a little early). picture is where it is on screen on the frame i cancelled

image.png
JackmanMarcus ๐Ÿ’™

If you buffer a pogo out of a dash here you perfectly land on this little platform, allowing you to pick up any stray geo that might've fallen onto it during the squit arena. It's the same speed as the other ways I've seen people do movement here.
You need to be at least as far left as the image for it to work, so just don't greed the dash as hard as possible and you won't be early.

visual_cue.png
JackmanMarcus ๐Ÿ’™

Slightly better version of this for All Skills, that makes use of left-right wcs.
If you're already doing left-right when you hit an actual wall it doesn't reset your fall speed at all, so you get to be as far right as possible and get rid of the wcs, so you can dash right as soon as you clear the bottom of the wall.
you just need to start holding analog left before you touch the wall.

SiddFlippy

basically applicable in every category with quitouts
i am sorry in advance for this information i'm about to share
you can make your quitouts super consistent by placing your mouse in a very specific place so that you can select both buttons required for quit out without moving your mouse at all. from there, i mapped my left click to jump and after opening menu to quitout, i mash click + either enter on kb or A on controller. i've been able to consistently save ~0.5 on average (though i was terrible at quitouts before). attaching an image for visual set up (put mouse inside where yellow circle is) and also a clip of my claw comsob to see in action. you can also do this set up for subsequent quitouts but after you quitout will need to readjust your mouse. its a bit tighter of a time window to set up mid quitout but its pretty free when you're loading a savefile for the first time. (tldr first quitouts are free and subsequent ones are harder to set up but are run viable)

https://www.youtube.com/watch?v=L_nn05uhzgY&ab_channel=siddflippy

20240525002118_1.jpg

More consistent and less annoying way to do Fog Canyon acid skip with grub save. May apply to more categories idk

Forward slashing the aspid mother then cdashing on the wall puts her in a better spot later than up slashing does (on average). Loses .1 or less but makes it easier on the return.

1st/2nd clip shows new strat, 3rd/4th show upslash. Even with slower movement she is more likely to be in a comfortable spot for the acid skip.

Fast way to do elegy city arena (especially wave 2), slashing the flying guy right. 0 soul entering
equipment is only spell twister and ddark, kinda unique so unsure if known. if any other categories only get that then it applies there too

Stratus (he/him)

Since the last walljump we do here is to the right (in left atrium 2 before the sawblade cycle), we can input a cdash here in order to walljump in the direction we're going. Saves around 0.1-0.2 over the non chain movement if done well.

This may have applications to other gate wallcling storages, as long as you have cdash when you do it.

For gpz% (first 2 clips) and forgotten corners (second 2) saves several seconds if you have wings, cdash makes it easier (fireball skip version is kind of tight imo). camera is a bit weird but fixes itself after a couple seconds as you see. jumping straight up to the platform (3rd clip) is possible but it's easier to just dash left if you aren't confident and that still saves time

(dropping off the platform at start like i did isnt part of the strat, its just to fix my savestate so that the camera moves)

SiddFlippy

1.4.3.2 exclusive heal strat for 1st cycle uumuu. can do an inventory hard fall cancel and heal out of the inventory and get 2 dreamnails a tthe top. after first cycle is pretty much same as normal. shoutout to vex for labbing this a while ago :beeDumper:

magneticpizza

-------- Phases ------

THK has 1000 HP, or 1250 HP (he heals TO, not adding 250 after entering phase 4 (last))

phase 1: 1000-751 HP
phase 2 (when he is able to do the first scream): 750-401 HP
phase 3 (where he is able to do 2nd scream/self stab): 400 until death HP (doesn't end until you hit him AFTER he has reached 0 or less HP, the hit that ends this phase does damage to the phase 4 health pool (ex. if you end phase with a nail slash he will be at 245hp in phase 4))
phase 4: 250-0

------- Evade Antic --------- (backdash/parry)

before THK's idle animation (explained below), THK will roll an RNG check depending on the phase he is in
(phase 1: 0%, 2: 60%, 3: 15%, 4: 0%)
if this check succeeds, he will either parry or backdash (50/50) after checking whether or not to turn around ( the only thing that can delay the parry/backdash is if he is turning around. )
the evade rng check is also retriggered by the end of a parry, as that goes to the idle, (this could be the cause of parrys chaining into themselves). this isnt the only way for thk to parry, or backdash

------- THK idle animation -------

This is the animation/state after he wakes up from a stagger, after he finishes a move, etc.

exception 1: the end of a backdash does not enter the idle animation, it just immediately goes to another attack (after this attack ends it will go to idle.) .
exception 2: an attack immediately after a teleport also does not usually enter the idle animation, it just immediately goes to another attack (after this attack ends it will go to idle.) not entirely sure about this one

The amount of time he spends in the idle state is rng and phase dependent:

Phase 1: .75s to 1s
Phase 2: .25s to .5s
Phase 3: 0s to .25s
Phase 4: 1 second

magneticpizza

the cue is when the seer avatar is about halfway into its 8th flap downwards (count every down stroke)
when this happens press nail jump and right on the same frame, then buffer nailslash, and buffer dash out of the 2nd slash

slyzian thought of idea to do 2 slashes instead of 8
picture is when to go in the down flap

image.png
PsyKlone

Extension of Archives WCS that saves about 0.7. To get the dashes to the right, go neutral and slash, then immediately press right and dash. On the very rare occasion that the small jelly is in your way for the first dash to the right, you can switch to the normal movement and go even. For all skills, cut out the last wcs dash so you can hold your nail and do the cyclone wcs.

Stratus (he/him)

Since you can still absorb dreamers while in the air, you can do so to avoid using soul if you have a cast. Also pretty swag.

Stratus (he/him)

Tired of losing time to that pesky one-time metal lag frame? No longer! Whenever you open the game, open this save and go hit the spikes. No more timeloss!!

JackmanMarcus ๐Ÿ’™

Alternate opener on the first knight for shade soul WKs. This and pogocancels are almost the same time on avg (accounting for the difference in soul after roll this is a tiny bit faster)
I prefer this one, because it's easier (especially in AS where you have to avoid diving during pogocancels), it doesn't risk getting you shade souls i-framed, and it makes the kill times closer on avg, no matter the rng pattern (Roll is less good, but bounce is less bad)
8.6s for nail attack
8.6s for roll, leaves you with 1 soul
9.6s for bounce

JackmanMarcus ๐Ÿ’™

These should be the best dmg rotations for pogocancel opener on the first knight.
8.7s for nail attack, saves 0.8 at the cost of one soul compared to dashing back over like Strat does in current TE WR
8.8s for roll, leaves you with 3 soul
10.2s for bounce

Small improvement to the quirrel dialogue dash setup at monomon: if you slide off the lip of the tank while neutral you will end up still facing to the right. This lets you take your time so there is pretty much 0 risk of messing the trick up with a bad dash.

JackmanMarcus ๐Ÿ’™

Strats for Soul Master p2 with a 2 soul start.
The first is a dmg tank that gets you a 15.0s kill, but is very easy to mess up since the timing is tight and he can easily i-frame your 2nd shade soul if you're not careful.
The second is a much easier dmgless version that gets you a 15.5s kill

JackmanMarcus ๐Ÿ’™

Several different strats for Soul Master p2 with a 1 soul start. The first is 15.8s for guaranteed dmgless.
The 2nd and 3rd are rng to get hit, 15.5s if you don't, 15.8s if you do.
The last two show good backups for fakedives. 15.9s if you get one for the first attack, 15.0s if you get one for the 2nd

JackmanMarcus ๐Ÿ’™

better dmgless Soul Master p2 strat for a 0 soul start, 16.3 second kill. This is the same speed as the dmg tank version that gets a shade soul off before getting hit

Slightly different setup for the aspid skip to Hornet 2. This makes it impossible for the aspid to shoot into the ceiling, and has felt overall more consistent for me.
It also allows you to back it up most of the time, due to the movement leaving the aspid directly under you.
Examples below of the normal look plus the backup 2 different times.

JackmanMarcus ๐Ÿ’™

Uumuu dmg cycle that makes use of dash slash storage, saves around 0.2-0.3.
Make sure you jump back and wait until Uumuus left side is aligned with the edge of the wall to do the last two shade souls, like in the clip

doing a normal dash for gate wcs lines up the dashes for the rest of the room better

Spirity

wings prejump :gorbbrain: here you can do every input as soon as possible from transition with a very small double jump. good luck not instawinging this cheaters ๐Ÿ˜˜

just stop guessing when to jump at the spike, there's no reason to allow human error like jumping too early, here's a 99% consistent setup where all inputs are buffered except the first slash, which you just do when you're in the final spot that you're going to jump from. so if you end up on the lower platform after killing the first aspid buffer 2 full jumps and do 2 slashes then jump at the spike. if you end up on the higher platform it's 1 full jump and 4 slashes before jumping and if youre on the ground it's 3 full jumps (not necessairly full if you want to greed it more)

.16 faster than normal dash

badass strat to save situations when uumuu's too high

PsyKlone

LK Dash Attack Storage
If you stagger Lost Kin during its aerial dash attack animation, it skips the landing phase and still thinks it's supposed to dash. Even if it pulls an empty hop or down stab, air dash always overrides them. You can manipulate this to chain air dash triples multiple times with the right timing. (s/o to Magnetic Pizza for helping me figure this out lol)

In order for the dash attack to be stored, Lost Kin needs to be staggered during the "Dash Attack" animation (green circle). If it enters the "In Air" animation (red circle), it loses the storage. Getting the third fireball tick to hit lost kin before the animation ends is a bit tricky, so watch the video on the left and practice the timing. You want to shoot the fireball at about the same time as LK starts the dash - just be careful because if you shoot too early you'll single hit. Even when you're not in the stagger lock, be on the lookout for the air dash attack and see if you can stagger during the dash animation - the dash anticipate animation lasts a long time so make sure it's not staggered until the dash starts to get the storage.

The video on the right shows an alternate stagger rotation that could be viable for LP. The extra nail hit will get the stagger count up to 7 after the triple, and on 1.2.2.1 it will still get tripled fairly consistently. However, it can be awkward/rng to triple the air dash with the extra stagger hit, so I would recommend only trying that on later patches.

When the dash attack is stored, Lost Kin can do a grounded dash 28% of the time which is worse than an aerial dash because you can't keep the storage (at least not consistently) but you can still triple it if you fireball early enough.

Screenshot_143.png
Screenshot_144.png

better essence setup, doing 5 nail means you have to be an extra 0.2 slower for fun than 4 nail wielderless which is easy to mess up, jumps have bigger buffer window, you do risk pressing the dnail button slightly too early and it just not coming out but this is still probably better + faster +easier most of the time for most people
2 full jumps when it pops, dnail when you land

partofthecreed

Pacifist Dashless Mantis Pogo
You can go over the big mantis and hit the lever without taking damage, irrespective of if it backs up or not, and do dashless mantis pogo afterwards. Can save 0.4 on its own over normal dashless mantis pogo, and adding in the timesave of ambloom upslash and no soul wow room brings it up to about 0.7. More details, notes, and things I noticed in the thread.

https://youtu.be/S4nbirwYCVg

You may have seen the response to this attack where you fireball THK at the top of its bounce, then slash -> dash under to maintain positioning for another loop. Turns out you can also dash the opposite direction and it works just fine. This is especially useful as a repositioning tool when THK is in the corner (as demonstrated here) since the sloped ceilings would otherwise throw off the positioning for this damage rotation.

Spirity

collecting some quick soul to do firebell if you come off of basin bench saves over 0.5s overall (not my finding at all has been theorised for a while). applicable in true ending and current wr all skills route, obsoleted in the new faster all skills route

saturniid

For the grounded mantis, instead of doing fb>dash>nail, do dash>nail>fb, this lets us do a nail cancel and use one less soul, so we can skip 1 soul in wow room. This should not mess with mantis pogo, the only issue this can have is if the grounded mantis backs up, in which case you have to react by forward slashing instead of up, which loses some time but should still save time overall. Videos of both instances attatched.

lower cdash saves ~0.4 over normal strat and imo is easier as well. I haven't timed without dashmaster so idk if it's good for all skills and 106. Note that you can't cling at the lowest point (otherwise you'll crash into platforms), you need a bit of extra height

PsyKlone

Faster, more consistent start setup for TE Radiance. You still wanna start with full soul but only shoot 2 fireballs at the start, then dash in and buffer 6 nail hits like this:
Pogo --> Side slash --> Wings side slash --> Side slash --> Pogo --> Pogo
This puts you at a good height, refreshes your dash, and leaves you with full soul so you can react to any pattern she does and get double hits.
Getting the nail hits in time and dodging certain attacks can be pretty tricky. If you feel like you were a bit slow, prioritize dodging the attack over getting 6 hits; the 5th hit is also a pogo so it's better to lose the hit of soul then get hit right at the beginning of the fight for double damage.
If she starts with the triple laser, it's important to react to the laser placement so you don't dash directly into one, then just make sure to only fireball when you have an opening and save your wings to stall in the air if needed. If she starts with the sword burst/aoe, you basically wanna do the same thing but it's harder because the attack is faster. In general, it's better to stay in the middle verticaly when going for slashes so you have the option to both dash left and right, sometimes this also makes the sword burst miss completely.
If she does a passive attack and you dash in the same direction she teleports, just dash the other way and spam shade souls, you still have time to get at least 2 double hits, but usually you can still get 3. Of course remember to delay subsequent fireballs ever so slightly so they're not i-framed.

Spirity

new rta nail turnaround, make sure to jump before slashing to not lose wcs, and this also works better with a smaller jump compared to no turnaround slash

Spirity

so something to understand about dreamers:
first of all, we all know that dreamers take 10 slashes to kill; with that in mind, count to 9 hits, and between the 9th and the 10th slash, press and hold focus.

on my button overlay, b/circle is focus, and you can see i press it before my final slash on herrah. this allows you to start the focus animation a bit earlier, pretty much immediately after the final slash, with minimal delay

works on every dreamer, saves around 0.25 for each

PsyKlone

Update: It's faster and safer to do a nailcancel at the beginning so you don't have to shoot the extra fireball at the end. You'll have to delay the second fireball less but it's consistent once you get a feel for it, and you don't have to worry about dodging the boomerang if you get the good RNG. If he doesn't backup, do the same damage rotation from before without the last fireball. Once again you only need 6 soul entering so you can still do firebell.

i think it's too hard for people, but if you really want to skip the screaming not by dive

not see it in runs so post in case. made with tas but fisrt SS should be available

You can fit in an extra nail cancel during Uumuu damage with a 2-1-2-1 rotation. Because you move a vs earlier into the damage rotation, I found it easier to start with 2 upslashes to offset the extra knockback the earlier vs adds. Dunking or damage tanking before damage also makes it easier.
2-1-2-1 is also nice because you can pivot to 2-1-3 at the last second if you don't think you can fit the nail cancel in without knocking Uumuu away early.

Consistent quick kill for 107 (requires pure nail so probably not applicable to 112), saves like 0.2 over optimal old fast strats but much more on average. line up with the doorway at max horizontal range of ur shriek so that he doesn't step back.

Going from right wall is much more lenient and significantly easier (imo) than any other setup, loses ~1s to left wall and basically breaks even with center double shrogo, so you can decide if that's worth for being easier/more consistent, regardless thereโ€™s 0 reason to do center double pogo now

reposting here, doing a fast nail cancel allows you to chain shrieks with no overlap, nail is iframed, id use an upslash to avoid recoil though
https://cdn.discordapp.com/attachments/822611746086715423/1076882128622600313/2023-02-19_08-02-48_-_Trim.mp4

sawayoshi

A much easier method to catch the fastest cycle in WP Balcony 3 (aka Top Lever). The current most common strat is to dash to the wall under the breakable arch; pogoing the sawblade instead makes this cycle significantly more lenient.
Confirmed to work on 1.2.2.1 and 1.4.3.2; assumed to work on 1.5.

Archives wcs that saves around 0.5s over the normal wcs strat. This works by unclinging from the wall during wcs, doing an upslash to prevent a wallcling, and quickly dashing to the right.
For the wcs through the lumaflies, make sure to wall jump out of the wcs between the second and third lumaflies. Getting hit by the third lumafly still breaks even with the standard strat.
https://www.youtube.com/watch?v=XCo6QDnGrLc

JackmanMarcus ๐Ÿ’™

Better strat for the dmg tank fast kill on Soul Master.
Saves 0.4 since you get to skip a cast after the dmg tank.
You wanna cast right before he spawns, not too difficult to time with a little bit of practice if you have a good feel for when he starts a new dive.
Try to lean towards being late rather than early since you can just back it up with the normal strat if you're late and don't get the cast off.
This strat also allows you to do a nailcancel after the dmg tank if you missed one of the earlier hits. (Just make sure you don't nailcancel too fast because he will i-frame it)

PsyKlone

Shade soul double setup for the white palace kingsmould with a reliable backup for bad rng. Stop cdash around the rightmost poll, dash and buffer 3 nail hits, jump and delay a fireball. You want to stay in the second to left orange box (just to the left of the door) where it can either dash back or swing. If it dashes back, the shade soul should double consistency with good execution and two more single hits will kill. If it swings, get a nail hit and dash --> two nailcancels --> shade soul as shown in the video.
This saves 2-3 seconds but you need 6 soul going in, so it's only worth it if you have dream wielder, in which case you would dream nail the devout in beast den and firebell as normal.

ai_boxes.png
Spirity

i haven't timed this but this movement seems fast someone can back me up later. depends a lot on the position of the lightning lumafly enemy at the bottom

Saw magma do this neat lil pogo. Can be helpful if you suspect you're too close to the moss charger.
https://clips.twitch.tv/HyperEphemeralMooseTwitchRaid-cX2wSHL1WlPfGlmx

left side climb demo
poor execution but it should give the right idea, only thing is in the spot where i sharp shadow in the middle you do 2 dashes if you dont have it

the ending is slower over a perfect greed, but faster on average if ur trying not to hit the spikes

This mantis pogo doesn't kill the mantis warrior and doesn't use a fireball meaning it saves time in that department and its faster than the normal mantis pogo by about 0.5-0.6 if done correctly. RNG dependent for the mantis warrior on whether he jumps back or not and that's what the time save is. I didn't make this mantis pogo up I believe the original is from Blair5414. Also ignore my hp mod was too lazy to take it off. Works on all patches to my knowledge.

JKmaginary

https://clips.twitch.tv/KawaiiDirtyMoonRaccAttack-kj1BpN8mGVKCLogY Soul routing for full soul hornet on lp, roughly saves about 1-2s ish cause it makes text skip worth.

The moss knight can hit you when you double pogo (Cause sometimes if you're too low the pogo height is negated) so the timing needs to be practiced a bit. If the moss knight swings at you to the right wait a little bit before jumping back down, cause it will hit you.

The vf that you hit for the first cast can be hit while dropping down for the first time, but either way neither of them lose time cause you need to pick up the geo anyway, and the strat is to jump.

Mainly picked this up from the tas but the vf hit was labbed by me

A 4 hits setup for the downdash pattern.
At the start of the fight, walk up to middle platform, swing 7 times and then full jump with an upslash.
For the consecutive cycles walk up the middle and then full jump. Walking up the middle won't mess damage rotation for any other attack, so doesn't really have any downsides: https://clips.twitch.tv/PolishedCrepuscularOstrichSuperVinlin-cxv3M8Hksrsac7R2

JKmaginary

1fb right side rafters:
Not really the most useful strat for runs since its pretty rng for the vf to get in the right place to do this, only really try to do it if you are doing roomsob/comsob etc. Its about 0.15 faster than double fb-ing and 0.3 faster than the regular strat.

As for soul routing, it makes it so you can go into the room with no soul which is nice, it also allows you to do this strat: https://discord.com/channels/772964112908156938/822611544231772170/1042428277987475487 without losing time to soul routing. This would save an extra 0.1 since you don't have to pogo past them and can just dash through so overall it would be like 0.25-0.4 of timesave which is not at all worth for how rng it is.

Prolly needs to be labbed a bit more for 1221/high fps, but highly doubt it would be too much different.

easy alternative sharp shadow cycle thats same speed as 2nd fastest (only really easy on 1.5, otherwise its a bit bad) [forgot about the other one that's a thing]

DoffyMM

Consistent set up for White Palace stallball
so it works bc you bonk your head on the ceiling i hit in the start of the clip which position you at the right height to dash-wings and then shoot your fb
things that can happen : you don't bonk your head on the right spot and that mess up all the setup (back up-able)
; the setup doesn't position you in the x axis so you can be too far or too close of the slope
; you don't bonk your head, if that happens you're going to be too high so you have to back it up like normally

JackmanMarcus ๐Ÿ’™

Always upslash or downslash before touching the wall when going down through a vertical transition if you're doing transition wcs.
It still gives you the correct flags, ("Wall Touching" and "Wall Left" in the vid) while stopping you from getting slowed down by clinging to the wall
Saves around 0.1 on avg

Krythom

A different continuation of the deepnest wrong warp based on Staxis' idea to use the load warp as a more consistent alternative to the rng loadzone involved in the original version of the ww. By chaining the load warp into a second one you can then do a quick oob to merge with the normal dupe route and save ~6s. However since this strat means skipping the room where you would normally collect soul it means you enter den with 1hp and only 2 casts of soul so you lose time to needing to wait for the devout to open twice and to extra soul collection as you exit den. Still comes out to ~2s saved in total over the original WW strat while being less risky (less chance of rng screwing you and less consequences for bad rng).

There is unfortunately still rng as the trick requires performing the wrong warp facing left which means you can land directly on a spider as the room loads. If that happens there is a backup but you can no longer perform the chained load warp and you'll have to heal before continuing the dupe meaning a large chunk of timeloss (though still slightly faster than not doing the ww at all)

partofthecreed

Dashless mantis pogo. Seems to be pretty consistent if much harder to pull off than double dash. One thing to note is that you dash as soon as you hit the lever, which I've heard loses you geo, but from my experience you can still get all the geo, just less on average. Main thing is that if the mantis on the left attacks too early it seems to mess it up but you may still be able to time your pogo better to avoid that. Seems to save 0.1-0.3

NerfIrelia73

An easier way to get passed the husks for the new GHusk strat. Good way to avoid getting owned by the husk hitboxes like 90% of the time and you don't bonk into the wall as often as the other strat. From my timing it might also be a little faster, but timing was kinda weird so not 100% sure. Speed is at least close to the quick pogo dash.

calligraphiti

transdash movement out of cursed vfly pogo. not always possible you have to be pretty close to the platform.

Low soul strat for GHusk. Collects more geo on average, loses like 0.2s-0.5s to the normal strat (timing is v hard bc of GHusk rng), though situationally it should save time depending on how you normally collect that soul. The point where you dash after the big jump is kinda specific, since it's mostly what determines whether the pogo dash will make it into the lil tube thing
https://youtu.be/kGir7C5M5bQ

Unovercharmed quick kill for TMG for 107 with shaman+grimmchild - same speed as the overcharmed kill. Requires full soul and 2nd extra vessel to be consistent (you can rng get it without the 2nd vessel though). Make sure none of your shrieks get cut off by damage tanking before shrieking or something

calligraphiti

new strategy for petra arena using left side. I do not believe that this is the fastest strategy but I do believe that it is a step in the right direction for LP. we have to start ignoring what is considered fast on 1221. Left side petra arena seems logical if you need to kill a stray petra.

Dash onto the left trap platform as soon as possible to activate it extremely early. Jump off of it as late as possible and fire two fireballs to the right. Ideally you get 3 hits on the first petra and 2 on the second petra. Alternatively, you might get only 2 hits on the first petra. If you activated the platform early and jumped late you will be just in time to catch the platform.

Saves almost a second with really good execution and rng

Soul reroute + strat change for trap bench. Left enemy in the first room saves what looks to be about .5 to old strats, right enemy loses about .2 to left enemy. Be far away from the petra when you slash + jump up to it to increase chances of double. May be better to get the extra soul leaving Uumuu, needs more labbing.

so this is the new movement of my movement saves around .1 to my old movement. This will save around .2 to left spawn husk and with right spawn husk it should be comin around losin maybe .05 to .1 but to lose time you have to do upslash husk along with greeding the wall jumps so most of the time my movement should be even with it. So on average my strat will be saving time. Note that you can react to the certain spawn of the husk but it's kinda hard

magnolia๐Ÿ’™

Different pattern (2 upslashes) that sometimes saves the double when you get really big jumps (ghusk jump distance is rng) and also should save a bit of time because you don't have to walk as far to aggro her the next time

Easy and consistent devout skip setup found by @Magma. Loses 0.8s to the above setup by Aksel. First clip shows what you'd do in 99% of cases, second clip shows what to do when it opens before you can upslash it (need to change strats on reaction for this to be consistent). You need to delay your dash over in that case, so the pogo just keeps you up for longer. If it backs up you just dash over it, though you're likely to take a second hit.

Faster strat to skip the devout, the idea is to get very close and high to the devout, then do a pogo and take dmg asap (to simulate the devout opening and dmg tank from original devout skip), then dash over
https://youtu.be/4-HnHnqhUjM

I've been messing with double dash 1 fb epogo and Ive found it way easier to do 2 fbs instead of just 1.
The inputs arent super presice and there is a lot of wiggle room.
If you are taking dmg as you are pogoing the spore you can try to dash closer to the ceiling and/or moving forward after pogoing to get further. If you detonate the spore after bouncing in the mushroom try delaying the second nail slash in the set up a bit less or try pogoing the bouncy mushroom a little later.
The height of the last dash can also be slightly modified as well as adjusting/removing the small delay inbetween the nail slashes in the setup if your having problems with it in general.
Also, I recommend putting yourself against the wall of the block at the beginning and letting go of any directional input until after the 3rd dash and letting go of them again after the 1st fb unless you are missing the sporg of getting hit by the explosion as mentiones earlier.

Don't know if this is known, but this is a pretty good visual/audio queue to time the gate for traitor lord. If you slide off of the right wall, and wait until traitor lord's "blowing up" sound stops, start channeling cdash, and release it slightly delayed. If you release cdash perfectly on time, you'll smack into the gate.

magnolia๐Ÿ’™

better 2 slash that saves 0.2 on the old one.

1 slash is fastest
2 slash loses 0.1
3 slash loses 0.5

2 slash is basically always best unless you literally need no extra

partofthecreed

Devout pogo, backup strat if you end up not collecting enough soul on the way through beast den and need more than two hits to get to full soul for the last devout.

Starting point is about the same as the normal lantern pogo (right side of the raised platform). Movement is neutral dash, dash hold left, buffered dash, buffered jump, and then stop once you're at the right spot above the devout. The "right spot" being just left of the thicker hanging foreground web strand.

for reference, if you notice uumuu is way too high you can do a pogo and try to save it like this

slowed down clip of 1 slash with hitboxes and input display. should make it a bit easier to follow

sawayoshi

a modified 1.4+ any% uumuu 2 cycle strat. first cycle seems nicer this way than otherwise. 2nd cycle uses the higher small platform instead of the middle platform to make dream nails much easier to come by. unsure if more consistent than existing strats

JackmanMarcus ๐Ÿ’™

This transition wcs saves .2-3, depending on how late you grab the wall going in, and how early you dash.
The wallgrab loses .02-08 from my testing, depending on how late you grab.
It is the easiest transition wcs I've tried, because you have a couple frames to buffer the jump, and don't have to do any other inputs immediately.
If your jump press is early, which will likely be more often than not, when you miss it. You can easily react to the fact you didn't jump, and just do standard movement as backup. Which only loses the small amount of time to grab the wall on the way in.

Saves some time over just dunking in the acid, (dont try this at home), it's safer to go up until reaching the warp zone and then trying to get the stallball, just in case you fail. You'd need to take more soul or just go into the hornet 2 fight with less soul if youu go for it. Its also another way of going into the fight with full health if you get it. Still, prob more viable for a comsob or something.

calligraphiti

saves some time bc you dont have to go to the right and can directly go up. Pretty easy and consistant, if you are too far right you'll probably still get the stallball but wont reach the fb when pogoing and if you are too far left your vs will get eaten by the wall.
Not sure how much it saves, but its probably worth going for (2 seconds or more, maybe?)

imagen_2022-07-10_232645791.png
JackmanMarcus ๐Ÿ’™

Consistent setup for the timing to do the tiktik pogo on 1221, just jump as soon as you hit the corner.

NerfIrelia73

Nice setup for the jump at the beginning of dreamplats. Get in the position in the screenshot and then as soon as the seer appears nailslash 7 times and then hold jump and forward at the same time. Dash just as the seer is leaving the edge of the screen to get onto the platform. Might take a little practice to get the timing right. You can tell you're in the right position if you see the very edge of the post in the background right behind the knight's horn. You can be a little further up, but that's where I prefer to be.

Screenshot_532.png
ins0mnia (she/her)

Optimal end to the abyss climb IL. Saves about 0.1s over rekkey's ending with the downside of being terrible.

WolfIrelia73

fastest and completely consistent setup for dung defender using flukes. note that if you don't pogo dung defender before the 2nd scream skip, you will prob stagger it once more and lose ~0.8s.

WolfIrelia73

timing for fluke multi hit:

  1. 6 slash then fluke, this fluke deals melting damage
  2. when gruz mother does the slamming attack, usually 2x damage
WolfIrelia73

best startup I can find with steady body not cursed at all, can replace flukes with shriek if you run shaman build, shaman shriek is .5s faster

fivebrane

Preparation of a file hardsaved at the kp door with bench storage. Basic idea: benchwarp a file saved at the start of kp anywhere, then mms noclip to the kp door hardsave and quit out

fivebrane

New dupe route past gruz mom to city for low% ag on 1211. File 1 is hardsaved at dirtmouth, file 3 is a special file hardsaved at the kp door with bench storage (see below for how to prepare such a file)

WolfIrelia73

consistent way to deal with the worst rng in p1 without slowing down the other patterns. don't cast the first shriek too quickly, otherwise it only deals 3 hits and can't kill oro using this strat. timing of the ssoul isn't very hard, just finish this combo consecutively and don't wait for ssoul.
I'm practicing nonfury p5 with steady body, but of course this strat works without it.

WolfIrelia73

consistent strat to deal soul master phase 2 in 3 rounds if you have some soul

WolfIrelia73

I don't know if there's any particular reason why runners don't shriek soul warrior once it spawns, but this shriek easily deals 2/3 hits so outweighs the current great slash.
I always leave 1 cast soul to deal this shriek, cos there's usually enough soul and time window to heal after soul warrior or even after mawlek.

๐Ÿ’™AlejsXY๐Ÿ’™

husk sentry quick kill
this is what i found worth doing if when he gets his shield up instead of doing an upslash it does slashes. I think there's another RNG where he does upshield at the very beginning, although i think this happens if you do something wrong (and don't really know what to do there).

probably already known but i havent seen it, slightly different set of movement for the final set of dream nail platforms, ~.15-.2s faster than landing on the 1st platform that spawns.
annoyingly easy to undershoot the 3rd platform you land on, so jump a bit higher than you think you need to

Cursed but consistent mantis pogo that skips one of the dashes, i found it based off something I did in TAS, but quick glance shows cerpin was doing something similar into double dash. Allegedly saves 0.4 but idk how accurate that is. Difficulty wise, its much harder than mantis pogo, I'm about 80% consistent after 30 minutes but I know what I'm doing wrong every time i mess it up so take that as you will. If someone else has also come up with this I'm here to vouch for its validity and post it here

This kinda messes you up geo wise, you get less geo and often none at all, so maybe don't do this all the time, or just default to top row if you're doing SS route

You want to fireball halfway through the gap (red) , higher or lower does work, but it makes the rest tighter, you then want to dash, walk a bit (green), jump and hit the lever and immediately dash to the right, full jump after getting past the alcove, pogo once while making sure to not bonk on the lip, pogo again

Backup wise, usually the worst that happens is a mantis hits you and you just mash your nail button and ur all good, you can also just do double dash if ur spooked

Common mistakes:

  1. You need to pogo later than you would in double dash because you need more height
  2. You need to jump for the lever at the correct spot, earlier than double dash, if you don't the left mantis will be too high/low
  3. If ur slow the right mantis gets too close
  4. If u fireball too low the right mantis gets too close
  5. Fireball too high and the left mantis is too high

All in all fairly reasonable enough to do in runs with enough practice I'd assume and definitely run viable enough for comsobs

Also note a lot of the timesaves gonna be how far you go left after doing the 2nd pogo, and this makes doing the 3rd dash on the platform to mantis claw even worse timewise

unknown.png

May uploaded the version of the stallball with more items, just wanted to put this here in case anyone wants to know how to do the fungal core stallball skip with only MoP and shamans.

Possible new tech for fireball double hits when you can't usually double hit. Might not be practically applicable to the greenpath baldur but maybe somewhere else something similar
might save a few seconds

faster damage tank setup if ur not gonna open glowing womb, 20% chance the enemy won't swing, which you can just land on top of them if they shockwave, you can still combo it into a second double damage hit for opening glowing womb which saves 0.3 in freeze frames but loses 0.2 to slower enemy movement, leaving you at 1 hp super early as well, so i think its probably not worth if ur gonna open glowing womb despite being slightly optimal

calc'ing knockback into timing as well means your results may vary, but it should be faster ur opening glowing womb with shade soul later

worth noting that you're gonna need to take more damage elsewhere if you do the first option than you would waiting for the big bean to hit you

๐Ÿ’™AlejsXY๐Ÿ’™

first post by frying whales, this is the most consistent setup I've found for the uumuu extra on the first cycle.
When you notice the extra jump to the wall and wait till uumuu stops moving, then go over uumuus head to avoid the attack, the dashes afterwards are done when uumuu start moving again.

2 fb easier set up for the first acid skip.
You have to dash off the closest platform, dash again in the air when you're at the same height as the not sloped wall (beacuse you want to cling). Then, hold right for a moment to cling and don't hold any directions, shoot 2 quick fbs just after being under the ceiling level, delay a bit while you press right and then dash and wings instantly.
(only useful for people bad at fb quick turnarounds)

Starting from the loading zone you basically do 3 wall jumps into a dash, double jump, then fireball the bottom corner of the wall while the top of the knight is slightly above the bottom of it. You want to be near the center but slightly closer to the wall you arent facing. Works in both directions and use vysnc of course.

(dare I say that?) Consistent setups for shade skip skip, with and without shaman. Get the horizontal position correct (with shaman you need to be slightly further to the right) using the background textures. For shamanless, dash and cast as high as possible. With shaman stone, you need to fall a tiny bit or your fireball will go too fast as it does in the first attempt. Either way, don't press directions until after the dash. Only consistent at 50 fps

daanolav

significantly easier mag isma skip without dashmaster and with shaman's, using diagonal fireball https://youtu.be/6V-C6GAVfME

so you said that the fungal skip is trash, here is a more reliable strat with 2 fbs, the best i got was a few 3 out of 4 attempts in 10 minutes.
Just jump roughly where the post is and fb just above the slope, fb again in the slope and pogo to end it.
The closer you are to the spot with the 1st fb the easier it is and if you see that you are already too low with the first fb dont even try to shoot another one. You will know if the first fb is too low if it hits the wall later than usual.

MethylPalladium

Seems this strat hasn't been known by many yet
https://b23.tv/t8R7850

the skip saves a ton of time, you would probably have to reroute a bit for geo though
its actually pretty hard to do with just one fb, but you can fb stall to get the correct hight easier, its really precise

daanolav

station honestly super viable, just position approximately there, do a full jump and fireball slightly after the peak

daanolav

swag strat if you want to go to the bench, not sure if it's faster otherwise but it could be, this one is pretty doable

Faster strat for the grimmkin.
end the cdash just a bit early to have time to charge the cyclone and not hardfall (by landing on the corner)
If you can react to getting good rng (low spawn, left or right) (by cancelling your cyclone early), you can get a 2s timesave by one cycling the grimmkin (like in video).
If you get bad rng, it's .3-.6s timesave.
You can also go for double fireballing if the grimmkin gives you a high spawn and shoots fireball, but would not go for it - if you fail it you're screwed

Latest patch has the ability to get inventory storage with just quick map, using this and the fact that benches warp you, we can skip the tutorial, wake-up animation, and the need for delayed interaction storage for mound skip. This will save 5s over the DIS mound skip, and is much easier, but will instantly kill your run if you mess it up. We also have to bench again because mound hardsave will override the bench we use to cancel the warp since the bench comes first, and you need to quit out to have access to quick map storage again.

Steps:

  1. Quickmap storage your inventory, jump into VS (going higher is easier and safer since you'll get more slope speed)
  2. Close inventory, hold left until you get near the entrance and hit the slope
  3. Hold right until you ur light gets near the bench
  4. Bench as soon as the knight in the animation hits the ground
  5. Get off the bench, and get back on
  6. SQ on the 3rd save icon appearing

you can skip doing the shade skip in some clawless categories with this skip.
https://youtu.be/sOdWBUB2P7w (1st part; clawless categories)
https://youtu.be/dYJFn4wry-Y (2nd part; only csc, i think)

magnolia๐Ÿ’™

Jump to slash lurien, same idea as city bridge and peaks grub lever.

unknown.png

another setup for uumuu wcs

dash as the explosion begins, 4x nail swings (if you want, imo helps with timing), jump when the knight passes the bottom of the gate

PSA about geo routing (particularly negotiating Spire geo, Lever geo, and Herrah Rock geo):

The colors on the last table represent the "tiers" of money, where green is fastest but gets you the least, yellow is average on both, and red is slowest but gives the most. They're ordered in this way because Herrah Rock + Lever is roughly equivalent to Spire (~30-35 geo).

So, from this the strats are:

  1. If you're filthy rich (531 is the minimum assuming you pick up all the geo that drops) coming out of GHusk, Lever geo in Chandelier and in Lantern is the fastest.
  2. For all other cases, start with Spire geo in Chandelier and get Lever geo in Lantern. If you have an extra cast after Spire Geo then also collect Lever geo in Chandelier. If you still don't have enough, get Herrah Rock geo after. Lever in Chandelier isn't worth if you're gonna get Herrah Rock after since it's faster to just get Spire in Chandelier and skip Herrah Rock, but the opposite is true for Lantern.
unknown.png
Krythom

Pause buffering kinda works for midair airwalk jumps, in order to get it it you need to jump the frame after you unpause, this is the main required trick for the dash first route which saves ~20-30s if done optimally

WolfIrelia73

this shriek at the beginning always deals full damage. it also pushes markoth higher so it's more likely to give you good pattern. I'm not sure if this strat has higher dps in fury p5 runs.

ins0mnia (she/her)

optimized example of above. The downdash is approx same speed / maybe barely faster but it makes the end line up nicer imo

!!cerpin

alternative pickup pattern for the mv root. loses about ~1.2s on quitting out after the journal compared to quitting out on last essence, but it seems easier to do well, and overall saves about ~0.7s ideally.
on average i think the strats should be about even, but enemy rng in the room makes it awful to actually get a good avg reading

Backup movement for if you miss one of the dream nails during 2nd phase. This is preferable to the cdash under since cdash is usually only recoverable with a slow attack, whereas this covers slow attack and both fast attacks. You also just generally have more time to kill with this so it's comfier imo. I got really close to Uumuu for the pogo in this clip, but it's really lenient so you don't need to.

Onion (he/him)

Dash setup similiar to whats already used. Dashing from the brim that slightly extends further than the rest of the tank puts you as far right as possible for Quirrel. Only tested this for CP but should work for any patch.

Krythom

Airwalk strat for den, saves ~0.4 over normal strats, loses ~0.2 if you dash too late for ariwalk, loses a lot if you dash too early for airwalk

magnolia๐Ÿ’™

Here's a video for when to dash inventory dunk when you get a slow attack for middle uumuu
https://clips.twitch.tv/SaltyViscousBeanRuleFive-agF81AcLjbyWaIvY

Made a video tutorial for the Soul Catcher early control setup. Saves about 2.5 seconds on categories that are already picking up soul catcher as their first charm
https://www.youtube.com/watch?v=w-5NJ3Uylhg

๐Ÿ’™AlejsXY๐Ÿ’™

For anyone that wants to try this, when you get the three walljump at the end try to do a full walljump then the following pogos can be almost bufferable

adaptation of spirity's movement above for good rng out of the crawlid, if you get bad rng do what spirity does instead

Moon๐Ÿ’™

(I'm not sure if I should post this here)
Another qga setup, pretty consistent but probably not as consistent as the normal one.
Press right the entire time and tap jump to jump as low as possible, the cdash timing can be tricky, but the jump helps

5fb setup for uumuu.
Do standard strat, but do 321 instead of 33 to fit another fireball. (upslash upslash upslash fireball cancel, upslash upslash fireball cancel sideslash fireball cancel). correct your position slightly to the right before third upslash to get it easier and less tight. If you miss it, it falls back to the normal cycle.
For second cycle, bait uumuu in the center of the arena (takes a bit of practice). Fireball as quirrel makes uumuu vulnerable so that they don't get knocked back, then double upslash.

This strat has roughly the same speed as the normal strat, but makes you end at 5 soul instead of 1, making soul collection for herrah dupe much easier - you don't have to rely on rng dnail or hit any big jelly out of archives.

If you get double double, your last fireball will kill uumuu instantly, for a bit of bonus timesave

With the 2 hits of soul from previous strat, this gives you the one net hit of soul you need for firebell. Saves .8 over triggering devout attack, then parry pogo + backhit

Consistent setup to have full soul for the devout in beast den.
After the two dashes to land you on middle plat, do a dash followed by a neutral dash to not go too far left & not activate the camera movement.
Then you face right, do float inputs, turn left, jump downdash turn right, side slash twice (keep track of your soul, might need a third time if unlucky of weaver rng), then dash left and proceeed as normal.

This loses .7s optimally, but gives you enough soul to 3fb the devout in beast den, needing only two nail hits to kill it. This saves ~2s (no need for damagetanks or nail hits after the tank), so a net save of 1.3s. This also gives you two soul, allowing for next strat...

zuiivel

Mawlek optimisation for when it does the jump attack, allows for one extra hit in the air which allows you to keep doing consecutive hits instead of having to pause a little bit waiting for mawlek to land.
This strat is 100% consistent and makes jumps "optimal" over big spits, because the fastest big spit attack is RNG.
Saves around .2-.3 for every jump

(?)
Soob into thk's room. There's ground oob.
Do a late soob optimally, early soob doesn't save time.
Best i could get is .5s to no soob, realistically on average .3s.

i'm sure there are people who know this, but i didn't, so psa, if you fail wiggles heres the death cycle, just wait for the second middle saw at least and go up the left side, if you're fast you can make the normal cycle but two behind (dashing past first saw in the hallway in the down position), you can make the fast dashmaster cycle three behind pretty easily (dashing past first saw in hallway in the up position), this is faster than a room reload unless you get hit immediately, in which case it goes even and is safer

!!cerpin

labbed the flukenest extra quick kill we can do go for in 106% at least now (with twister + dwielder + flukes + shaman). basically 1x <0.8 fluke first, then 6x flukes with a dnail at whichever point youre comfortable with, make absolutely sure to not overshoot any of your post-dnail flukes, and end with a ddark. this was unironically 90%< consistent when I performed the inputs correctly, where the only irregularity was how the first cast bounced.
there are 2 risks you have to be aware of for this:
1: if too much of the first cast hits you have to adapt and either miss some of your pre-dnail flukes on purpose, or simply accept a slower kill and do one less fluke during the early control.
2: if you have any flukes laying around after your casts when you're supposed to ddark: be very careful about ddarking. this is why you want to be completely inside collector basically during your casts. thats what the "failed" video demonstrates here.

Schy๐Ÿ’™

Kingmould skip that saves 0.5-1s depending on execution and is 100% consistent

Krythom

The main trick required for no VS route which saves ~13s over collecting VS, extremely precise, in its current form probably not at all run viable

!!cerpin

example of the setup for fast false knight exit. the left taps work together with the scuffed upslash knockbacks to keep you in range to both hit and avoid getting caught on the lip at the top of the doorway with the jump.

I made a guide for True Ending nmms, which is now run on current patch. It doesn't go into detail about anything nmg in the route (which is a decent amount of it) but assumes no prior glitches experience.
https://www.twitch.tv/videos/1283091574

Vexsance

Made a tutorial video going over some of the Grubsong% movement! Hopefully this makes learning and optimising the category a little easier. Thanks to everyone who shared their strats and knowledge of the movement.
https://youtu.be/zeBLxtC5rpM

!!cerpin

based off of a setup i labbed for lp firepogo

Epogo strat i found (this might exist already in that case sorry) that is fast and looks cool
i find it easy to do because there's no waiting to it, you just go through the motions.

dash off as soon as you land, neutral off the wall, walk left to the far left mushroom, turn back to the bouncies, bounce off leftward, fireball, pogo spore. It's hard but as i said if you get the rhythm it should be pretty ok. main thing to note is that you just need to focus on dashing high enough after the mushroom bounce

magnolia๐Ÿ’™

WP IL strat, saves 1.3 on next fastest cycle. Bookmark this for when someone wants to kill WP in 2030

this strat will allow you to get another nail hit's worth of soul on the first knight if you are low. this allows you to do the first knight quick kill with only 6 soul before the fight, as demonstrated in the video (started with 7 soul, ended with 1 soul)

X-Bow Cooper
Krythom

RTA viable setup for wrong warp past the first deepnest room during the herrah dupe, after regaining control after hitting the loadzone nail twice -> max jump, after room loads nail swing once after hitting the ground then jump back through loadzone, wrong warp should occur, immediately re-enter bottom load to prevent getting sent back to queens gardens and proceed with rest of herrah dupe as normal

~5s timesave over no WW but since the other strat is horrible to optimize closer to ~8s in reality

magnolia๐Ÿ’™

True Ending White Palace IL strat, saves about 1.5, this shit sucks ass but its possible. It's very easy with sharp shadow, so useful in WP IL and when people start using SSDM in 106, but very difficult with TE loadout.

Easier way to hit the good spear cycle, neutral wall jump at the start of vertical corridor, wings and pogo, do either another wings or wall jump, wall jump and pogo

Visual cue for cyclone drop, wait until the end of the spikes, release cyclone, pogo at the end of cyclone, cyclone saves a bit over a half second to regular drop with a pogo for dash refresh and ceiling boost

this is a backup strat for dog cycle in case jerkface still has their laser up by the time you get to the top. seems to be faster than waiting for the laser, but it is certainly faster than getting hit and continuing

Ely โšซ

Here is all the boss battles in 112 and 107 where flukenest has been found to be either optimal or viable/ preferable over the non flukes alternative. I will first post the unambiguously optimal fights and then post the ones which may come to preference.

Nosk: Good RNG fight saves 10 seconds over non flukes combsob. Bad rng isn't super punishing as nosk has a lot of attacks where he can get multihit, you shouldn't be losing more than 5 seconds. If he goes into the ceiling instantly you can shriek as usual.

The charm loadout is: Shaman stone, spell twister and flukenest, needs overcharming.

Collector: There is a completely consistent quickkill which has been posted in strats before. Additionally, flukes will instakill collector out of the final phase. In total this is seven seconds of timesave over perfect shriek only fight.

Charm loadout is shaman stone, flukenest and dreamwielder. Charm switch optimally at tram bench or at oro bench for a safety heal.

Watcher Knights: Saves 5 seconds on average over optimal shriek fight. Each watcher dies in three fluke casts, so you can kill them before they even attack. To make up for the lack of twister i have come up with a couple of strats to gather soul (showcased in video). Its still optimal to throw the chandelier down, and the fight needs to be started with full soul.

Charm loadout doesnt change from collector.

all the new root movement i've labbed compiled into one video, was gonna make charts but they were hard to follow and looked bad so i didn't https://youtu.be/7nP83XoaDWk

Minikit

By delaying the bench sit, you can jump through the closed doors above the bench in White Palace without having to go push the levers to open them

(Sorry for the laggy video, still setting up some settings)

NerfIrelia73

If you need 3 hits of soul on the way to Watcher Knights, then you can do this strat to get 3 hits without losing too much time. Haven't timed how long it takes compared to normal strat, but getting the soul can be worth sometimes. You need to hit the rava immediately after the 2nd wall jump otherwise he'll be too far away to get the 2nd hit with the upslash. As long as you hit him with that first nail hit you will never dash into him. Not too difficult to do with some practice.

earlynot

some fluke kills i found from a few months ago some of these do require overcharming and rng https://www.youtube.com/watch?v=HT0Bi3U1nsk (sorry about it being on youtube couldn't make it so it wasn't a download)

Ely โšซ

With flukes you can get a consistent instakill on collector before he can jump. The sequence is: scream kip, two flukes, dreamnail, three shrieks, nail hit, dreamnail, two shrieks and one fluke

The damage is incredibly tight and its really easy to miss one or two flukes or some hits of shriek, so to make the strat safer you can prefluke where collector will spawn. You do this by dashing, jumping, fluke, dashing before shade cloak is refreshed and then dashing again where you normally would.

probably something a lot of people know but i keep seeing it not used so i guess a psa, if you don't want to be stuck in the ceiling during your pogo, wait to fall first before pogoing, saves up to 0.2 to getting stuck in the corner, if you buffer the pogo out of your dash you will get stuck briefly every time

its also applicable i guess to 1221 but the lamp pogo movements faster

nosk quick kill on cp, saves around 15 seconds overall compared to optimal flukeless fight. very very lenient, just fluke it in whichever direction it goes and it should always work. requires 5 flukes, or 4 with really good rng

faster strat for pogo grub on 1221, just delay a bit and then steal cp strats :) saves on average around .5 based on my testing

spent some time looking at the fsm for hu and found that after his big attack, which side he teleports to is only rng if you stand in the center of the arena. if you are on the left side, he is guaranteed to tp to the right, and if you are on the right side, he is guaranteed to tp to the left side. youre able to start moving right after the last pancake spawns
here are some screenshots of the farthest left or right that you can stand.

20211223131500_1.jpg
20211223131530_1.jpg
sawayoshi

a variant of shade soul shaman stone 1 cycle for uumuu. first example is with extra, second is without. important points to watch out for are keeping uumuu at the right spot after the 3rd attack (slightly off the right end of the center platform), and delaying the first shade soul a little bit to make it double more consistently. an extra sets up perfectly for the original 1 cycle setup that you see most often. can be mirrored across the center if you feel more confident with the extra setup moving right than moving left.

zuiivel

Movement in first qg room towards wraiths, around 0.4 faster than comsob

a while back i posted a walking strat for the damageless lantern pogo, but it was hard to get, this is a setup thats not only faster than taking damage (0.2 if you greed) but is easy and lenient. Full jump as you hit the ground, line up with the middle of the bench, wait to fall, dash, and pogo for easy timesave. This works even when the crawler hasn't turned, but works better when it has.

adapting from AlejsXY low fps vengefly room strat, this movement has the goal of not aggroing the top fly early, we do this by pogoing the 2nd fly to the top, the dash into the wall is simply a way to make sure you don't pogo too high, if you get all your wall jumps nice and low you can skip the dash

both lose time to landing, but don't get you hit

Deleted User

a setup to greed the first ddark
after the dnail do 2 normal dashes then full jump when the knight overlaps with the right eye of the last watcher, as soon as you hit the wall do a full wall jump while holding left and do 2 neutrals when you hit the ground
the visual cue to start the ddark is when the knight's feet are at the top of the watcher's horn, you can do it when they are halfway between the top of its head and the top of the horn like i did in the clip but it's very risky and doesn't save much time(probably less than 0.2s)
to see if you got it or not open the debug console and if the watcher's health is at 132 then you got it, if its at 155 then you missed the first hit
use this only if you know the timing for the dnail without any setup cause if you mess up, knowing the timing is the only backup
if you are too late and can't get the dnail without getting hit, commit to the dnail and tank the damage, the soul is more important than the health
i tested this only on 1221 but it should work on cp too

slightly (maybe more than slightly) cursed way to skip the first devout, complete with lineup
The devout also may not open right away, do not hit it, it needs to open into you, and if it backs up, just do the regular up and over.
If you have trouble getting the line-up (which is really tight) you can get as close as you can and dash into the devout as soon as it opens, this requires very good reaction time, but is a good backup.

To make up the geo get the bottom level in the room above king's station. This requires good RNG. If you don't get a good line-up, it's better to skip it (this is the fastest way i know how to cover the geo). If you end up skipping the geo, just kill the devout for the geo.

!!cerpin

same strat without dashmaster. just hold direction and dash, the cooldown should line up on anything but absolute worst-case backing up rng, in that case it still dboosts you towards the dreamer in all my attempts.
never actaully timed this, but not having to wait eliminates 99.9% of possible devout rng, compared to having to wait for the cooldown.
https://clips.twitch.tv/SuspiciousHelplessStarlingPJSalt-Pd816xD1HMewW3f7

transdash into neutral dashes to refresh your shade cloak right before dashing through the devout. In my timings saves 0.2 vs getting good rng via just doing a regular movement and waiting in front of the devout for the refresh

MarcyAugust ่™ซ

I was having trouble with the Kingsmould skip we do in True Ending, and I hadn't seen an alternate setup for it to make it easier/not have to deal with moving to the right and risking hitting the spikes on the way up, so I found a method that only uses dashes to line yourself up to do the final pogos (except for the first bit, where you want to line yourself up outside the dark cloud on the foreground so that the knight is completely unobscured), which I find is way more consistent and easier for me to do :)

sawayoshi

a reaction-based cp pogaxe setup that should be 100% consistent when done right. if the miner walks right immediately, jump, dash into the conveyor, jump out, and pogo the ax. if you're too slow to react, the axe will be too far left to pogo. if the miner walks left initially, wait for them to walk right, and then do the same movement. if they throw an ax immediately after the left-right movement, wait for the ax cooldown, and then do the movement. requires decently fast reaction times and a bit of reaction training.
not usable for dashless categories, as it's too slow to pull off without dash.

Deleted User

an easier setup for wcs than scruffy's and w/o having to learn any timings
stop holding jump once you're above the lantern, then when you're far enough right to pogo the soul container tap left and pogo neutral, buffer the jump and dash when you're around the height of the crest in the door(its better higher than lower), if you're too close to the door you can do a wiggle after the jump
once you hit the ground jump(don't buffer or you'll jump in the wrong direction) and immediately neutral, this should put you close enough to talk to the shaman, if you're not you're dashing in the door too low

i haven't timed it but this is probably slower than scruffy's bc they dash only once

damageless cycle for folks who can't not wall jump on conveyors or realize they're at 1 hp once they're at the top

consistent setup to get the corner correct for dream dash every time (which is super important if you're doing this clawless)

get on the right side of the 2nd post (position isn't super precise but don't go past the grass and don't go before the post), swing 7 times when you see the seer, full jump and dash as seer leaves the screen

oh i guess some quick trouble shooting, if you're going past the platform, you're dashing too early or are too far right, if you're hitting the side, you're either jumping late, or dashing early while also being too far left

saves 3s lol

X-Bow Cooper

full jump twice and dash like this video

This movements apparently been known to be possible on 1221 but its possible on cp as well. Saves a full second.

setup for reverse ACN skip on the way back from Hornet 2 in P5BO. start the cyclone while standing and just walk off the platform. potentially makes skipping isma's worth it

Deleted User

transition wcs to avoid the hardfall without dashing. I did not discover this, I believe it was first discovered by CC

since the crystal beans are load dependent, this ones too far to transdash past, however you can just walk up to the lantern, and jump up while its turning (it can't spike during its turn) allowing you to get by damageless, the more potato your pc, the better

oh also the hitbox is asymmetrical too lmfao so that helps

the fastest way i found through the dlc rooms, if you need soul, don't jump at the first flying sentry after the first dash, instead do 2 dashes, and upslash right before you wall jump and upslash again, you have to react to the final sentry, i messed up a wall jump there but you should get the idea, let me know if i'm missing something (messed up the first husks a little as well but oh well)

same as above, but turn around to save 0.1 and pogo the explosion instead, also looks cooler, and is slightly more lenient, as you can see in the first example theres no way i could be that off of the original fireball epogo setup and still make it

I hate cp epogo as much as anybody else. I kept on struggling continually with calli/alli pogo and making sure the spore didn't bonk, so I arrived at this setup. Idk if anyone else has too, didn't see it anywhere.

Basically you dash as soon as you see the spore, once you hit the ground walk right and jump pogo the mushroom, and then hover. More similar to the original one fb setup than anything else, except everything works out of neutral dashes and very easy timings.

Edit: you can still get one hit of soul with this, but you forfeit hit number 2, and it also does work even if the sporgs awake in case you're doing it as a backup or you missed

Troubleshooting: make sure you're not dashing as soon as you hit the ground, but instead when you see the spore, if you're bouncing into the spore, you might be walking too late or dashing too late, if the sporg is bonking on the middle square, you're dashing too early or walking too early, overall its fairly lenient, so even if you're succeeding, you might still have your center for the trick off balance

Small but consistent 5s timesave for the dupe to herrah. Credits Krythom.
after getting early control from the spikes, immediately hit the load, mash nail and as soon as you hear the nail hit do a full jump. Video shows it twice, once with visibility, once with normal vision. Save state is positionned just before the load that you would hit by slowfall

As a bonus if you need it (for example hecked up the soul collection from archives) you can gather soul off the spiders.

idk turning seems to make the save icon appear faster after early control, finding more details on if its shade soul exclusive later [it is] and this only works on 1221

harry_dum77

this is more of a swag strat but whatever

harry_dum77

has anyone ever done this epogo in a run before?

An adaptation of apress' gorb early control for when you need to go to stagnest. Saves 5 seconds over the normal 112 strat when done well, and like 2-3 when you don't get an instant control. I intentionally included a couple failed attempts and a possible backup for when you agro the vengefly too soon. Also beware - if you don't get a cdash soon enough before getting the control, the game scams you out of it and you need to just dash into stagnest. Still faster though
https://www.twitch.tv/videos/1216218448

NerfIrelia73

Timing this room is hard so numbers might not be completely accurate, but the estimate I got from doing this strat compared to hugging the left wall was about 1s - 1.5s. Sometimes you can get hit by that last row of guys if you get a bad bounce which loses about 0.4s - 0.6s so it's still faster. If things go wrong or you mess up, then I was losing about up to 2s to my fastest times for both strats so there isn't much of a difference there. This strat seems to be more consistent though at least for me. Useful for any categories that want to quit out from this grub like grubsong%

apologies for repeat posting, but you can actually avoid the chain if you do the wcs where you hold both directions at once (you actually dont need that type of wcs to make it, but its much harder without it) [i misunderstood how the wcs with both directions worked, it was just placebo. still recommended tho since its faster]. this is easier than the chain imo and looks like it saves another 0.2

another bl wcs. saves at least 0.8 over the 2 slash method, but needs to be chained to get into the water, making it much harder to do consistently.

sawayoshi

a setup to time the final shade soul to finish failed champ. useful in any category that does this fight with shade soul.
the timing is done by falling down when the floor breaks, hardfalling, fullhopping off the ledge, and casting at failed champ's height. tested on 1432, should work on any patch 1221-1.5

To have full soul during the dupe, assuming you hit the free big jelly + all small jellies in archives (and didn't have soul after uumuu), and get the rng dnail, you need 3 hits of soul. One on the small jelly, two by killing two of the three big jellies. The third one is free, you can hit the first one for soul if it's up (first clip), or the second one, even if it is too far right (second clip).

Going for great slash out of stag, apparently it's faster to go for the ceiling boost instead of the cyclone drop. The rest is just a normal movement. I've also botched one dash at the end, consult Spirity's 106% movement right before hitting the lever

neat background object pogo to get on the belt before saving the grub

mayonnaisical

easier variant on the TE shade skip, based on how I do it with a dash into the shade instead of drifting onto it

shown here is a setup where you don't need to drift at all to get the damage boost, instead you dash into it, this allows you to just hold down for the most of the trick and do the pogo and fireballs until you turnaround and dash to the ledge,
one thing to note is that you'll need to make sure you're facing to the left at the beginning of when you jump to get it to work instead of it not mattering like with the regular setup

if you're used to the regular setup, the timing might feel a little bit off, i line up the shade and myself with the background then dash at the apex of my jump

!!cerpin

how i do the first frog wave. rng as all frogs strats are, but something like ~40% of my attempts are comparable to this speed (as you can hear on me literally not even being excited about the pattern anymore)

An alternative method of scream skip that only uses cdash and a walljump. Check this for cues: https://discord.com/channels/772964112908156938/836364889604751450/910120787955052564

NerfIrelia73

Small skip to the root that saves 1.4s - 1.6s. Avoids the bad rng with the rava which is really nice. You have to dash kinda low to get the wallcling because you can't cling where that seam is. You can cling to the upper hitbox, but it's hard to do and I end up hitting the spikes 99% of the time so I just go with the lower one. Doesn't seem to save any time if you are going for the storerooms key instead of the root. (Originally found by Jodii)

Uppercasserole

Not mine, but I see lots of people doing slower or sketchier strats. Land by the geo rocks and slash up, right, up and jump. The moss knight will always hop backwards (the same manipulation used to get the double fireball on the first moss knight). About 1 second faster than the right-side strat.

downslash when you scream skip! saves however long 1 nail hit is and timing is not tight at all, just downslash when you are over mawlek. too early you'll go over (better than missing entirely though bc of nail hit) and if you do it too late, you'll get the skip but the nail hit wont come out

i dont know if this is known, but I dont see many people going for it.
upslash the vengefly while youre landing on the platform. saves .1 - .2 and makes it so the vengefly will never underplat. make sure not upslash while still rising or youll bonk

!!cerpin

cdash into door, 4 dashes right (until big veins here), then 4 dashes back left, single slightly delayed nail for the knockback and timing, full yump, dash, wcs (also try to dash as you land on the ground. if youre lucky it preserves the wcs (likely physics framerate jank))

Spirity

.1 faster hahahahahahahahahahahahahahahahhahahahahahahahhahahahahahahahhahahahahahahahhahahahahahahahhahahahahahahah :maggotprime: :maggotprime: :maggotprime: :maggotprime: :maggotprime: :maggotprime: :maggotprime: :maggotprime:

Schy๐Ÿ’™

cool strat for bad rng on the last wingmould which happens like 1/4th of the time approx.
approx. saves 0.5 depending on what kind of rng you got (isn't faster to go for with good rng though)

!!cerpin

another "peach" (aka easier but slower) method for this cdash. landing near the edge and walking off to the side is about 0.05-0.1 faster than the dash into the side to set the cdash up.
note: do not cdash too high, you will bonk

(also worth note: the good cdash itself saves ~0.7s over the older dash+pogo only strat. the different peach strats save about 0.3 to 0.4 depending on execution)

!!cerpin

just a circa cue for a swagdoor setup with the birthplace early opening. stand there, charge cdash as the lifeblood light thingy lights up "fully", release when its charged. it works for me, but i also have slow reflexes so may need some adjustments
https://clips.twitch.tv/PatientPuzzledPepperKevinTurtle-KrZ9qMJ4M4O67Vzh

Spirity

originally found by deababy, but not as widely known as i'd like it to be. around same speed/maybe a bit faster and much much less likely to get fucked by rng (i didn't get hit by twister once in 40 minutes of testing, vali says it can happen though) AVOID GETTING CORNER CORRECTED LIKE THE PLAGUE

.9 on the way to get the pale ore. getting the wcs sucks, beware
https://clips.twitch.tv/LovelyShakingLatteBatChest-YI3oRu0gx8RqeS7e

ins0mnia (she/her)

Version of Lemm wcs with a pogo to extend it to the transition

Spirity

https://youtu.be/cqfKlp-iA_w?t=39 yes, this is not even my video here, but it's actually really cool what's happening here: you do a little jump and then you can nail the lever instantly on this room, because of how the lever hitbox looks. not sure how much it saves

Quatopine

backup for getting bad aspid spawns and missing double spike if you don't want to reset

tl scream skip 2
https://clips.twitch.tv/CrispyHandsomeSkunkPrimeMe-blmmFk0y_dFFOmqR

enter with full soul, cyclone 2nd wave and dive on top of the mantis you didnt cyclone. 3x fluke into upswing, land on floor (dont have TL land on you) and spam fluke.
beware: if you do the last fluke late and kill TL during his scream you softlock so yeah dont do that

faster entry https://clips.twitch.tv/EnticingObliqueBottleKippa-GsS-aZukgxvalRge

grub collect https://clips.twitch.tv/ProductiveSpineyBadgerBCouch-YjlMYE7_q-0kYOOv
if vengefly follows you, do an extra dash before starting cdash (shown below)
https://clips.twitch.tv/BrainyTsunderePterodactylSoBayed-RdKOiwpsjCzgtJL3

gets 3 casts of soul instead of 4 (still enough for brooding mawlek quick kill)

Good movement through crypts - in particular, the early control (from the "soob") into downdash is pretty nice alternative to cancelling a transition storage drop & cancel. I recommend tapping right a bit after the map close animation (don't actually soob tho), then when you get visibility tapping right then downdashing then hold right again. Often you will land just a LITTLE bit to the left of the breakable floor, be ready for that

.3 on regular mvmt from here. dash (afaik) 1st frame to get the wcs. enter clinging left wall, hold right + dash on entry, during the start of wcs start holding left. easier variant is to get wcs from buffering jump, then dash (delay dash out of jump a tiny bit, tiny bit slower than getting wcs out of dash)

setup for early control on Gorb essence pickup. Just stand on the left of the platform to activate the vengefly. I'm using the lamp in the background to line up my dreamnail.
You need to wait until the essence tracker changes before save and quitting. Saves about .8 if you're just gonna save and quit since you can open the menu earlier. Saves more like 2.5-3 seconds if you still need to do anything in cliffs.

a nice wallcling storage to start off flower quest, also saves .2-.4 seconds

NerfIrelia73

Do this instead of spending time luring the bee over if it isn't in the right spot to pogo

Saves .8 over pogaxe, loses roughly .4 to get second try. Vertical position is somewhat precise, but with consistent walljumps it usually works out (anywhere around the last conveyor spike is fine, lower is safer than higher). Not really fullgame viable with the current state of things, but .8 is .8

Consistent scream skip for elegy% or any other category that has to fight collector without shade cloak but with the dash.

NerfIrelia73

Making blue lake fun, but in reverse. Setup is pretty easy to do with some practice. Saves a little over 3s and probably closer to 2 - 2.5 if you take a little longer to get the setup correctly. Max timesave I got was 3.3s

Easy setup for double DNail at the start of the Uumuu fight (adapted from Gwonkee's movement). Just follow movement up to the final platform -> full jump, then DNail on landing. If you land in the center of the plat you can do them back to back, but you can move back if you land too close to Uumuu.

not sure exactly how much the mvmt saves, prob like .5 ish
https://clips.twitch.tv/FlaccidBoxyMinkAMPTropPunch-P6h7gTdvHrzNiQue

cancel cdash and restart for .15-.2s timesave. youll be one hit of soul lower than if you do the regular dash entry
https://clips.twitch.tv/AthleticHumbleOtterEagleEye-gOFtUqfYFoXV1fyL

.05-.1 timesave over dashing in and hitting lever normally https://clips.twitch.tv/NimbleFaintCaterpillarDancingBanana-dvQBiChK7Kk4FaAw

neutral dash + hold left and buffer the cdash and youll have the right height every time. credits to @CC for telling me to do this https://clips.twitch.tv/TalentedEncouragingChowderNomNom-LbIGYBDGf295eVf_

climb on right side in the beginning, saves .2ish https://clips.twitch.tv/CarelessAmazonianChipmunkKreygasm-2SlZjcnDlhRTxmZI

hit the grub through the floor, be further left than you think you need to be. saves ~1s (makes the mimic kinda awkard to deal with tho)
https://clips.twitch.tv/TriangularConsiderateCookieCmonBruh-FOewjzAl4WYv-2V7

different exit, saves ~.25 with good rng and closer to ~.1 without
https://clips.twitch.tv/SillyArtisticTrollDoubleRainbow-lkpMZGQnB-rvl1Kx

saves ~.2-.3 over dashing right into dashing left to start the cdash, kinda tight. can make it easier by dashing into the wall, if you do the dash, its ~0.05 timesave
https://clips.twitch.tv/EnchantingInexpensiveSangHassanChop-nfhVeAq_kbcnjMqp

(edit) can save another .2 by prejumping after the downwards transition ๐Ÿ™‚

room after thorns, saves upwards of .2 (everyone does diff stuff here so gl getting a baseline time)
https://clips.twitch.tv/GrossSmallDadFrankerZ-brrMtnv6J3MlwF9L

faster exit by .1, wings out of cdash is really precise + walljump at top is precise. kinda bad but hey .1
https://clips.twitch.tv/BloodyGentleCarrotTheTarFu-9cNKa3kiWq1MxpxN

less awful exit, about .05 (on avg) slower than the above strat but is way less tight and awful
https://clips.twitch.tv/DeterminedZealousMangetoutKAPOW-L_VTUWPz_j-wbcln

cancel cdash before hitting the sloped ceiling bit. saves like .5s on the dashes at the end of the 1st room/beginning of 2nd room i see some runners doing
https://clips.twitch.tv/HonestFunBaguetteTakeNRG-FwRhI2-YyYh2kAmU

.15s faster than landing on top of the platform, can setup the strat by bonking the ceiling on the jump. this is .2s slower than the walljump on the right, but no risk of hitting thorns
https://clips.twitch.tv/TriangularZanyApeTTours-AoVsZlL5wfnKl_pf

crushers cycle that doesn't require inventory drop and does the dive instead. At most 0.15-0.2 slower than the optimal inventory drop cycle you can do there, 0.6 faster than the sketchy invless cycle and about 1.5 faster than the normie cycle

buffer 2 dashes, jump and dash into wall and buffer cdash and release asap. finicky but 0.5s faster total. if youre late, the 1st dash is probably late (start when you see the knight on the bottom of the screen)
https://clips.twitch.tv/BitterSnappySquirrelDancingBaby-jkUGp_3Fsxtn6Jsj

5 dashes after nightmare lantern dreamnail perfectly align you with the left edge of the lantern for wiggles with the inner hitbox of the cyclone slash: https://clips.twitch.tv/SmellyHomelyLionAMPEnergy-HIJWxid2SYJrh-jY

I guess you can technically do it even faster on the right edge of the lantern, but the slow camera makes it very curse to align yourself

.1ish, saw jokull do it and didnt see anyone else do it so posting for attention
https://clips.twitch.tv/TangentialGoldenAardvarkPJSalt-BxHWiYvYi397s-OS

stop cdash early to give yourself time to charge cyclone. saves like 1.5s
https://clips.twitch.tv/BashfulEndearingElkGivePLZ-YSf5nLEvBcXSRBUa

calligraphiti

faster than pantapogo and has a damage tank variant. I start the dash very late. Fastest since it allows for easiest greed timings

General purpose sub-pixel alignment for the DNail WCS setup (that is to say this should work on any ledge like the ones shown). Walk into wall -> neutral jump -> neutral dash. I ran into problems buffering the turnaround after the dash so don't do that ig. Not fast but a good place to start for tight-quarters areas (i.e. QGA room).

jeffismehpic

that enters deepnest from queens garden
saves .25 over standard dbl dash to platform. works for other actions too (setting dgate, etc...)

harry_dum77

new strat maybe? takes out the need for soul gathering after 1st fireball skip, could save a bit of time

!!cerpin

cyclone drop for categories going from kings stations to kingdoms edge with cyclone and cdash. saves 0.2 over the 1221 inventory drop strat seen in All Skills (example here: https://discord.com/channels/772964112908156938/890167936340340746/893441493094793226), and trivially lenient in comparison

Obtain transition WCS on the right. Frame perfect dash left, hold right again. It is not faster to chain this on the lumaflies at the bottom, faster to inv drop. Idk full timesave cuz i'm bad. Also hit the jelly, i'm dummy. If you miss it you won't be hit by lumafly, but you miss the cycle so you lose time

https://clips.twitch.tv/FaithfulHyperPanVoHiYo-czVHcgIhDWji3SMM

.4ish over old strat, if the enemy is too far right to walljump, pogo up and do the old strat

https://clips.twitch.tv/GlamorousAssiduousCrowChefFrank-vQl3F9b0H4SuSS39

dash into side of platform to get to roof, saves 0.4 over landing on top. walljumpable surface for the ceiling goes lower than it looks visually

fivebrane

Small timesave for 1028 any% AG (or low% AG), room dupe to skip walking across RG grimmkin room (apparently inoki already has this strat, but leaving this here for reference)

Deleted User

Strat to double hit the left fool by using freeze frames from the right flying fool dying

shade soul double timing for Mantis Lords

Short video on Rhino Petras with extra visual cues for position/timing. Extra info in the description.
https://www.youtube.com/watch?v=QL66y9Sftv8

!!cerpin

leaving the elevator above Lemm down after the very first visit lets you do a fun inv drop, skipping the any% lever on the right side, and saves about ~1.2s over good execution of the regular strat.
if you hit the inv drop but hardfall it loses ~0.3-0.5s (so still saves time), if you miss the inv drop there's a very lenient backup which loses ~0.5s over good regular strat execution, but is completely consistent and makes avg loss with the strat negligible.

examples here:
https://youtu.be/SF58ZtGx24M

do two neutral dashes at the start of the room to fool the shade gate into letting you in before the shade cloak cooldown. Originally found by Monstah way back in the days. You can hold a direction and still get this, but it's not as consistent as just two neutral dashes. Those work every time

Faster way to reach this grub using wall cling storage. Doing a full height jump against the wall here gives wcs. You can either choose to line yourself up before the full jump, or just go for it straight away. Faster strat saves about 2.5 seconds while the easier one saves 1.5 over the cdash from the left wall.
You'll want to be neutral while falling past the wall and it will automatically push you away from it as you reach the bottom of it. Once you get pushed away you can dash left and do the pogo.

Uppercasserole

Fairly consistent setup to get a fakedive while escaping soul sanctum. Saves around 3 seconds (+ some soul) compared to going all the way down. Dash into wall, dash 3 times, then press down, left and quickcast simultaneously (maybe down-left slightly before quickcast). Works on 1.5, 1.4.3.2 it only kinda sorta sometimes works.

!!cerpin

simple screen shot of the snail shaman triggerbox, showing how far away you can be and start talking

unknown.png
!!cerpin

consistently fastest strat at the start of Lost Kin dream (cp inv drop may be faster, but this is faster on avg for any humans, bc not 1/50th of a second input), saves 0.1-0.3 over other non-invdrop strats
note: start with neutral dash

*faster strat from sawayoshi here:
https://discord.com/channels/772964112908156938/822611746086715423/886141987395350559
https://cdn.discordapp.com/attachments/822611746086715423/886141986980110357/2021-09-11_00-49-27.mp4

ChocciAdam

A full-length run viable strat for making a faster spear cycle. Saves about 1.3s over normal cycle. Relatively safe because timing cues can tell you if you won't make the cycle. Apparently Ax discovered this independently recently, but I couldn't find anything posted so adding it here so everyone can benefit.

!!cerpin

Pest's "old" tutorial on basic watcher knight's strats, specifically with some meta think strats (which can be applied to literally any boss) on how to learn the fight:
https://youtu.be/Oc-_Vg-Y8ME

cuber_kk

shortest path for mantis to hit Knight but in tas, rta run could do it.

MethylPalladium

MMC quick kill with Flukenest without SStone
Demonstrated by Nightmare31

!!cerpin

setup for the triple dash strat at the start of the qga room for flower quest. 1 neutral dash in to 2 (almost) full dashes squeezes beneath the thorns and saved about ~0.3s to my timings

adding to the above post, hitboxes shown as well as a setup that does not require baiting the shade back to the left. fulljump as soon as you land after the dash back to salubra, then start the 3 fulljumps to get the shade up as it passes the red line in the image. requires you to be fairly close to the edge of aggro range to be able to dash into the ledge. this variant saves ~4s over a good 1fb and ~7 over a 2fb. performed at 250fps on 1.4.3.2

MethylPalladium

Dash only, no need for fireballs
Discovered by ้›จ็”Ÿๆฅช็ฅˆ https://b23.tv/ZzU5GX

mayonnaisical

Kill dupe Gorgeous Husk so it drops 6720 geo with different loadouts potentially used in runs (or 1028 rando)

1.0.2.8 with Shaman Stone : https://youtu.be/hco2kAV5gPk
5 nail hits and 3 flukes

1.0.2.8 without Shaman Stone : https://youtu.be/lOVeu37AdMA
5 nail hits and 4 flukes

1.1.1.4 with Desolate Dive and Shaman Stone : https://youtu.be/TwphQFPS1Mk
Full Dive, 4 nail hits and 2 flukes

1.1.1.4 with Descending Dark and Shaman Stone : https://youtu.be/ZUyhfL5tp50
Outwards splash, 5 nail hits and 2 flukes

1.1.1.4 with Shaman Stone and no other spells : 16 nail hits and 2 flukes

Spirity

I'm not a Hollow Knight speedrunner, but i found this method of killing soul master/tyrant which turns out to be faster than the usual way of killing the boss
(in the clip I use crystal dash, but it is not necessary, I just used it because it looks cool!)

Space Narc

I'm new to running Hollow Knight and I've been trying my hand at All skills (1.2.2.1). While i was practicing the skips to make my way to Isma's Tear I found a visual cue to time the jump for the last acid skip. When you crystal dash into the wall you kick out a dust cloud and when the front edge of that cloud passes the far side of the platform, that is when i hit jump. I went from failing 4/5 times using an audio cue to getting the jump 9/10 times with the visual cue. I hope this helps anyone learning the category like me.

Isma_skip_visual_Q.png
magnolia๐Ÿ’™

If you hear the rava aggro during the load you can do this every time and avoid going right wall. Sometimes it doesn't aggro and you just do it normally

!!cerpin

~1-2s faster than usual strats for the room, ~0.1s slower than way riskier strats
(the shade soul assumes you picked up soul eater earlier so you have the entombed husk to mourner cycloned for soul)

ins0mnia (she/her)

Turns out you can do the revekless transdash out of the jump to the right wall however it is stupid tight and Not Good tm

ins0mnia (she/her)

A rambling and horrible revekless tutorial with hitboxes and stuffs
https://youtu.be/OPiMJd2E89Y

Eduboy25

the final pogo isn't necessary and you can just do an upslash instead, but then you're screwed if you get a fakedive

seems to be a fairly consistent way to get dog cycle as the first laser bug lets up their laser much more consistently than with the original method

Eduboy25

a different strat for shroom left side spawn. Only gets 1 hit of soul so won't really work for AS

zViitor

Those are all places you can full jump to save time or to make some rooms easier while not losing any time.
https://imgur.com/a/IK5c9vN

upper transition makes subpixels just work, no dnail setup needed. more lenient than it looks

magnolia๐Ÿ’™

Faster devout than currently used fastest one, but takes really good reaction time if it backs up

very slight optimization in ancient mound, instead of pogoing to go up to plat, just go under :) saves not a lot overall but still worth imo, read video description for more info
https://youtu.be/szLRcrviuO0

Small optimization to do the movement for shade soul. Allows you to send the elevator back down without having to wait for it to reach the top (where it delays a little before being able to be sent down again). Two setups - 3 hits is safer, you can't really send the elevator back down too fast. 2 hits is tighter, if you send the elevator down too fast you'll def lose time
Safe (3 hits) :

!!cerpin

this shows the post-king's pass set respawn trigger for any 1221 categories picking up fury before s/q.
once the knight's hitbox (the yellow box in/around the knight) touches the vertical box here, your spawn in point is set and you can turn around to reenter KP

unknown.png
!!cerpin

quick comparison for bench animation/timings based on distance between trigger distance and final sitting position.
based off of this and frameforwarding it seems regardless of where you activate the trigger, the animation takes a set amount of time.
aka bench asap as you reach the trigger

https://youtu.be/Aym1PFk856I

unfortunately i couldnt find any real way around the 2nd portion as it would kill a lot of time to do the "straightforward" way, sets you up nicely to just inch by the 3rd portion cycle too

slightly easy to bonk head on the first wall cling jump (in 2nd portion) going up to the 2nd wall cling jump, but a bit of an outward swing should alleviate that as well

calligraphiti
Spirity
RhinoFeeder

Quick kill for petra arena.
For the second two, line your knight up with the top-right area of that hanging basket, like you can see in the video here. Shoot your first fireball ever so slightly before the first petra's hitbox is available. This first fireball SHOULD MISS THE FIRST PETRA. Because of the way petra AI works, the petras will always move back away from you to keep some distance, and thus the second fireball will hit the first petra with a double

General area to jump and slash birds for potential 1-4 soul

magnolia๐Ÿ’™

WCS superslide entry to abyss

Pharest

Dashing to the wall is an easy way to inventory slide.
It's also possible to do it without the dash but more precise so higher chance to get pushed to the spikes.

The fastest known way to drop into birthplace in True Ending. Shoutouts to Muri.
Even sloppy version of this drop will be on par with tryhard version of the normal drop most people do, and this particular execution is ~0.3 faster than the best regular drop I was able to pull off. On average it saves like 0.6-0.8
https://www.youtube.com/watch?v=l3KuZSIa-Zs

wcs setup for archives gate that works for both True Ending and All Skills. Start nails when you hear uumuu exploding. Prob works well for any% but you just stall a bit instead of using wings

zViitor

credits to tk3.
A semi-consistent setup for fake dive in sanctum. Should work in all patches. Video provides more details.
https://youtu.be/CLHa7tg6dp0

magnolia๐Ÿ’™

credits to underlein and vali
very lenient

The guy named after the room

TASers (shoutouts to @cuber_kk ) found a faster way to do the moss knight quick kill in Greenpath. The reason why it's faster is because you start by casting a fireball during frames where the moss knight is invulnerable, effectively saving those frames. According to my timings, it is easily 0.4s faster on average than what we do, and failing can be as fast as the normal strat (screenshot from my timings: https://cdn.discordapp.com/attachments/840457024592150568/841971025582489620/unknown.png). I assembled a small video to show the strat and also teach a setup which seems consistent: https://youtu.be/34nZk3KUuuI

The guy named after the room

slightly faster (~0.1-0.2s) way to drop to uumuu. It is still faster if you play it safer and close the inventory a little bit sooner

NerfIrelia73

Strat for Dung Defender where you overcharm with Twister and Shaman. You only need to dreamnail once with this method and you'll have enough soul leftover to use dive right after the fight to get the relic below the arena. Useful for categories that don't care about being overcharmed after this fight with a damage tank.
https://www.youtube.com/watch?v=mbn9vu3PG_Q

ins0mnia (she/her)

WCS strat to get to Monomon extremely quickly. You prob want to inv drop down the shaft to make it faster, I just didn't to show what's going on.
Close inv when Uumuu explodes, then 3 count jump dash should give the WCS at a good height.

The main draw of this strat is it can be done when you finish the fight on 3 soul 1hp to get to Monomon for the heal and then get pfloat either leaving the dream or after Monomon. Without this you would just be stuck.

If you know you're going to have to go for it as soon as Uumuu is killed it's pretty comfy, I'm getting it like 60-80% in practice and it would be a dead run anyway.

Comfy set up for the dreamnail sequence if you don't go for the early controls. on the second big platform you just need to touch the center pillar, no need to wait (but you can to be extra comf).

ins0mnia (she/her)

This is the faster true ending shade skip setup not counting the 0fb version coz fuck that noise. Align yourself with the left side of the door and do the three full jumps as normal. The more diagonal you can move with your shade the faster.
Also attached in the second clip is the same setup but done with 1 fireball. You have to move a bit more vertically and make sure the pogo after the parry is at absolute max range. Kind of a meme but if you get a promising dboost and pogo you can do this one on reaction to that.
Both of these clips were done at around 350fps as per the counter in the top left, and should be easier at lower framerates. I can't get 600 fps in that room but if you do the 1fb version may be quite difficult if not outright impossible.
As per TE shade skip general guidelines, if the shade fireballs mid skip you're just going to have to play by feel but starting it further left like this gives you a lot more space to work with to try and save it so it should be slightly preferable to if you were going for a further right setup.

The guy named after the room

Video assembling what is supposed to be the fastest way out of the archives. Two main interesting points:
-the cyclone drop into jump is faster than cyclone drop into dash but you must hold right to be in reach (comparison with ax's comsob : https://cdn.discordapp.com/attachments/818520522471637052/831549844698431518/unknown.png)

  • the diagonal archives proposed by cerp. The strats has a little bit of variance depending on jelly rng, so you better practice it, but it's fairly consistent.

https://www.youtube.com/watch?v=2m8p9AzCbkQ

ins0mnia (she/her)

Basin spike tunnel tutorial with lineups and timings for consistency. Pretty chill once you know the setup.

RhinoFeeder

Fastest elevator climb I've been able to manage over the last few days, incorporates all new strats. The last enemy has some RNG on position but the most consistent setup I find is to just ignore him and fireball skip. If you're not comfortable with a fireball jump there's ways to lure that enemy lower (cling the side of the wall for one jump) and then pogo it.
https://www.youtube.com/watch?v=pzJsEwcLK2I

magicalJelly

a way to save possibly at least 0.5 seconds if you don't like thorn skip. requires Long Nail and Mark of Pride. (so far requires very precise movement/thorn jumps to get the cycle)
(Discovered by an unknown member of the Chinese community)
Uploaded the video so that it wasn't recorded on my phone and will be viewable on all platforms
https://youtu.be/U9T7jEanMHM

RhinoFeeder

Fastest drop I could find through the room right before Queen's Station Skip. If you're low on soul you can hit a few of these jellyfish on the way down without losing much time.

Also to note - you can pogo the jellyfish I took damage on but

a.) their positions are slightly rng so it can be hard to react
b.) it actually seemed to be optimal to just take the hit and keep falling

RhinoFeeder

Modified trinomi drop for low-percent. I didn't feel like recording more but if your fireball turnaround is really clean you can land on top of that ledge without needing to wall grab.

ins0mnia (she/her)

The shade skip to access Hidden Station without wings. You want to fireball your shade as shown so you don't have to bench at Hidden Stag and come back for your geo.
https://youtu.be/bGToMfBu8Kw

!!cerpin

Do a minimum height hop at this cue (the smallest tap of the jump button you can), and land on the highest ledge below for a simple consistent soft-fall setup in King's Pass.

note: there are upslash strats to cut your minimum height hop even shorter. This, however, means this cue is very likely too early to get consistent soft-fall, depending on how early you upslash to cancel your hop height.

First scr.shot shows where cue is before ground crumbles, second shows after.
Credits: Muri

https://media.discordapp.net/attachments/740939883446796298/788787271197392916/unknown.png?width=1587&height=901
https://media.discordapp.net/attachments/740939883446796298/788787349755658260/unknown.png

ins0mnia (she/her)

Extremely cursed dash only shade skip that saves a little time in TE due to not having to collect soul. Needs 120 or lower fps, so only saves 1-2s if you have to turn on vsync, but if you cap to 120 or lower or are on console it saves around 5s instead.
https://youtu.be/YL_PgTjlfps

ins0mnia (she/her)

https://youtu.be/C_u5NWznCsI consistent collector scream skip setup (use background objects to time the dashes)
Original post by Ax2u


ins0mnia (she/her)
ins0mnia (she/her)

https://clips.twitch.tv/IntelligentCrepuscularPizzaTwitchRaid Itemless mantis pogo setup
also works the exact same if both flying mantis go under the alcove. just make sure at least one follows you in
Original post by Pest


ins0mnia (she/her)

https://gfycat.com/thunderousconsciousabalone fast first WK for any% nmg
https://gfycat.com/spanishsickfulmar more optimal way to fireball THK in the middle of his slam attack
Original post by Fireb0rn


ins0mnia (she/her)

https://gfycat.com/frankpassionatelarva left side teacher's archives (tanking two damage, saves ~.6)
https://gfycat.com/anxiousrapidbasilisk left side teacher's archives (tanking one damage, saves ~.3)
Original post by Fireb0rn


ins0mnia (she/her)

https://www.youtube.com/watch?v=PItrcl1qxyE&feature=youtu.be Queen's gardens load warp
Original post by Krythom


ins0mnia (she/her)

https://youtu.be/nYkkLzmrMcQ how to do 2 or more flukes on each of troupe master grimm's attacks (required for balloon skip in 106%)
Original post by Ax2u


ins0mnia (she/her)

Double dash mantis pogo: https://youtu.be/HLaYY7BhzO4
Original post by Ax2u


ins0mnia (she/her)

https://youtu.be/ley-RlVA4HE consistent aspid arena double spike kill explanation (1.2.2.1)
Original post by Ax2u


ins0mnia (she/her)

Getting WK geo chest twice
https://www.youtube.com/watch?v=4FP-ewB3H_I
Original post by Allison


ins0mnia (she/her)

Grimm quick kill for 112% with spell twister
https://clips.twitch.tv/CheerfulSpotlessPoxJKanStyle
Original post by MonStahLer


ins0mnia (she/her)

https://youtu.be/qfFXjTmFBF0
save transfer glitch
Original post by Savy


ins0mnia (she/her)

https://www.youtube.com/watch?v=FKWwCvptAiQ THK Spike Kill
Original post by Allison


ins0mnia (she/her)

Dreamer duping https://youtu.be/OysREfaCwt8
Original post by Serena


ins0mnia (she/her)

https://www.twitch.tv/videos/636890652 dumb pogaxe is dumb
Original post by pest


ins0mnia (she/her)

https://youtu.be/T13rUYzl-wc Itemless skip to Lurien by doing Dupe -> Wrong Warp -> Something else that isn't either of those
Original post by Krythom


ins0mnia (she/her)

PoP god gamer thorn dash https://gfycat.com/coolboringjavalina
Original post by Fireb0rn


ins0mnia (she/her)

Mantis pogo variation for TE to get more geos: https://www.youtube.com/watch?v=FlAx7YHvpbE
Original post by Muri


ins0mnia (she/her)

cp uumuu 1 cycle for cp all skills https://www.youtube.com/watch?v=sStHypsLa3w
Original post by Underlein


ins0mnia (she/her)

Current Patch Main Menu Storage (MMS) with Noclip KP into bench storage. Also covers great slash early control.
https://www.twitch.tv/videos/812633331
Original post by ins0mnia


ins0mnia (she/her)

Fungal Wastes Drop Slash Strat (saves ~.2) https://youtu.be/barpGdvX9LY
Original post by Sedic


ins0mnia (she/her)

WCS preserved through inventory drop and dash refreshes after uumuu (requires Isma's tear) [credits: monstah]
https://clips.twitch.tv/HelpfulAmusedPotatoTheThing
Edit: Easiest way to do this is to let the acid close inv for you. This prevents accidentally getting inventory storage too :ins0mn2Comfy:


ins0mnia (she/her)

Hey all, I made this a little while back but had it unlisted on youtube as it was a private upload for someone. I think it can help out a lot of people with any% CP Uumuu. I do quite a bit of explanation up front and then demonstrate the fight.
https://www.youtube.com/watch?v=Chh_BuLfdVI
Original post by RhinoFeeder


ins0mnia (she/her)

https://youtu.be/j9ZEtm6VFtc all skills left side archives exit, not much slower and much less rng dependent (also full strats i do for before left going left side).
Original post by Spirity


ins0mnia (she/her)

Tinker's 2 dnail Dung Defender quick kill clip, for 1.2.2.1 flukes + shaman (current 106%) - https://clips.twitch.tv/GorgeousModernGorillaShadyLulu-5D5D02NxpSVjQihj


ins0mnia (she/her)

left side vs right side teachers archives exit (any% nmg)
Original post by Pest

ins0mnia (she/her)

Queen's Gardens thorn warp hazard respawn hitbox, colored blue. Pictured is a successful collision. #Fungus3_05
Original post by Slaurent

qg-respawn-hitbox.png
ins0mnia (she/her)

alternative to the normal claw FK skip, the last load is rng (good rng shown in vid), saves 1-2s with good rng, loses 1-2s with bad rng

ins0mnia (she/her)

an easier way to do the uumuu 1 cycle, i believe credits to HollowMC.
its just as fast, but you need to be conscious of where you are when you shoot the fireballs on the platform or the second wont double.
Original post by Tsira

ins0mnia (she/her)

Here's my guide for uumuu on current patch, for which I use a dramatically different setup than I do in 1221 for reasons explained in here
https://www.youtube.com/watch?v=Chh_BuLfdVI
Original post by RhinoFeeder


ins0mnia (she/her)

Looking over my old content and don't believe I've ever shared this in here - aspid arena double spike setup for 1221:
https://www.youtube.com/watch?v=Ya96rJqDEIo
Original post by RhinoFeeder


ins0mnia (she/her)

small video about how exactly the cyclone slash strat works on the THK chains
https://youtu.be/Mv3Z09CMflA
Original post by Ax2u


ins0mnia (she/her)

a different way of doing the right side of room after godcycle without getting hit
Original post by Tsira

ins0mnia (she/her)

Uumuu extra attack one cycle recovery compilation post

Pisces' tutorial:
https://www.youtube.com/watch?v=ZihoQdYQZcg
Monstah's setup run clip:
https://clips.twitch.tv/BoxyAntediluvianCamelFreakinStinkin
Ax's original strat:
https://youtu.be/1NvaIcu0o80


ins0mnia (she/her)

#bonus_underplat #Fungus3_Archive_02

Left-side All Skills Archive climb skipping the cdash along the ground by using the platforms, wings and diagonal movement instead. The final underplat is required to avoid triggering the above Lumafly on a horrible cycle

Note: There is some variance in jellyfish positions. The biggest is whether the first Ooma is high or low in its cycle. Depending on its height, you can either dash underneath+wings up to platform, or over it like in this clip, neither lose any significant time to the other.

The final Uoma may occasionally be too far right to squeeze by on the inside (similar to the cdash variant), if you have suggestions on how to handle that, I am all ears.

Saved me 0.5s to left-side c-dash with the last bg object pogo into wings at transition and the same level of execution.
Saves ~0.9s over average right-side climb with poor rng.
Saves ~0.6s compared to decent right-side climb with good rng and lumafly leftwards dboost.
Original post by Cerpintext

ins0mnia (she/her)
ins0mnia (she/her)

Fastest strat for climbing from the 1st elevator to the breakable wall in the chandelier room.

-Do each dash very low to the ground.
-If you mistime your jump and do not regain wall cling storage on the ground, continue dashing, you will not lose time to the default (no wcs) strat.

Optimally saves ~0.5s to any non-wcs strat.

Edit: minor timesave if you climb all the way to the top on the left side, and dash right (so that you do not require any wall jumps on the right wall. (~0.1-0.2)
Original post by Gwonkee

ins0mnia (she/her)

https://www.youtube.com/watch?v=8-5Pi-denSw

  • Defeat a dream warrior without absorbing
  • Dupe the room it's in
  • Talk to absorb one of them
  • The remaining one is now fightable again
  • Infinitely repeatable
    Original post by Serena

ins0mnia (she/her)

Explosion Pogo Strats Compendium
1221:

Classic setup (tutorial by Muri): https://www.youtube.com/watch?v=AB1NIK7V-pQ
Low% setup (~0.3s slower than the classic setup): https://clips.twitch.tv/EntertainingDoubtfulWrenChefFrank
Ouipogo (~0.4s faster than the classic setup): https://clips.twitch.tv/CrackySassyPlumberTheThing
Fire's slash strat (as fast as Ouipogo, harder but reasonable): https://gfycat.com/smallminiatureanemoneshrimp
Fire's fireball strat (~0.5s faster than the classic setup, probably not run viable): https://gfycat.com/fr/deartalkativejavalina

Current patch (the explosion is no longer pogoable):

Fireball setup (compact tutorial by Xero, extended tutorial by Mathulu): https://youtu.be/QUp6msZzgTw + https://youtu.be/bYsRWyHjcmM
60Hz Vsync/Console setup (tutorial by emray): https://www.youtube.com/watch?v=uztaN_toC_U
Panta's setup (tutorial by valigna): https://youtu.be/4wdfFMLblz4
Xeph's setup (tutorial by Xeph): https://www.youtube.com/watch?v=Sg2_AjMaCh0
Low% setup (mostly a meme, given CP Low% is not really a ran category): https://discord.com/channels/283467363729408000/283467985224466442/818047318158475304